
By: Leah Tudor
DISCLAIMER:
The following blog post details an existing lesson plan that was retrieved from the Kennedy Center Education Program webpage. The resource, originally designed by Rebecca Holden, can be found here: Cartooning Political and Social Issues.
SUPPORTING MATERIALS:
- Short Overview of Blog – Video
- Alternate Format of Blog – Google Doc with Tabs
INTRODUCTION FOR EDUCATORS
Political cartoons first emerged in eighteenth-century Europe as a form of visual commentary on political events, public figures, and social issues. The popularization of Enlightenment ideas such as natural rights (life, liberty, property) and consent of the governed, coupled with increasing literacy rates and technological advancements, substantially contributed to the rise of political cartoonists such as Jame Gillray [1]. These cartoons swiftly made their way to the American colonies. In 1754, Bejamin Franklin published what is considered to be the first American political cartoon (i.e., “Join, or, Die”) [2]. Since then, cartoons have been widely used in the U.S. as a means of communicating political critique and shaping public opinion.
Political cartoons are an exceptionally valuable resource for educators, particularly those who teach Social Studies, English, or Visual Arts classes. They function as primary sources, providing direct insight into the political, social, and cultural dynamics of various historical periods (e.g., American Revolution, Gilded Age, Great Depression, World Wars etc.). Moreover, analyzing political cartoons helps students develop critical thinking skills by teaching them to examine main ideas, interpret visual rhetoric, recognize bias, and consider multiple perspectives. For Visual Arts educators, political cartoons offer a unique opportunity to explore artistic techniques, composition, and the use of symbolism, exaggeration and satire to convey meaning throughout history.
OVERVIEW
Context & Audience:
The lesson plan discussed in this blog post was developed by Rebeca Holden for the Kennedy Center’s education program in 2023. It is designed for the 6-8 grade band and is recommended for social studies or visual arts classes; however, it also has applications for English classes. The guiding question of this lesson plan is: What role do cartoons play in presenting viewpoints about political or social issues?
The 6-8 grade range is recommended for this lesson plan because it aligns with the developmental stage of students in this age bracket (~11-14). At this stage, children begin to engage in abstract reasoning and perspective-taking. This is also the period where children begin to solidify their own identities [3]. Thus, it is the ideal age to introduce critical thinking activities. Additionally, the creative component of this lesson provides students with the opportunity to express themselves and their new identities by exploring issues meaningful to them. All that said, this lesson plan can be adapted for higher grade levels by increasing the analytical rigor and including more written reflection and debate.
Learning Goals:
The lesson plan identifies the following learning objectives, noting that students will:
- Examine the practice and art of political cartoons.
- Discuss the U.S. Constitution’s freedom of speech.
- Discuss the meaning of satire.
- Examine sources to find those that provide the most relevant and accurate information.
- Analyze examples of political cartoons, including the way an issue is exaggerated, a caricature of a person, and the use of satire.
- Use a graphic organizer to explore viewpoints expressed through political cartoons.
- Design and illustrate a political cartoon.
- Present work to an audience.
The lesson plan also outlines its alignment with the following National Core Arts and Common Core State Standards:
National Core Arts Standards:
- VA:Cr2.1.6a – Demonstrate openness in trying new ideas, materials, methods, and approaches in making works of art and design.
- VA:Cr2.1.7a – Demonstrate persistence in developing skills with various materials, methods, and approaches in creating works of art or design.
- VA:Cr2.1.8a – Demonstrate willingness to experiment, innovate, and take risks to pursue ideas, forms, and meanings that emerge in the process of artmaking or designing.
Common Core State Standards:
- ELA-LITERACY.RI.6.7 – Integrate information presented in different media or formats (e.g., visually, quantitatively) as well as in words to develop a coherent understanding of a topic or issue.
- ELA-LITERACY.RI.7.7 – Compare and contrast a text to an audio, video, or multimedia version of the text, analyzing each medium’s portrayal of the subject (e.g., how the delivery of a speech affects the impact of the words).
- ELA-LITERACY.RI.8.7 – Evaluate the advantages and disadvantages of using different mediums (e.g., print or digital text, video, multimedia) to present a particular topic or idea.
LESSON MATERIALS
The lesson plan draws on a diverse set of materials to support student learning. This includes slides and websites with various examples of political cartoons, a graphic organizer for creating one’s own cartoon, articles explaining related concepts (i.e., satire and freedom of speech), and videos highlighting the power of political cartoons to convey meaning and influence public discourse. Instructors will need to either have a projector for displaying the online materials or a printer to print them out. Instructors will also need to provide arts and craft materials (i.e., paper, colored pencils, markers, etc.) for the last stage of this lesson’s activity.
Slides
- Slide: Political and Social Cartoon Examples
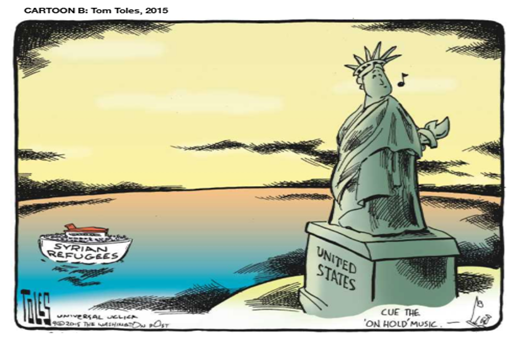
- Comparing Refugee Cartoons
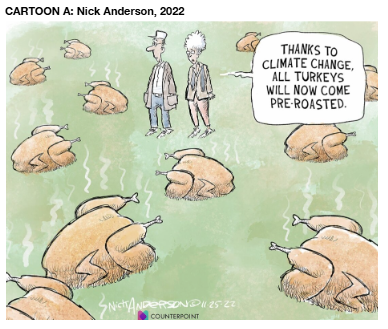
- Comparing Climate Change Cartoons
- Planner: Political and Social Issues in Cartoons
Websites
- Political Cartoons
- Editorial Cartoons on Education
- Editorial Cartoons on Politics
- Freedom of Speech
- Explaining Satire
Videos
Educator Preparation & Consideration:
Teachers using this lesson plan should have a basic understanding of the U.S. Constitution, particularly the first amendment right to freedom of speech. This principle underpins students’ exploration of political cartoons as a form of expression. Moreover, while this lesson plan is intended for the 6-8 grade band, it can be adapted for higher grade levels. To meet diverse learning needs, educators can further modify how this content is delivered. For instance, static images can be supplemented with animated political cartoons to better engage auditory learners.
It is important to note that this lesson plan does not provide a set timeline for how it should be carried out. Thus, how much time spent on each step of the instructions is left to the educator’s discretion. Assuming that class periods last approximately 60-90 minutes, a potential timeline could be: Phase 1: Engage (1-2 class periods), Phase 2: Build (2-3 class periods), Phase 3: Apply (2-4 class periods), and Phase 4: Reflect (~1 class period). Depending on the desired rigor, educators can adjust this timeline to be longer or shorter.
INSTRUCTIONS
Phase 1: Engage
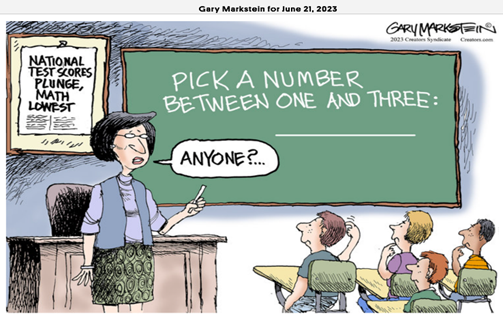
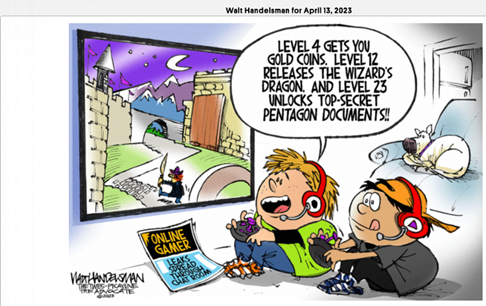
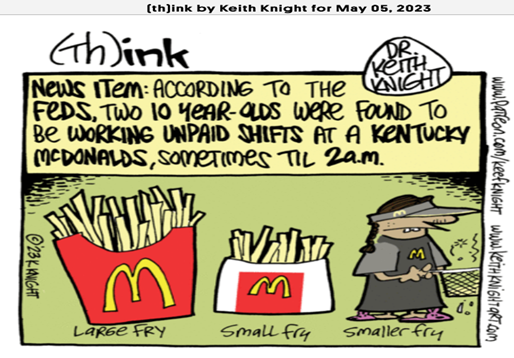
1. Present students with the Slideshow: Political and Social Cartoon Examples.
- Invite them to closely examine the images and captions, then share their interpretations. Following this, identify the images as political cartoons and introduce what they are – a form of editorial art that uses caricature, current events, or public figures to communicate an opinion.
Cartoons from Slideshow

2. Open with a discussion about the U.S. Constitution and the importance of freedom of speech.
- Utilize the provided source on freedom of speech to guide the class discussion. Emphasize that artistic expression is one way individuals exercise this right.
3. Create a class list of ways people express their rights through free speech.
- Brainstorm as a class and visibly record responses on a whiteboard or piece of paper. Explain to the students that they will use this information to evaluate different cartoons.
4. Extend the conversation around free speech to discuss what it does not include.
- Refer back to the list included in the freedom of speech source.
Phase 2: Build
1. Play The Power of Political Cartoons video.
- Instruct students to listen as Matt Weurker, a cartoonist, discusses his work.
- Following the video, guide students in reflecting on the role of political cartoons in society.
- Consider the following questions:
- Why are political cartoons an important part of American history and culture?
- What are the advantages/disadvantages of expressing opinions in simple, direct ways to represent a specific viewpoint?
- What other ideas can be illustrated in political cartoons?
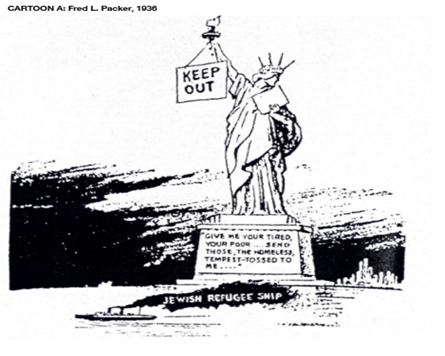
2. Present the Comparing Refugee Cartoons source.
- Demonstrate for students how to analyze the cartoon.
- Work together as a class to answer the comparison activity chart.
- The activity asks students to consider the following questions:
- What do you notice? – Make note of any details that are symbols or metaphors.
- What issue/topic is this cartoon about?
- What point of view/opinion/argument is represented in this cartoon?
- What is the primary message?
- What colors, words, and/or illustrative details help convey the cartoonist’s perspective/position on the topic?
- What is similarabout the two cartoons?W
- hat is differentabout the two cartoons?
- If you could speak with the cartoonists, what questions would you ask them?
Cartoons from the Comparing Refugee Cartoons Source:
3. Separate students into pairs or small groups for next activity — Comparing Climate Change Cartoons.
- Instruct students to complete the same comparison chart activity this time with cartoons centering the issue of climate change.
Cartoons from Comparing Climate Change Source:

4. Discuss with students what they know about stereotypes.
- Prompt students to identify examples of stereotypes that they have seen or read.
- Facilitate a discussion about why and how political cartoons have been used to stereotype political figures and societal problems throughout history.
5. Assign students to find additional examples of political cartoons.
- Share with students some resources to find more cartoons:
6. Divide students into collaborative groups.
- Instruct each group to select two or three cartoons to analyze from the ones they independently researched.
- Prompt the groups to weigh the pros and cons of political cartoons while discussing following questions:
- How are political cartoons effective or ineffective forms of free speec?h
- How do political cartoons depict stereotypes?
- How do illustrators use hyperbole and satire to make a point?
- Do political depictions persuade or encourage people to take a side?
- Why is art used to convey messages?
- Why do cartoons remain a part of the way we are provided with news?
Phase 3: Apply
1. Introduce an “original cartoon” art project.
- Distribute the Planner: Political and Social Issues in Cartoons to help students plan their initial design.
- Emphasize that their cartoon should clearly address one side of whatever political or social issue they chose to draw about.
- Encourage students to watch the What’s Behind the Lines? video to get tips from professional cartoonist, Andrew Haore.
2. Review appropriate topics for the project and review key elements a political cartoon should contain.
- Refer to planner for definitions of key elements:
- Symbolism – symbols that represent ideas or qualities
- Captions – a brief text providing an explanation
- Labels – a word describing or clarifying objects or people
- Irony – when you say something different from the way things are expected to be
- Analogy – a comparison between two different things that share similar qualities or characteristics
- Exaggeration – a dramatic representation of a physical characteristic, object, or place
3. Draw the cartoon
- Distribute arts and craft materials for students to use (e.g., paper, markers, pencils, erasers, etc.).
- Designate the allotted time for the project.
4. Display the cartoons around the classroom or school.
- Encourage students to write an artist statement to go alongside their work.
Phase 4: Reflect
1. Conduct a gallery walk so students can view and discuss all the different cartoons.
- Instruct students to carefully examine each other’s work and critically analyze the issues conveyed.
- Have students take note of how their cartoon compares to the others.
2. Conclude with a reflective discussion or written response in which students evaluate the role of political cartoons in shaping public discourse.
- Propose the following questions:
- How are political cartoons an effective or ineffective method for creating interest in a political or social issue?
- How do cartoons create interest or disinterest in a particular political or social issue?
RELEVENCE AS A TOOL FOR PEACE EDUCATION
Connecting Learning Objectives and Pedagogies to Peace Education:
This lesson plan’s learning objectives and standards directly connect to peace education, as they aim to cultivate the same capacities that underpin peace and conflict resolution such as perspective-taking, empathy, and critical thinking. Through their analysis, students are encouraged to reflect on how media frames sociopolitical issues in ways that often are grounded in bias or perpetuate harmful stereotypes. This process pushes students to question dominant narratives and consider multiple points of view, aligning with the social awareness aspect of the Social and Emotional Learning (SEL) pedagogy [4]. This lesson also aligns with Betty Reardon’s education for peace framework, as its objectives focus on, “…[creating] some of the preconditions for the achievement of peace” [5].
Other pedagogical approaches utilized in this plan that directly align with peace education are collaborative learning, discussion-based inquiry, and arts-based exploration. Each of these approaches aim to foster dialogue and engage students thoughtfully with complex issues. This collective and artistic engagement helps students become more confident in expressing their ideas and working with others while also developing a stronger sense of civic responsibility. Moreover, the types of political cartoons examined can be adapted to address certain topics that foster intercultural understanding. For instance, political cartoons about immigrants or refugees can prompt students to consider the hardships they experience and empathize with their struggles.
ALTERNATIVE ADAPTATION
Connecting to Contemporary Contexts
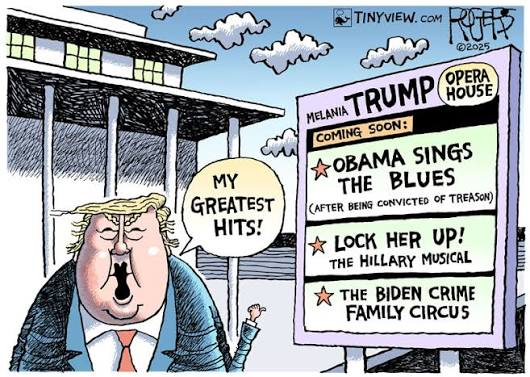
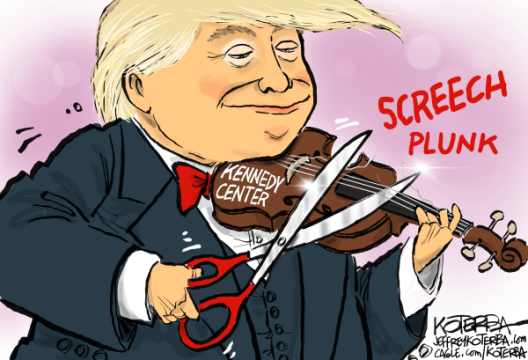
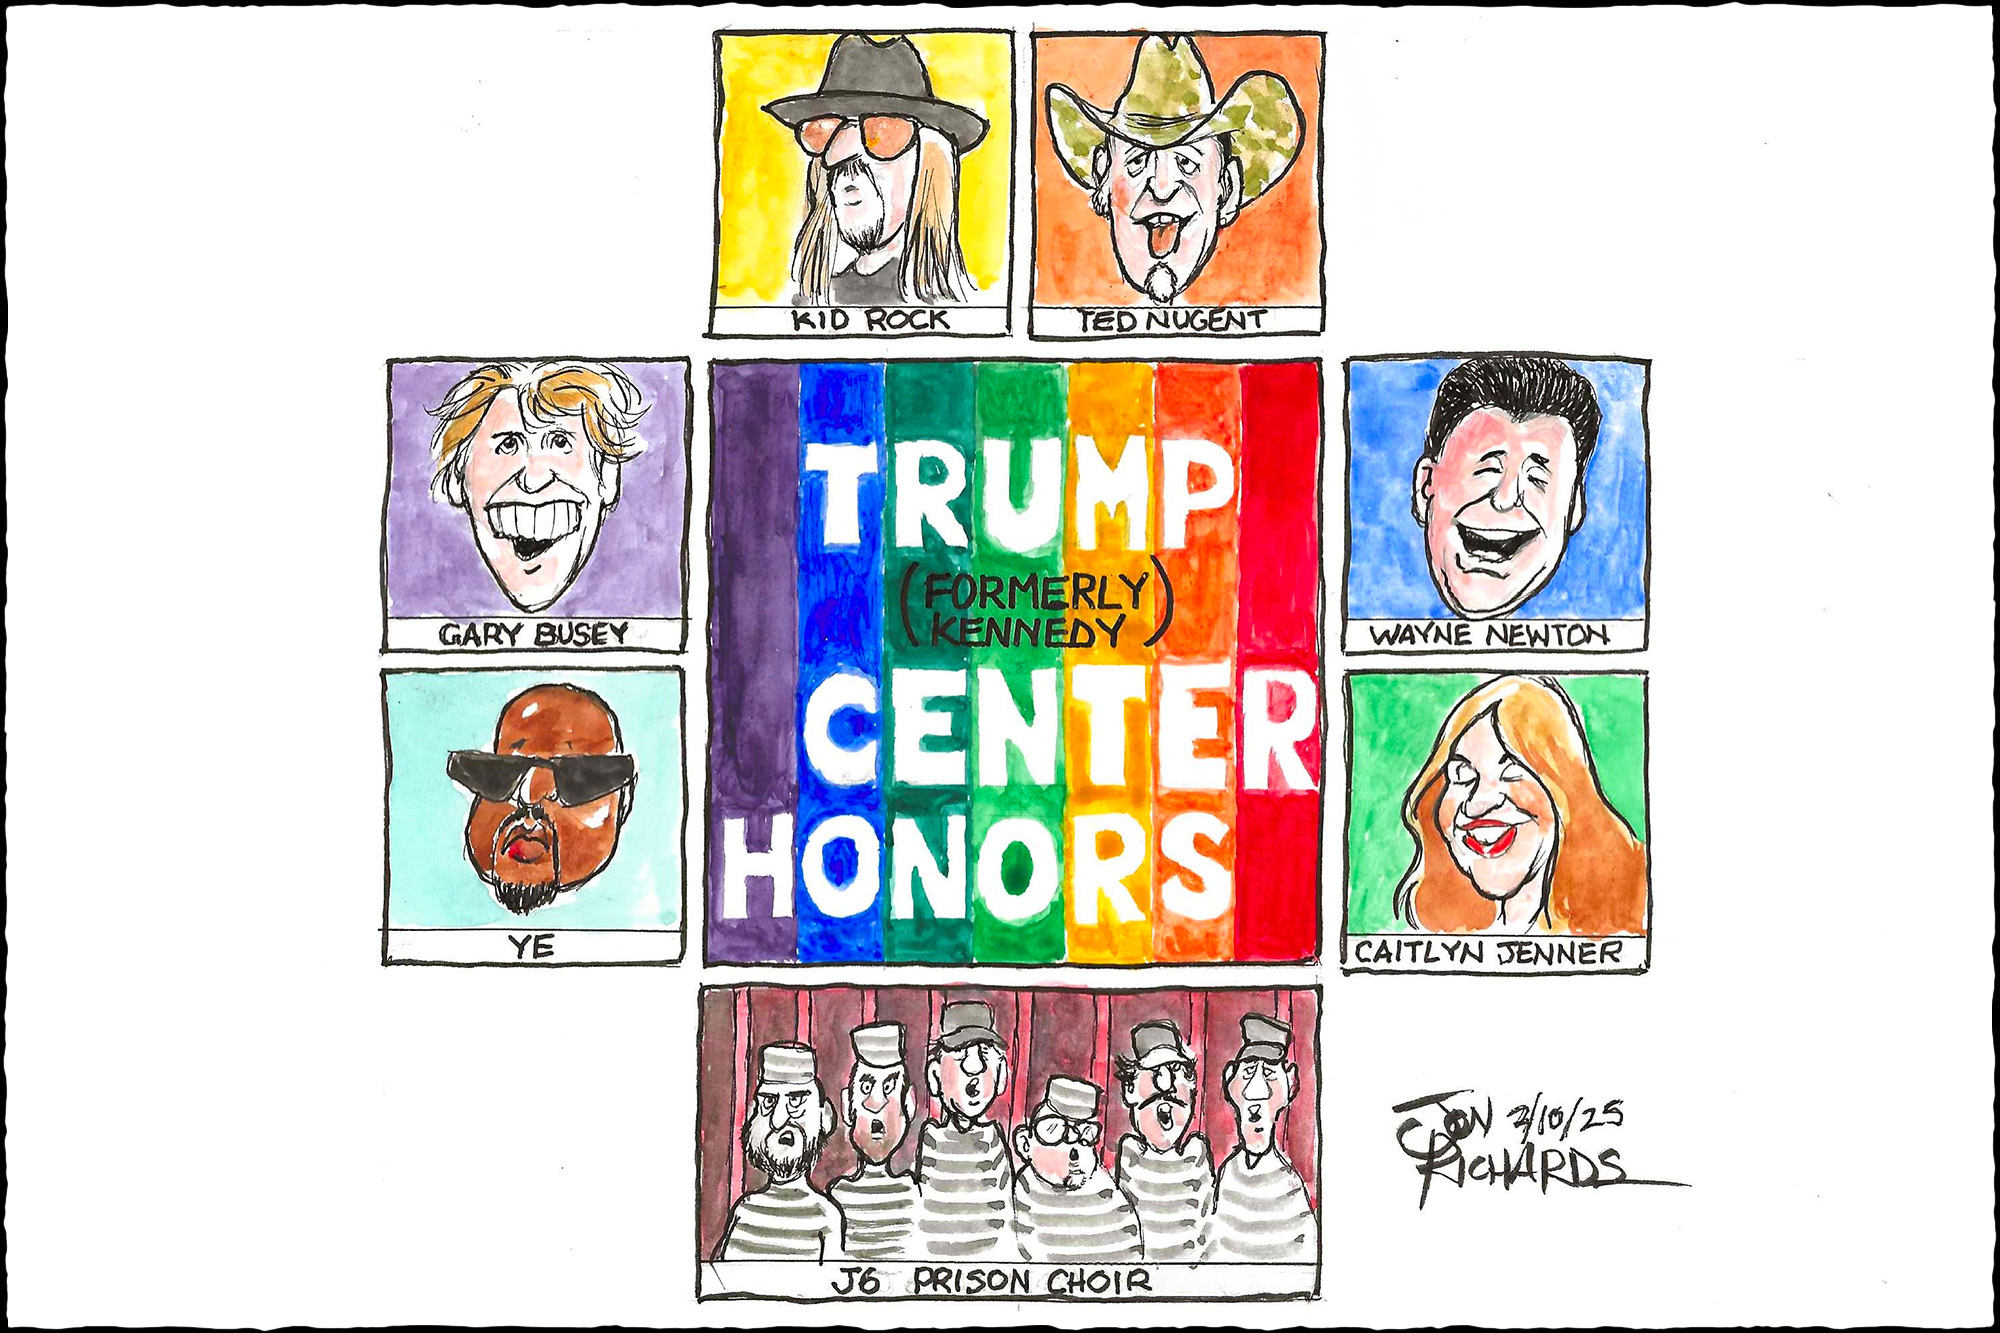
To further enhance the relevance of this lesson plan, educators can incorporate contemporary political cartoons that reflect current events and public discourse. For instance, given that this lesson plan was retrieved from the Kennedy Center Education page, one possible adaption of this lesson is to include recent cartoons that engage with discussions surrounding the current administration’s decision to rename the institution the Trump-Kennedy Center.
Adaptation in Practice:
This modification can be incorporated into Phase 2 (Build) of the lesson. For example, educators may replace or supplement the provided comparison activities with the political cartoons included below. Students can analyze these cartoons using the same guiding questions outlined in the lesson, focusing on how artists use symbolism, satire, and exaggeration to represent different viewpoints and influence public opinion.
Educator Considerations:
When incorporating contemporary political content, educators should be mindful of maintaining a balanced and inclusive classroom environment. Discussions should remain grounded in critical analysis of visual rhetoric and evidence-based interpretation. Establishing clear expectations for respectful dialogue is essential. Moreover, since cartoons referencing the Kennedy Center’s renaming largely represent the views of one political perspective, it is important that the instructor offset this imbalance by prompting students to critically consider the question: “Whose perspective is missing and why?” In this case, the missing viewpoint is those who are supportive of the Trump administration and its decision to rename the center. To further engage in perspective-taking, the instructor could ask students to consider what a cartoon supporting the decision might look like. The purpose of this prompt is to encourage students to consider both perspectives, even if they strongly support one side over the other. This concept of perspective-taking is a foundational component of effective peace education.
Sample Cartoons Referencing the Trump-Kennedy Center:
ADDITIONAL RESOURCES
The following resources provide additional background research and classroom-based examples for effectively integrating political cartoons into teaching practice:
- Bickford III, J. H. (2011). Students’ original political cartoons as teaching and learning tools. Social Studies Research and Practice, 6(2), 47-59.
- Cartoons for the Classroom. NIEonline . (n.d.). https://nieonline.com/aaec/cftc.cfm
- GED Testing Service (2020). Teaching Social Studies Through Political Cartoons. [Video]. YouTube. https://www.youtube.com/watch?v=fqU7et4a5vE
- Miller, G. R. (2011). Analyzing historical political cartoons: Helping students with diverse learning needs analyze primary sources. Middle Level Learning, (42), 13-15.
- Morgan, H. (2025). Using Political Cartoons to Promote Learning and Motivation. The Social Studies, 1-8.
- Political cartoons and public debates. The Library of Congress. (n.d.). https://www.loc.gov/classroom-materials/political-cartoons-and-public-debates/
- The art of suffrage: Cartoons reflect America’s struggle for equal voting rights. Constitutional Accountability Center. (2020). https://www.theusconstitution.org/blog/the-art-of-suffrage-cartoons-reflect-americas-struggle-for-equal-voting-rights/
- UVA Center for Politics (2023). The Power of Political Cartoons [Video]. YouTube. https://www.youtube.com/watch?v=JCpnvsm-lNU
