The organization, Teachers Without Borders, specifically based in Nigeria, released a curated memorial peace education program, in honor of the late Dr. Joseph Hungwa. The lesson presented in this blog post, has been extrapolated from the program’s course highlighting the varying methods, in a four step process. The process allows for students, to reflect, create, and design their version of a peaceful world. To which, have been adapted and amended by fellow peace activists, such as Elise Boulding and Warren Ziegler, turning it into a six step process.
Context:
Educational Setting: This resource is best utilized, in the follow spaces, both of which can be formal and informal.
Subject matter:
Literature, History, Arts, and Media and Design (Graphic Design).
Age Level:
Grades
K-12
This particular lesson, has been curated, as a stimulating and creative activity, to which, allows for the flexibility of educators to design a lesson catered to their student’s age ranges and subject matters. Hence, different tools may or may not be used to facilitate this lesson. The activity may be amended to allow for minimal tools during facilitation, as well.
Implementation:
The educator, may incorporate this resource, when discussions of narratives, empathy, creativity, and design are present.
Time: 45-60 minutes
Lesson Plan: Logistics
Begin with a warm-up: Childhood Memory
Ask the students to hold an image, in their imagination, then, take that image and engage with it. The engagement portion is brought on by, expanding the image itself. This can be done by, asking them to interact with the memory, through leading questions
What was happening?
Who all was there?
Activating the five senses: Touch, Smell, Taste, Hear, See
What can you touch? What did it feel like? Could you taste anything? What sounds were present in your memory? What else can you notice?
This should allow for the student, to in a warmed up phase, thus allowing for the imagination of planning the future to begin. Pause here, for a small break, if needed.
Wish List
the student may be asked to identify, what they most hope to see in their preferred vision of the future, through the guidance of imagination.
Stepping into the future
The facilitator will enter the guided visualization portion of this lesson. To which, they will help guide, the students to “see”, their future, through imagination. Allowing for independent work time to curate the ideal version of their futures.
Sharing images
The images can be shared, in both a large or small group setting, once they have been finished creating their futures.
The individuals, can do a walkthrough in large groups
assigning their future a “base”, within the particular space they are working in, so that other individuals may walk around the space freely and engage and “enter” with their peers’ futures.
Or, they can do a pass around, within small groups, through the computers/laptops or pieces of paper they were working on.
World Construction
Allowing for their futures to come together, through sharing between the peers. Either, large or small groups, can partake in a discussion, in which they attempt to link, all the ideal futures presented to them, and allow for one unified ideal/preferred future.
Action Planning
Have the peers outline the specific steps, they would need to curate towards the future provided.
Materials:
This activity can be done vocally or with physical materials. Does not need to be accomplished within a formal classroom setting. Informal settings, are just as appropriate.
Physical materials, based on age group:
Ages: 5-12
Pencil
Markers/Crayons
Paper
Ages 12-18
Computer/laptops
Digital Software (Powerpoint, Canva, Adobe…etc)
Pencil
Paper
Pens/Markers
Optional: Non-tangible materials
Narrative design process
guided discussion, through group verbal communication and independent work and reflection periods.
Goal:
The varying types of peace education, that is most supported by and used to strengthen this resource is,
Social and Emotional pedagogy
Self-awareness, social awareness, and establish & maintain relationships
Culturally Responsive pedagogy
Awareness, for diversity, as represented in the various forms of expression, such as, cultural, religious, socioeconomic status, race, gender, and more.
Transformative pedagogy
Allowing for peers, to look beyond themselves, while also examining their interpersonal beliefs and truths. Hence, curating space for diversity.
Development of skills and attitudes, while engaging with this source, includes:
Critical thinking, self autonomy, world view appreciation, and ways of defining peace.
The journey and the outcome, may vary for all individuals, but the core concept remains, which highlights, the inherent need for believing better results are possible. There are no limitations onto the establishment of curating ones ideal future. Through, the critical thinking phase and recognizing that individuals have self autonomy within their respective worlds, they are able to assemble social and emotional awareness and appreciation for the world, as whole. Thus, leading them onto the journey of, how one defines peace and how that differs from the individual within their proximity.
Audience
Title 1, elementary and middle schools within the Fairfax County Public School district.
High School teachers, as well as, those specifically teaching graphic design courses, within the Fairfax County Public School district.
This exercise is inspired by a conversation with Gus Fahey from Valley in Motion, and by the Trust for Public Land’s (TPL) Transforming Schoolyards work. The Transforming Schoolyards projects with TPL are much longer in scope but are centered on youth- and community-led participatory design processes. The activity outlined below can be utilized as a standalone activity to serve as an entry point to participatory design processes that help students re-envision the public spaces they want to see, and therefore feel empowered to envision and create the future they want. If your context allows, you can explore more about what this longer term process might look like at the links included in the “Resources” tab.
This resource can be used in formal education settings as well as in informal community settings.
Trust for Public Land overview of their Transforming America’s Schoolyards work.
Context
Grade Levels: 4-8
Total Time: 90 minutes
Materials Needed:
tracing paper (optional, see note on preparing design layout)
poster boards or craft paper that include spatial outlines of selected location (for students to create designs on)
markers
coloring pencils
construction paper
scissors
glue
optional additional materials: craft pom pom balls or other items that could add dimension and/or simulate 3-d objects like bushes, trees, etc.
A note on preparing for the activity:
Selecting the Space: To enhance the connection to community, choose a specific community space that is meaningful to the students prior to this activity. The community space can be collaboratively chosen with the participating students.
Some examples you may select from: using the TPL’s Community Schoolyards project as an example, select your school’s playground as a space to redesign, or choose a park or playground in the school’s neighborhood.
Preparing the design layout for students: In order to give students a physical layout for which they can craft their design ideas, educators/facilitators can:
use google earth to screen shot the layout of the community space, print out that screen shot and then use the tracing paper to draw a rough outline of the space. This outline can be used as the frame/structural outlines within which students can place their own designs. Educators will need to make enough copies so that each student has at least one poster board prepped with the spatial outlines drawn on.
there are many ways educators can create the outlines of their selected space. another option similarly can start with a screenshot of the google maps outlines. Instead of using tracing paper, educators can use Paint, Adobe or other digital platforms to draw the spatial outlines that can then be transferred and copied onto each student’s poster board.
Optional Pre-Work Activities to do with students: To help students prepare to think creatively and get in the mindset to shift perspectives and engage in visioning work, it is helpful to offer experiential learning as pre-work or additional activities that occur prior to the one outlined on this blog. This experiential activity(ies) can help students experience the community space in a thoughtful way, and can support their design process by prompting them to note attributes of the space that they would either want to keep, remove, or alter in some way once they start designing. These prep activities may look like:
a scavenger hunt in the space they will later redesign. The scavenger hunt may prompt students to find:
flora/fauna in the space
built structures
other attributes of the space (is it hot, what emotions do students feel when they walk through the space? is it crowded? empty? is it accessible for everyone to move through in the same way?)
a walk-through of the space they will later redesign. Facilitators can encourage students to identify:
one thing they like about the space,
one thing they wish was different,
any other elements they see that they like,
why they noted these items (is it the texture, the color, the shape, the function?)
Learning Outcomes:
Students will have created their own public space design, supporting a sense of individual agency within the context of their community and their future.
Students feel empowered with a sense of possibility, hope, and confidence.
Students feel a deeper connection to public spaces in their community, with community members, and to the environment.
Implementation
Introduction – 20 minutes
Start with a quick icebreaker by asking students, “what is your favorite way to play?,” or “what is your favorite thing to do at recess?” Allow 5 minutes for students to popcorn their answers.
Then, introduce the activity: “Today, we’re going to get our creative juices flowing. Thinking about your favorite way to play, we’re now going to think about where we like to play. We’ll have a chance to design a new and improved version of our [insert name of community space, e.g. school’s playground]! You will each get an outline of the space’s shape, and will get to add in your desired design elements. You can add trees, flowers, other plants. You can add the type of playground activities you’d like to see – maybe a swingset, a spaceship-shaped climbing area, etc.”
Then, prompt a 10-15 minute group discussion and brainstorm to help the students get their design ideas flowing:
“What is one thing that you can think of right now that you might add to your design? Maybe you’re thinking about what you like to see when you go outside.”
Students can then popcorn their ideas, while the facilitator/educator writes those on a whiteboard, chalkboard, or poster paper that will be visible for all to reference.
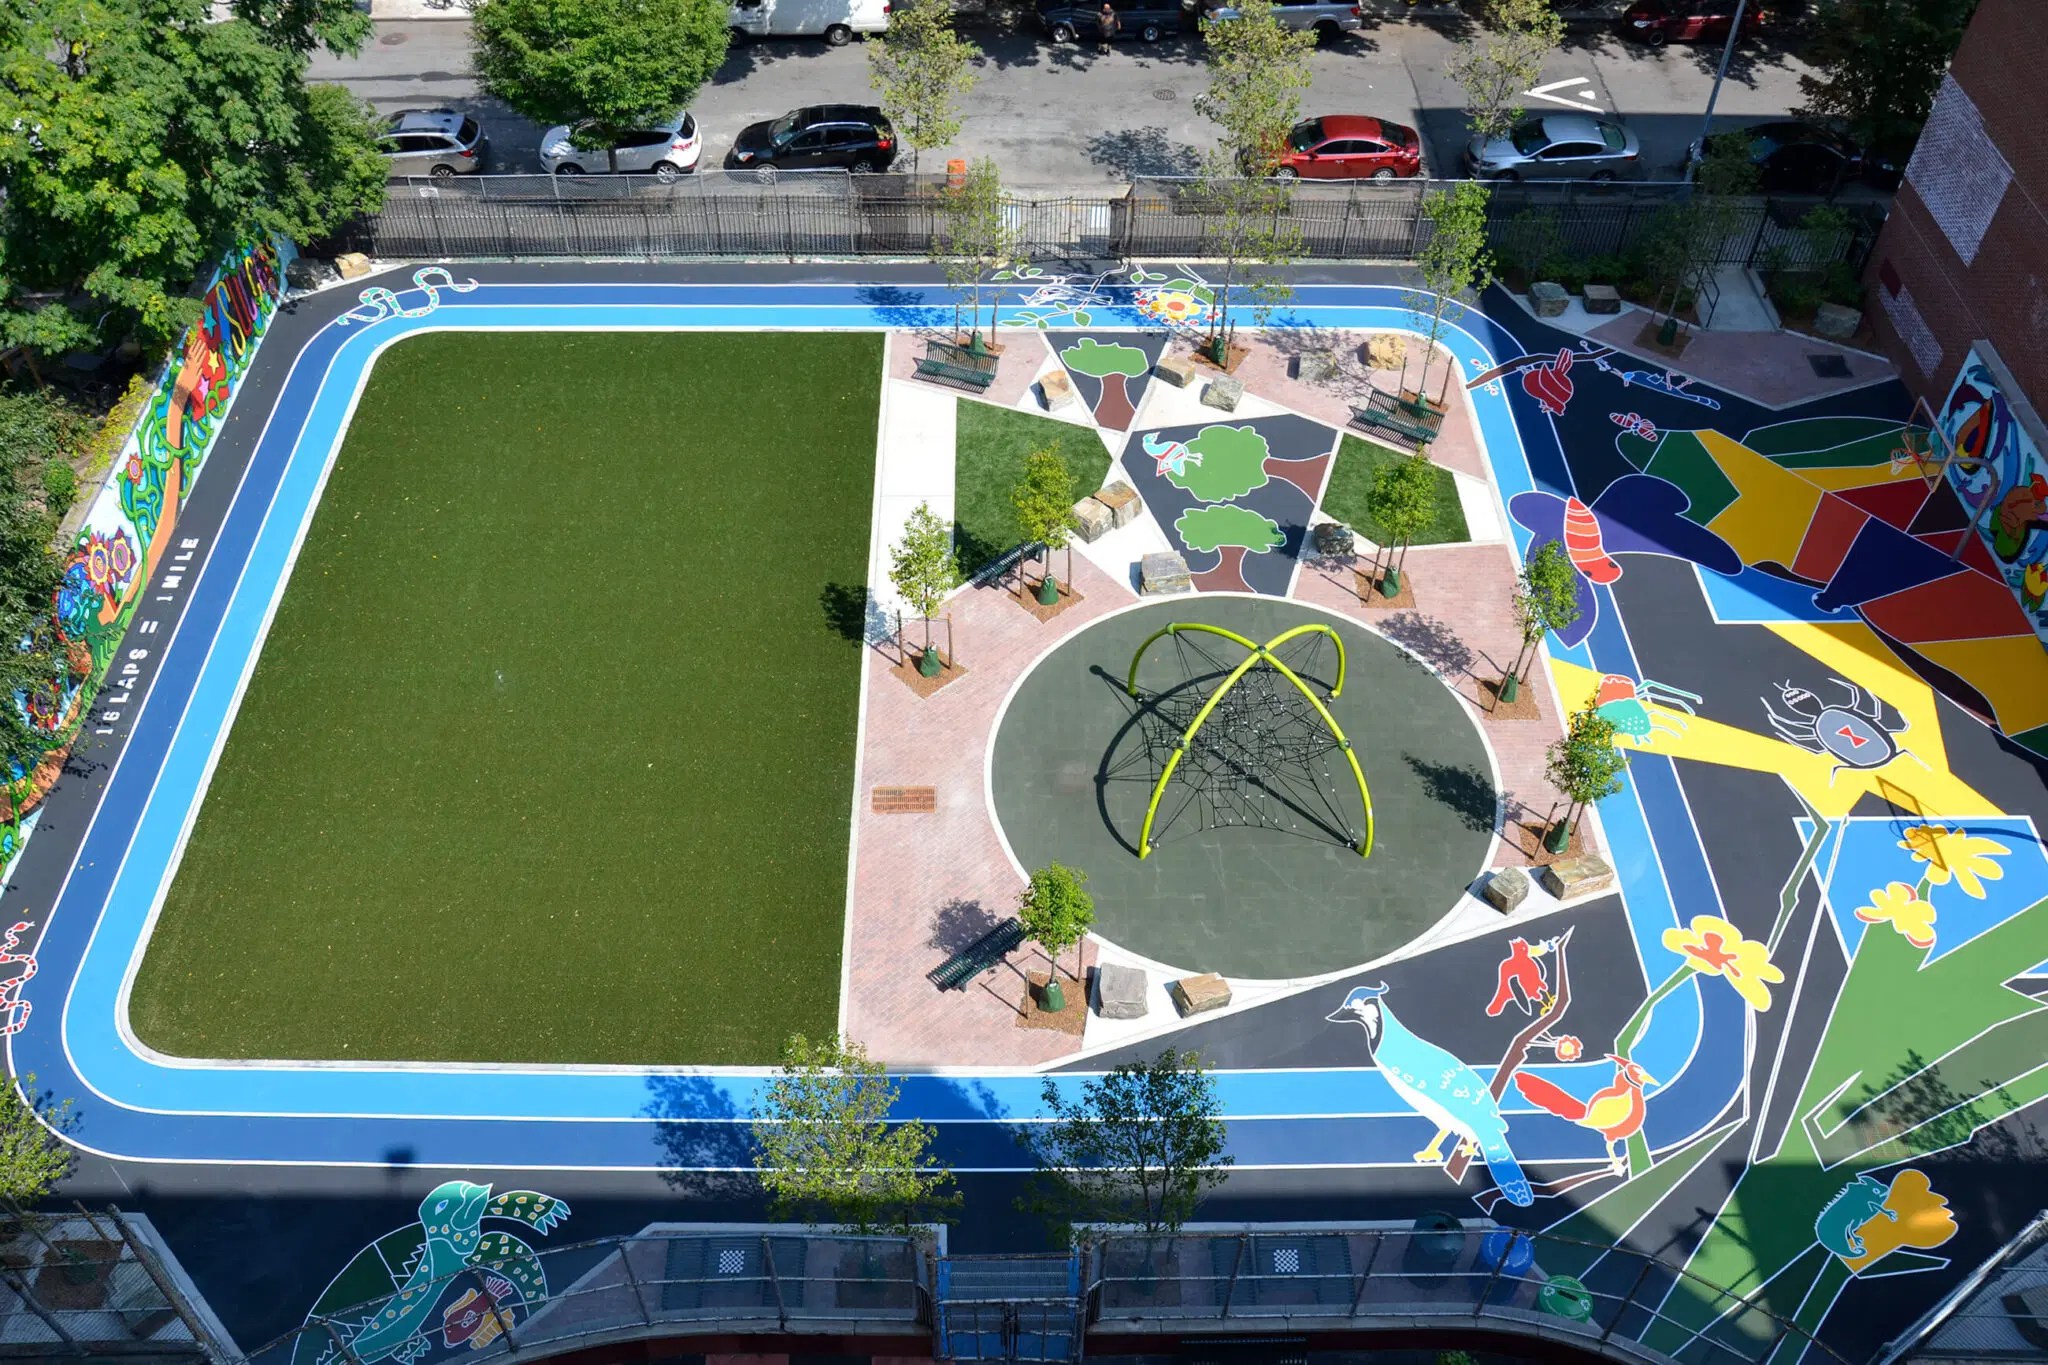
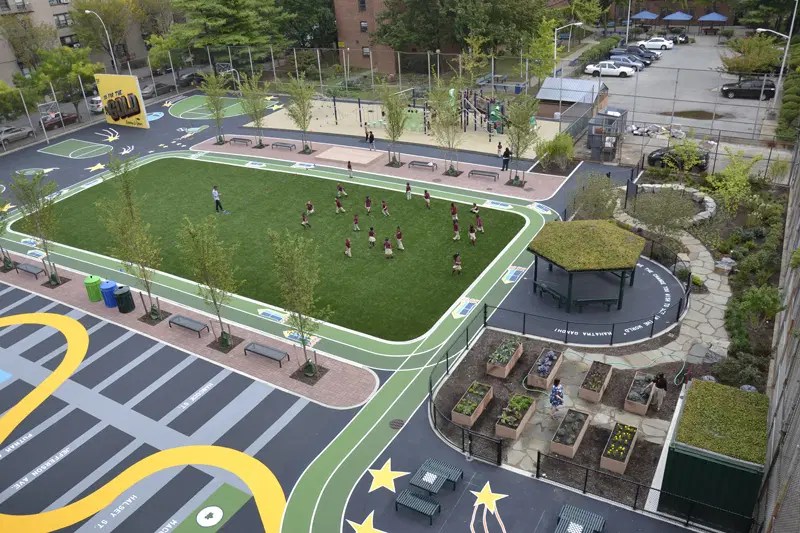
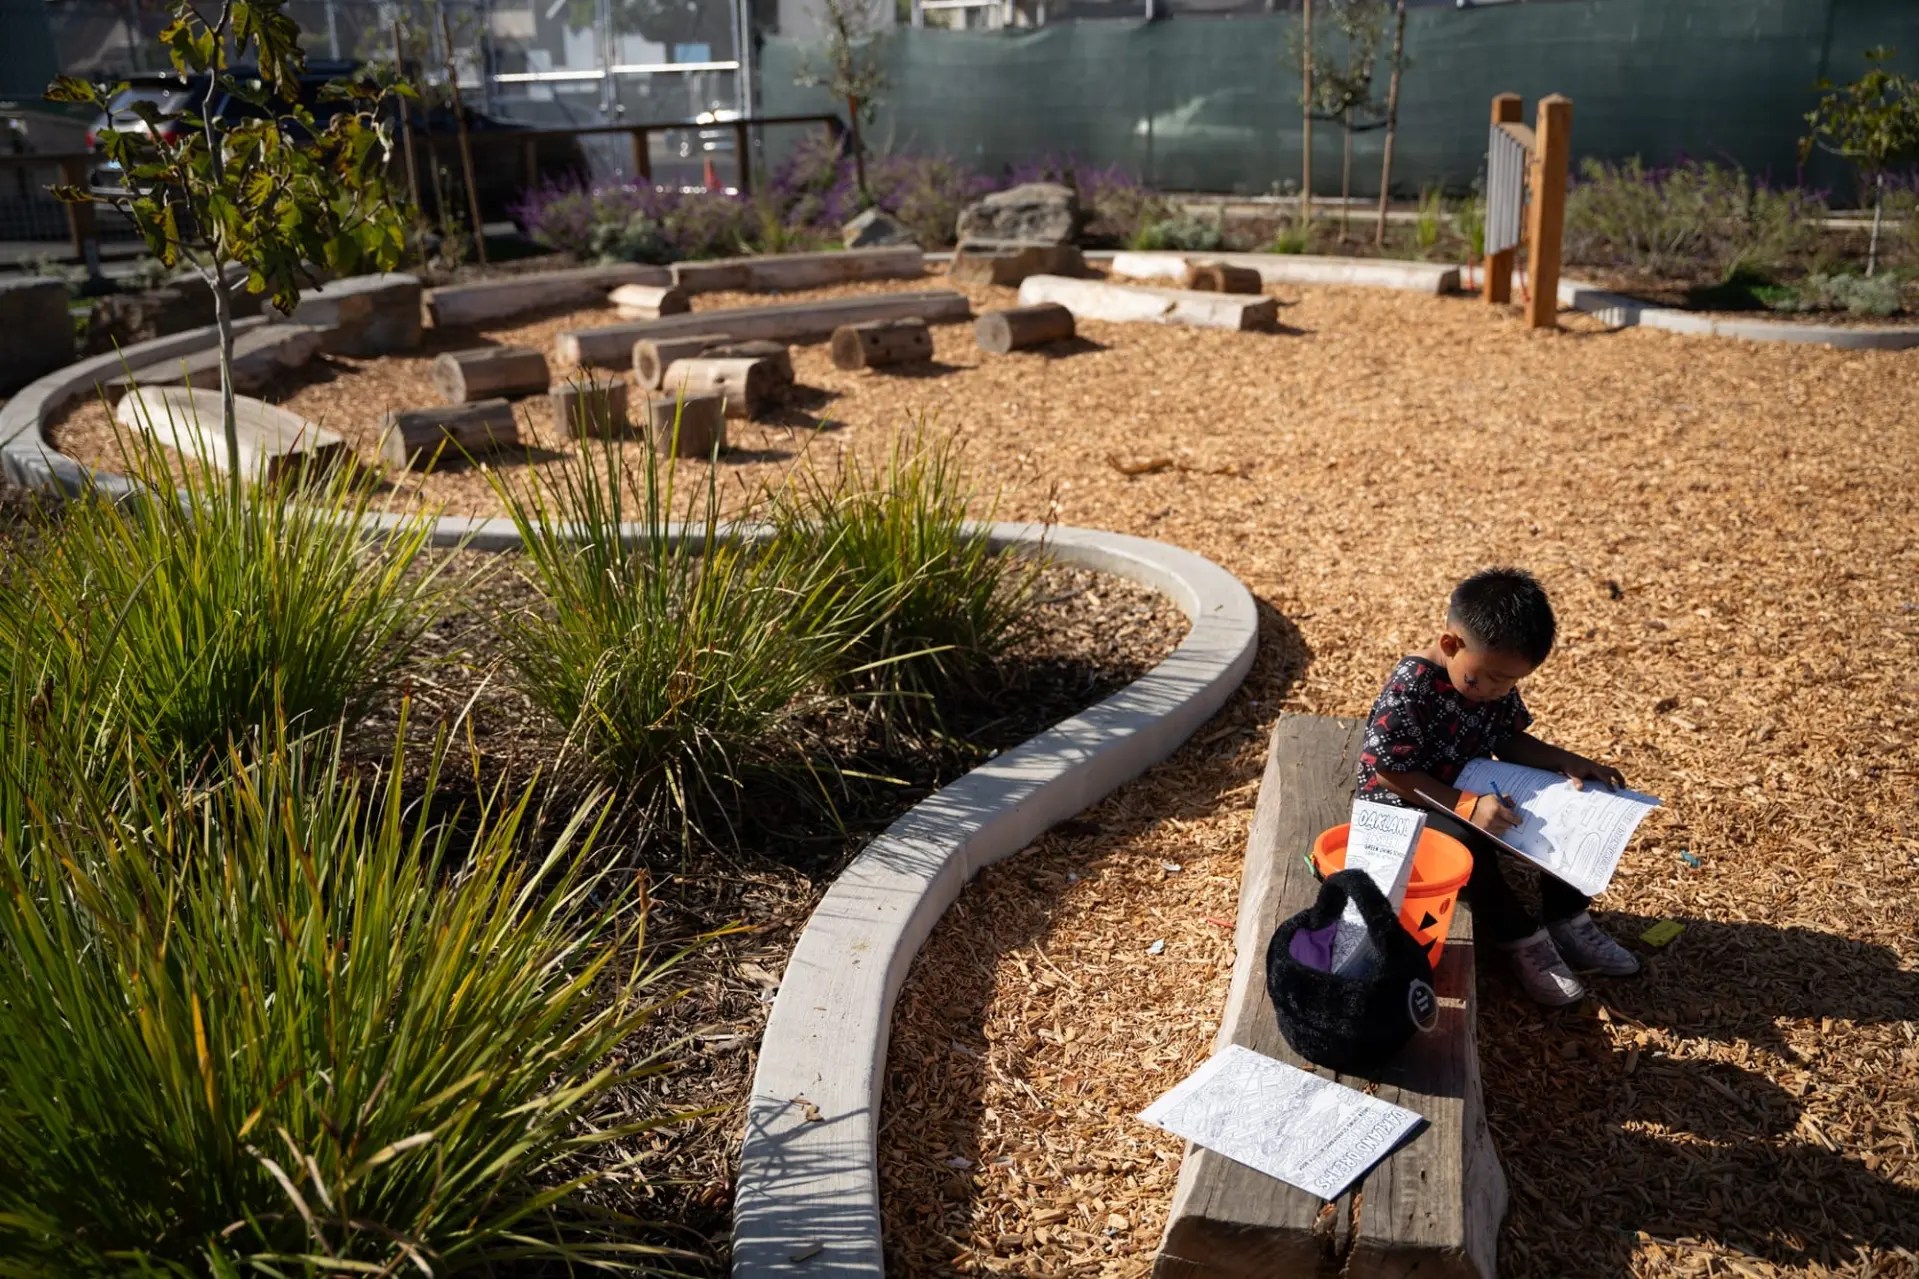
To help with this, the facilitator/educator can also show some examples (either on a projection screen or as print-outs) of redesigned playgrounds. Some examples copied below, from the Trust for Public Lands Website:
Facilitators can also pull up an image of the specific space that students will redesign, prompting questions like:
what do you notice about this space?
what do you like most about it? what do you like least about it?
what do you think is missing, or what do you wish you had here?
is this space accessible and usable for everyone in this classroom? for everyone in the community?
Designing – 40 minutes
This is now time to let students start crafting their designs. Hand out a copy of the ‘layout’ of the community space to each student.
Make sure that each table of students has crafting supplies (scissors, markers, colored pencils, tape, etc.)
Prompt the students to begin creating: “Now that we’ve got some ideas in mind, let’s get crafting! You can use markers, colored pencils, construction paper – all materials are at your table. You can be as creative as you would like, but try to keep it realistic. Imagine you are creating the first draft design for this [insert public space name], and that a construction and design company could use your design as the layout for the re-imagined space. So, for example, if you are including a swingset, place that on your paper where you would want to see it in real life. Same goes for trees, plants, other parts of your design. We’ll have about 40 minutes for this”.
While students are crafting, educator can walk around the room to check in on and engage with students. They can also provide time updates as the end of the 40 minutes nears, to let students know when to start wrapping up their designs.
To close, prompt students to wrap up and put away their materials.
Group Sharing – 25 minutes
After students have finished putting away their materials, use this time to have a group discussion, inviting students to share their designs with their peers.
Facilitators can ask students to individually share out their designs: “can we have a few students share their design with the class, highlighting 1-2 things they included and why they chose to do so?”
After a few students share, facilitators may then prompt the class:
Was there anything you saw in your classmates’ designs that you also included?
Anything you saw in your classmates’ designs that perhaps you did not include but really like the idea of?
To end, facilitator can ask the group, adjusting these questions slightly based on the age level:
how was this activity for you, how did it feel to design this space?
was it hard to imagine new elements in the space, was it easy?
what did you enjoy most about this? What did you learn?”
Closing – 5 minutes
Facilitators can end the activity by:
Recapping the elements discussed in the group share, summarizing similarities, differences, things liked and lessons learned.
Ask students to share any final reflections on this activity before they close.
Thank students for participating and reinforce the idea that designing and making art in this way can be a great way to think about themselves and their environments in new ways.
This lesson plan is built around the idea of a school/extracurricular field trip to the Children’s Theater of Charlotte (CTOC), North Carolina for students in the Greater Charlotte area. Specifically, The Kindness Project is a program that is run by CTOC that seeks to commission plays for young audiences specifically for the purpose of spreading kindness. As of now, they have held the world premieres of six different plays in this program, with a seventh premiere on the way. The activity below runs the sort of program that could be proposed to get students exposure to this initiative and explore how kindness is a value that could be expanded in their own lives.
This is a link to the CTOC website with general information regarding field trips For the specifics on the kindness project, click here.
2. Context:
While part of this lesson’s goal is to have students think about new mechanisms of how they can be kind to one another, another comes from the final dialogue about community and how they can begin to build their own beloved communities in their own unique contexts both in and outside of the classroom.1
5. Audience:
Charlotte Students: Charlotte has a wide variety of students from different socioeconomic areas that have their own unique and diverse experiences. There are also many schools in the area that integrate students from both wealthy and poorer neighborhoods where students might have very different cultural experiences. Kindness and community building work can both strengthen their own neighborhoods outside of school, but also connect these communities that are divided by economic or racial differences through getting kids to reflect on how they can take this information to others and cross lines of difference.
Teachers: Teachers might find capacity building for kindness to be a useful tool in providing a creative way for students to build community in the classroom which could limit disruption and violent conflict between students on top of the general expectations that educators set at the beginning of the school year. This activity could also expand to having a community vote on how they can do a participatory community project in their own school.
CTOC has shows for all ages, however, community building methodology might be best used by an age group that can understand and apply the language in the dialogues/activities. This activity recommends students be ages 10 and up for this reason. This is also because of the subject matter and background around the holocaust. This activity could also expand to other performances because of CTOC’s active initiatives to have performers both come to schools and also have students come to their location in uptown Charlotte. 3. Implementation:
Field Trip Logistics: While the idea of kindness could be used in a broader sense, implementation might depend on the show itself. For example, the show, Tropical Secrets: Holocaust Refugees in Cuba could be a means of educating kids both on the lasting impacts of discrimination and genocide, while also teaching them about how perspective taking is an important skill that allows for someone to realize that many people are going through very different conflicts and challenges that may not exist in your own life. For history teachers, it is important to set the field trip up when you are teaching the specific era of history for students. If the play is fictional by contrast and doesn’t really have a historical basis, it may be good practice to have students go and see the performance towards the beginning of the year while they are still building relationships with their peers.
Complimentary Activities: Writing a one page reflection may not actually allow for students to participate and engage with the material that they saw. Especially when most students see field trips as a break from school. Instead, it is recommended that you provide opportunities for dialogue before and after the performance(s) to empower students to speak up about kindness in their lives. Below is an example of some dialogues/tactics using Tropical Secrets: Holocaust Refugees in Cuba as the example play.
Dialogue [30 minutes before bus ride to CTOC]: Have the teacher split the class into small groups of 5 or 6 and print out possible questions about the subject matter of the play.
Ex.
What ideas/tactics, in your personal experiences, have been useful to you when learning about the experiences of others? What about when those experiences are hard to hear?
What, in your eyes, makes someone a hero? What do they act like? What do you think they feel in tough situations?
What have you heard about the holocaust previously from other classes or people in your life? What about the country of Cuba?
Were there times where kindness looked different to you then it did to another person? If so, when?
Before Bus Ride [Last 5 Minutes of the Dialogue]: Have students jot down a sentence or two on a sticky note about a question they have going into the play. Make sure they keep it with them throughout the day. (For younger kids, collect them and put them into a folder to pass out again. Make sure they write their names for efficiency)
Field Trip [Approximately 3-4 hours]: Have the students go to CTOC and watch the performance/have lunch. Leave a little bit of time in case the actor(s) want to speak to the class about the content/their own processes in the performance.
After Bus Ride/Following Day in Classes [30 Minute Discussion]: Pass back out the sticky notes from before the production and see if their questions were answered. Split them back up into different small groups to explore alternative opinions on the subject matter. Below are sample questions. They should address some of the key themes from before while building on what they have now seen from the production.
Ex.
Did your beliefs/views on holocaust survivors and Cuba change after the play? Why or why not?
What sort of perspectives existed in the play? How did they change as the stories went on?
Have you ever had a time in your life where one person’s act of kindness impacted your opinion on them in a positive way?
What does a community look like that is built on kindness, generosity, and people who are able to take other people’s perspectives?
How can you display kindness towards others in your own community? How can you work towards that community that you envisioned earlier?
How might you bring this idea to others that you don’t already know within your neighborhood and family?
4. Goal:
Textual Resources:
Romano, Arthur. Racial Justice and Nonviolence Education: Building the Beloved Community, One Block at a Time. Routledge, 2022. Introduction and ch. 2.
Living in and working in a pluralist society, such as the United States of America, diversity is not only the norm, but the ability to navigate the complexity of cultures every day is the expectation.
Visitors to the United States, through the many international education and exchange programs may find themselves outside of their element while immersed in a society that conflicts with the norms of their own.
The resource introduced today is the book, “The Culture Map” by Erin Meyer (Meyer, Erin. The Culture Map: Breaking Through Invisible Boundaries of Global Business. Public Affairs (2014)). This book outlines the different aspects of cultural contexts, and helps readers understand their own styles. It surfaces the challenges that could arise when communicating with those from other cultures while also touching on the issue of generalizing, and the nuance that always comes when dealing with others. This understanding is important for those being immersed in a culture different than their own, as it would help curb communication breakdowns. By gaining that understanding, international students/visitors may have a smoother experience during their program.
Context
This 90-minute suggested workshop outline can be used by international program administrators and educators who would like to teach about intercultural conflict: international exchange programs, study abroad, pre-departure orientation programs for those expecting to travel to different cultures. The activities could also be reworked for use with any groups of diverse students: shared housing/dormitories, student life activities, intercultural conflict workshops.
The outline is designed for college-aged students, however, it can be adapted for travelers of any age. This activity can be integrated as part of the pre-departure or arrival orientation program. If they are 16+, it might be beneficial to assign them to read one of the recommended additional resources (see list below) prior to the activity. If they are younger, the main concepts can be introduced to them during the session.
The additional resources noted below can be helpful to support students beyond this workshop. When advising students, the introduction of these concepts could help students navigate conflict by reflect on other’s cultural conflict styles while also considering their own approach to situations.
Goals
Increase awareness of cultural differences, cultural nuances and intercultural communication styles
Reflect on own style and how it might promote/hinder communication
Practice cross-cultural challenge scenarios and responses
Timeline (90 minutes):
00:00 – 00:05 Ice Breaker/ Into to Topic
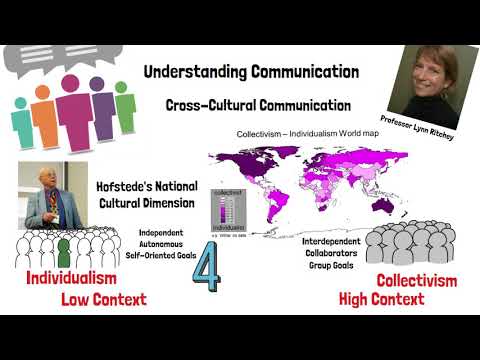
00:05 – 00:15 Understanding Communication: Cross-Cultural Communication
00:15 – 00:45 Cultural Spectrum
00:45 – 01:15 Intercultural Challenge Scenarios
01:15 – 01:30 Closing Reflections
Implementation
Preparation and Materials:
Classroom space with large wall to wall gap to allow for students to line up on a spectrum. Classroom should also be flexible to allow for small groups.
Printout of Scenarios, one scenario per group
A/V to play video
Ice Breaker: How do you say hello? (5 minutes)
When you have a group of international and U.S. students representing different cultures and backgrounds, you will likely have a variety of ways to say hello in the classroom. This activity may help introduce cultural differences, and how even through saying hello small conflicts may arise.
Activity (4 minutes): Ask each student to model how they say hello in their culture when greeting an acquaintance, a family member, and someone from the opposite gender. You can expect that this may be varied: for instance, Northern African (example Egypt) cultures may kiss on each cheek but not touch the opposite gender (some cultures may be ok with a handshake); Latin American (example Brazil) cultures may hug and kiss everyone, including new acquaintances. If you have a large group, instead of having everyone participate, you can ask for volunteers representing different cultures. When each person goes, you can ask: Are greetings different in your culture? Who wants to share a different example next?
Model how people say hello in the host community (the United States for instance).
It is important to acknowledge that “different is not wrong”, and that it is important to be mindful of how each greeting may be perceived in a different context. Ask the group to reflect on what it would be like for a Brazilian to greet Egyptians while visiting Egypt, and what it would be like for an Egyptian to greet Brazilians while visiting Brazil. Ask: What may be something that they should be aware of? How might not understanding the cultural nuances lead to conflict?
Debrief (1-2 minutes): This is an opportunity to recognize the beautiful ways by which people around the world greet each other. You can also use this opportunity to introduce some potential boundaries that the students/visitors may want to be mindful of with new U.S. acquaintances (for instance, kissing, touching, personal space, etc).
Concept Intro: Understanding Communication: Cross-Cultural Communication (10 minutes)
Share the following video with the group (5 minutes):
Quick Debrief: Ask (5 minutes):
Give an example of how people give negative feedback in your culture. Would it be direct or indirect?
When speaking with someone older than you, how formal/informal can the conversation be? Are there any ways by which you are expected to show respect? What would happen if you do not follow that expectation?
Cultural Spectrum (30 minutes)
This activity is built on The Culture Map, eliciting reflections from the group on their own cultures when it comes to the different cultural aspects: communication, feedback, power dynamics, etc.
Explain (5 minutes) to the class that they will stand along the spectrum, in the spot that they feel represents their own preferences. They can choose to stand at either end, or anywhere in between. Explain that you will read out each characteristic (listed below) and provide examples. Students/visitors can ask clarifying questions as they choose their spot.
Reflection on each characteristic (5 minutes each – 4-5 characteristics). After every characteristic is posed, and the students have chosen their spots, ask: Why did you choose that spot? How does this style show up in your community? Where would your grandparent/ older relative stand, if they were here, and would that change where you are standing now?
Cultural characteristics – choose 4-5 characteristics, as many as the time will allow:
Communication: High Context (nuance, not direct, must also read what isn’t being said and body language) or Low Context (direct, people mean what they say)
For example: a group of friends are at a party. One wants to leave. In a high cultural context, the person might say “oh look at the time, it is getting a bit late” and may stand off in the corner not engaging in much conversation. In a low context culture, the person might state “I want to leave now.”
Evaluating, when giving negative feedback: Indirect (provided softly, cushioned with positivity, and subtly) or direct (to the point, honest, frank)
For example: Giving a student feedback, indirectly that might sound like “I like how you mentioned xyz, and your approach was great. You could think about including abc. Doing that will certainly enhance the paper”. Those who prefer a direct approach might say “the paper needed more work on xyz.”
Leading: Hierarchical (high regard for boss, high respect for elders and age – even if within peer group, multilayered) or Egalitarian (boss works directly with staff/team, flat structure)
For example: In a hierarchical society, at school, students may be expected to stand up when their teacher comes into the classroom. In an egalitarian society, teachers/professors may make small talk and joke with the students – and may ask them to call them by their first name.
Deciding: Top-down (decisions are usually made from the boss down to the team/individual) or Collaborative/Consensual (decisions are made in groups with mutual agreement)
For example: In a top-down community, students may wait for instruction from the professor/teacher/supervisor – and they may not question it. In a collaborative community, students may be expected to share their opinion. The professor/teacher may designing an activity/assignment in collaboration with the students.
Trusting: Relational (to gain trust time and effort must be put in to develop and maintain relationships and trust) or Task-based (you are trusted because of the work you deliver)
For example: In a relational society, it may be expected to build a relationship and gain trust of the other person before starting to work with them. This requires getting to know them through intentional outreach. In a task-based society, you can simply start working with a new peer without much introduction.
Disagreements: Avoid Confrontation (passive approach, may beat around the bush, fear of negatively impacting the relationship) or Confrontational (disagreements are directly stated, differing views are acceptable)
For example: In a non-confrontational way, disagreements might look like subtle cues of withdrawal or slight change in tone. Instead of saying “no” or “I disagree with…”, they might say “I will consider this”. In a confrontational culture, they may say “I don’t think that will work”, “I disagree with this approach”, etc.
Scheduling: Flexible time (it is ok to shift dates/times around, time seen as a suggestion and not a commitment) or Linear time (deadlines are rigid, scheduled meetings are expected to be upheld)
For example: Those coming from societies that are used to flexible times may show up to a 7:00pm party at around 7:30/45pm. The hosts may provide an earlier time in the invitation, knowing that people will arrive later. Those who schedule with linear time will say 7:00pm, and expect people to arrive between 6:55pm-7:00pm.
Adaptation: These characteristics are based on the Culture Map by Erin Meyer. However, an adaptation could also be made to adjust this activity and use Geert Hofstede’s Six Dimensions of Organizational Culture, which looks at culture through the lens of: individualism/collectivist, power distance, femininity/masculinity, tolerant/avoidance to uncertainty, long-term orientation, indulgence.
Intercultural Challenge Scenarios (30 minutes)
This activity has students work on different cultural clash scenarios, and work together on ways that they could respond to the conflict.
Group work (10 minutes): Break the class into groups of 4-5, and provide each group with a different scenario. Explain that they will have 10 minutes to come up with a response to the scenario. The response should include: the timing ofwhen they will approach the individual/group, how they will approach the conversation and what will they say?
Ask participants to ensure full participation from the group. Each individual should voice their opinion, and the group should collaborate together on their shared response. They should choose one person who will present their response to the larger class.
Scenarios:
Scenario 1: Your professor assigned you with a group of 4 students to work on a class project. The team all grew up in the United States and you are the only international student. In the few meetings that you’ve had so far, they have worked quickly to build up the different components of the project. You are not used to this collaborative approach, and have not been speaking up in the meetings. You’re not used to voicing your opinion to people you don’t know well, and not sure how to let them know that you do not agree with the pathway they are headed on. You have been silent in hopes that they will recognize your disagreement. You also were excited to be assigned to this group, as they seem to be really kind, and you were hoping to build new long-term friendships.
Craft a response that includes: the timing ofwhen you will approach the individual/group, how you will approach the conversation, and what you will say.
Scenario 2: You are living in shared campus housing with three other students. They all have different personalities and cultures. You’re very excited to make new friends and you’ve all been getting along well. The semester started out great, until one incident that changed everything for you. One day, you had a few friends over (including a few older alumni) hanging out in the living room. Two of the roommates approached the group and said, “you are being very loud, we’re trying to study. We don’t appreciate your loudness”. They asked you and your friends to keep it down or go hang out somewhere else. You were shocked at their directness, and their insensitivity towards your guests. It was very embarrassing, especially in front of your older guest. How will you respond?
Craft a response that includes: the timing ofwhen you will approach the individual/group, how you will approach the conversation, and what you will say.
Scenario 3: You were tasked with training another student worker who joined the team. You have been working there for over a year, and are very confident with the daily tasks. You were excited to be given the responsibility of training the new student worker. You’ve noticed that the new trainee has been extremely kind, bringing food to share, inviting you to coffee, and has been overall courteous. When you explained the tasks to them, they confirmed “yes, yes” that they understood what was asked of them. However, you’ve noticed lately that they rarely show up on time, and this has impacted your ability to clock out as scheduled. You also noticed that they still don’t seem to be fully understanding their assigned role, and despite reminders tasks go undone. They haven’t asked any questions or even let you know that they are struggling. You want to address this issue, but you are also aware that there seems to be some kind of cultural disconnect. How will you respond?
Craft a response that includes: the timing ofwhen you will approach the individual, how you will approach the conversation, and what you will say.
Presentations of Responses (10 minutes): Each group reads out their scenario and explains their response. Allow time for the other groups to provide feedback, ask questions or suggest further approaches to the scenario.
Debrief (10 minutes):
Have you found yourself in a similar situation?
What role do you think culture is playing in the scenarios?
If this scenario happens to you, how would you relate to the person as it relates to your culture?
What are the assumptions being made about the behavior of the different characters in each scenario?
What are the potential cultural contexts of these people (high context (indirect), low context (direct)? How did the different cultural contexts create the clash?
What questions could be asked to spark a conversation about cultural expectations/behaviors?
What else might they consider when creating their response? Would gender play a role? What about age?
These scenarios were developed for college-student age, but can be adapted for different age groups and contexts.
Closing and Reflections (15 minutes)
Ask the group to reflect on the activities.
What is something new they learned about themselves, or someone else?
As they reflect on the culture map, is there anything they agree with/disagree with?
What does it mean to be mindful? How can one be mindful of the differences in cultural contexts?
Reflecting on the scenarios, if they found themselves in these situations, who might they go to to bounce off ideas on how to respond?
What is one cultural aspect they would like to take home with them?
How do we implement peace education into public K-12 Schools?
This is the underlying question behind the peace pledge activity that is part of the 10th lesson from an interdisciplinary curriculum plan designed by K-12 educators working across New York and Massachusetts. This curriculum was shared as part of the Spring 2026 Peace Week event hosted by the Jimmy and Rosalynn Carter School for Peace and Conflict Resolution. The moderator of the event was Dr. Rose Cardarelli, CEO and founder of Education for All Coalition, which provides education for children in vulnerable populations internationally.
The peace pledge promotes the cultivation of peace within ourselves, as an active process of action, and through exploring one’s identity. In addition, for high school students in particular, it can also aid in promoting the awareness of historical, local, and global contexts of peacebuilding.
Foundations: The frameworks behind this 10-week lesson plan are based on the following theoretical foundations
Critical Pedagogy: Developed by Paulo Freire, analyzing power structures, social inequalities, and developing “critical consciousness” against the global systems of oppression. 1
Culturally Responsive Framework: Multiple expressions of diversity (race, gender orientation, socioeconomic class, nationality, and religious backgrounds) are recognized and incorporated into the learning environment
Benefits: low tech, fosters civil engagement, contributes towards a sustainable peace environment
Activity Overview:
Peace messages, initially designed for the elementary school level, are ways for students to express how peace can be practiced and to understand what peace means. Students will engage in a series of workshops designed to aid in their understanding of peace over the course of 9-10 weeks, before the creation of the peace pledges. See lesson plans below.
Note: This activity is intentionally designed differently depending on students’ age and grade level. Please plan accordingly.
Materials/Preparation:
Postcards
A Writing Utensil (pencil, pen, markers, colored pencils)
Step 1: Writing Peace Messages
Objective: After the lessons that allow students to understand how peace can show up in everyday life, the qualities of peace within ourselves, and the global and historical examples of peaceful actions and movements, students within lesson plans 6-7 will start to analyze the language and tone that underlie peaceful messages in the creation of their own.
Instructions: Students will have 20 minutes to complete their peace messages on a postcard. They will be instructed to write 5-10 sentences on how peace is felt to themselves (elementary school), towards their character and identity (middle school), or towards an example of how peace will be put in action (high school). There will be a series of prompts given to students to help guide their responses. However, this is a student-led assignment, so the student will have the autonomy to write down their own answers.
Elementary School Prompts:
How is peace felt through your five senses?
How can what we feel with our senses change how we feel emotionally?
Based on previous lessons, what would peace look like?
Middle School Prompts:
How does our identity impact actions towards peace?
How does our outlook on the effectiveness of peace change how we talk about it?
How is peace related to equity and equality?
How does peace build resilience?
How does peace build our character?
High School Prompts:
How can peace be implemented through personal actions?
How can peace be implemented in our local communities?
Why is peace as an active process so important?
How do historical and global examples and perspectives of peace inform your understanding of peace?
Step 2: Peace Pledges
Objective: Following the peace message activity, students will write 2-3 sentences outlining how they will take action towards peace.
Instructions: Students will have 15 minutes to complete their peace messages on a separate postcard. They will be instructed to write 3-5 sentences on how they will use peace to understand how they and others feel (elementary school), affect change towards themselves (middle school), or how peace actions will be done in local places of communities and support networks (High School). There will be a series of prompts given to students to help guide their responses. However, this is a student-led assignment, so the student will have the autonomy to write down their own answers.
Elementary School Prompts:
I pledge to treat myself…
I pledge to try to…
I pledge to respect..
I pledge to use my words..
I pledge to help others by..
Middle School/High School Prompts:
I pledge to treat others and myself by..
I pledge to build/contribute to peace efforts by..
I pledge to make peace effective by..
I pledge to use peace in my everyday actions by..
I pledge to use peace as an active process by..
Closing Reflection: After the peace pledges are created, invite students to share what they wrote and share further reflection upon writing the peace messages, and how this 10-week course has changed their outlook on what it means to build peace in themselves, their communities, and within the world. Students can either speak individually or can be paired into pairs or groups to share amongst themselves.
Resources:
Persons of Interest:
Isabella Cuevas: She is a graduate student at the Carter School for Peace and Conflict Resolution. She works with disadvantaged youth through her program, the Storyvism Project. She is also the outreach coordinator for the Better Evidence Project.
Louis D. Brown Peace Institute: This is an organization that shares a similar educational curriculum centered around peacebuilding principles that thematically shape their activities. Learn more on their website 2
Lesson Plans
Elementary Level
Lesson 1: What is Peace? Understanding Peace Lesson 2: Peace in everyday life Lesson 3: Peace Leaders & Historical Perspectives Lesson 4: Empathy and Perspective through Peace Lesson 5: Analyzing Peaceful Language and Tone Lesson 6: Writing for Peace Lesson 7: Revising Peace Messages Lesson 8: Presenting Messages of Peace Lesson 9: Reflecting on Peace Lesson 10: Peace Pledge
Lesson 1: Historical and Global Perspectives of Peace Lesson 2: Peace as an Active Process Lesson 3: Everyday Actions in Shaping Peace Lesson 4: Perspective-Taking of Differing Ideals of Peace Lesson 5: Analyzing Language and Tone in Shaping Meanings of Peace Lesson 6: Writing for Peace Lesson 7: Revising Peace Messages Lesson 8: Present/Reflect on Peace Messages Lesson 9: Peace Pledge
Content: This resource is a lesson plan from the Louis D. Brown Peace Institute in their designated “Peace Curricula” section, which has designated lesson plans for Elementary, Middle, and High School Students. The section I have chosen to discuss is from their “Pathways to Peace: Lesson Plans for Elementary School.” This organization is dedicated to being a center of healing, teaching, and learning for families and communities that have been impacted by murder, trauma, grief, and loss.
Context: This lesson is specifically designed for elementary school-aged students. Those who then benefit from this resource would be elementary school educators, community youth facilitators, or anyone who falls into a category like such. This lesson is designed for formal or informal educational settings. This could be particularly helpful for communities dealing with children who were exposed to violence, whether directly or indirectly, through the media, in order to give them a safe space to process their feelings and emotions.
Implementation: This lesson plan can be incorporated at any point during the school year that the educator deems necessary, but could be especially useful if the school or community center holds Peace Weeks or even Mother’s Day events, as part of this lesson pertains to these matters.
The Lesson Plan Set-up:
Students will ideally be set up in a circle to facilitate open sharing.
Materials:
Large blank paper/poster paper
Makers, crayons, and/or colored pencils
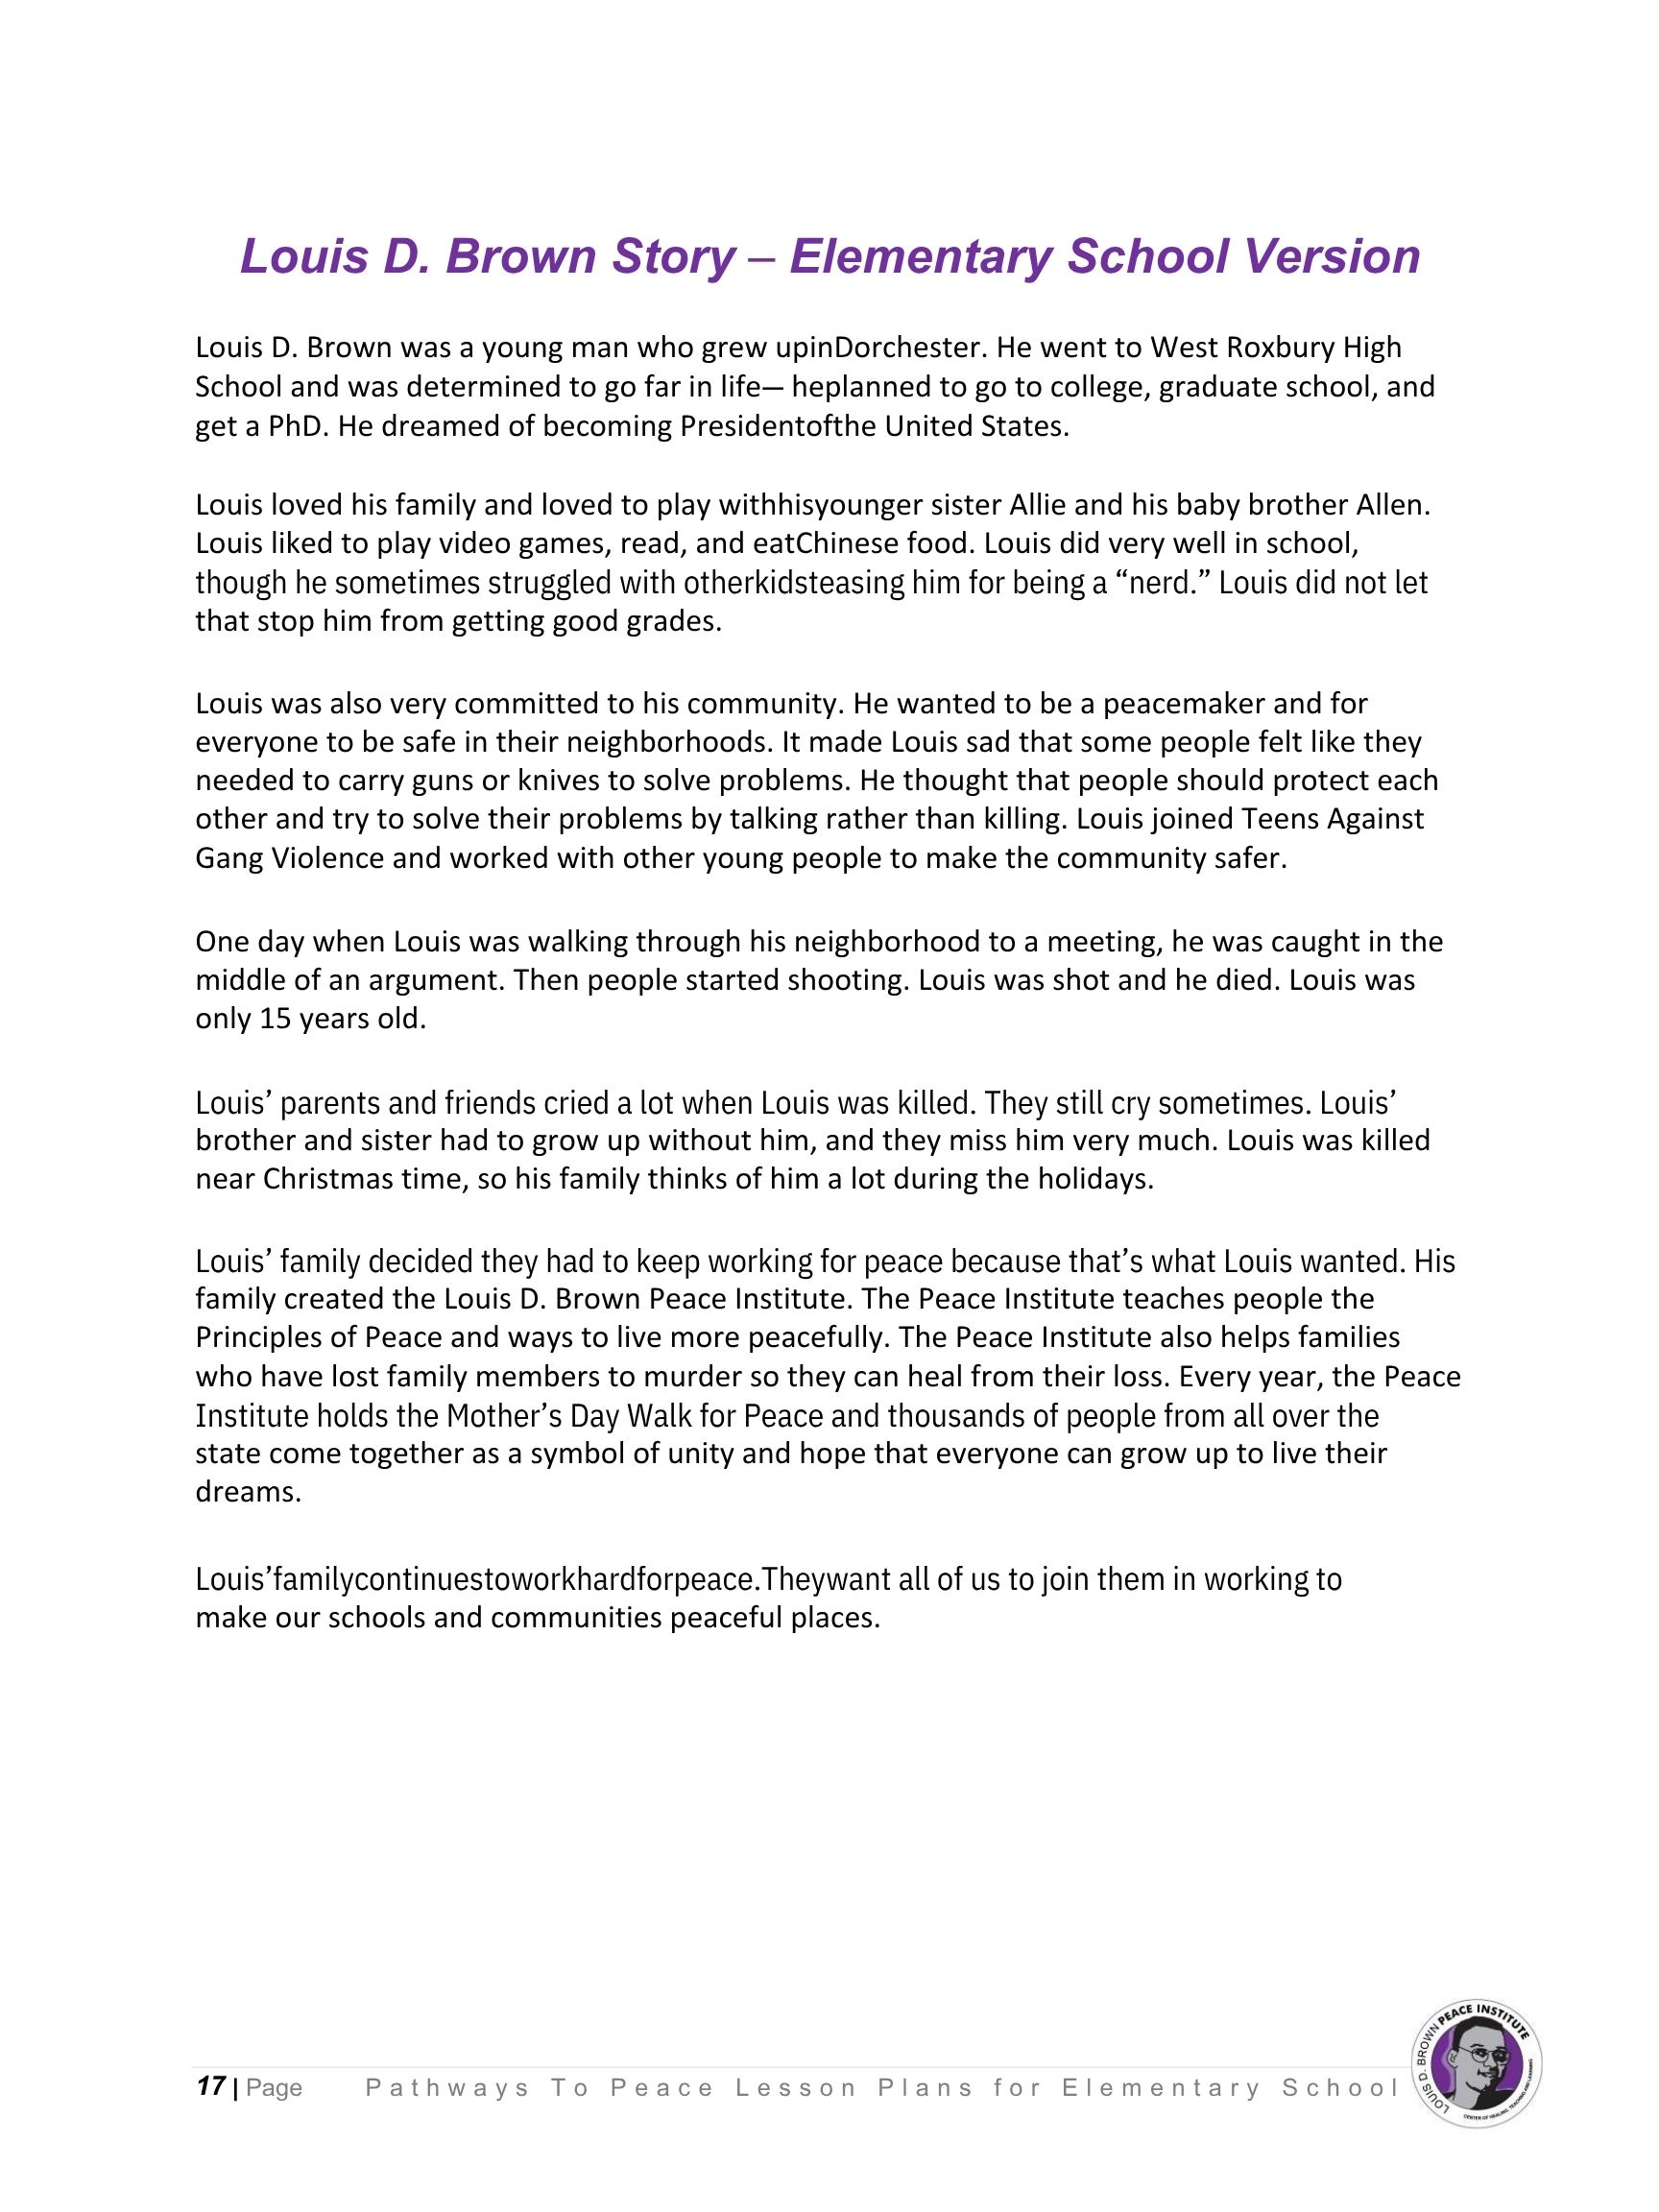
Printed copies of the story of Louis D. Brown (the Elementary version) (Provided Below)
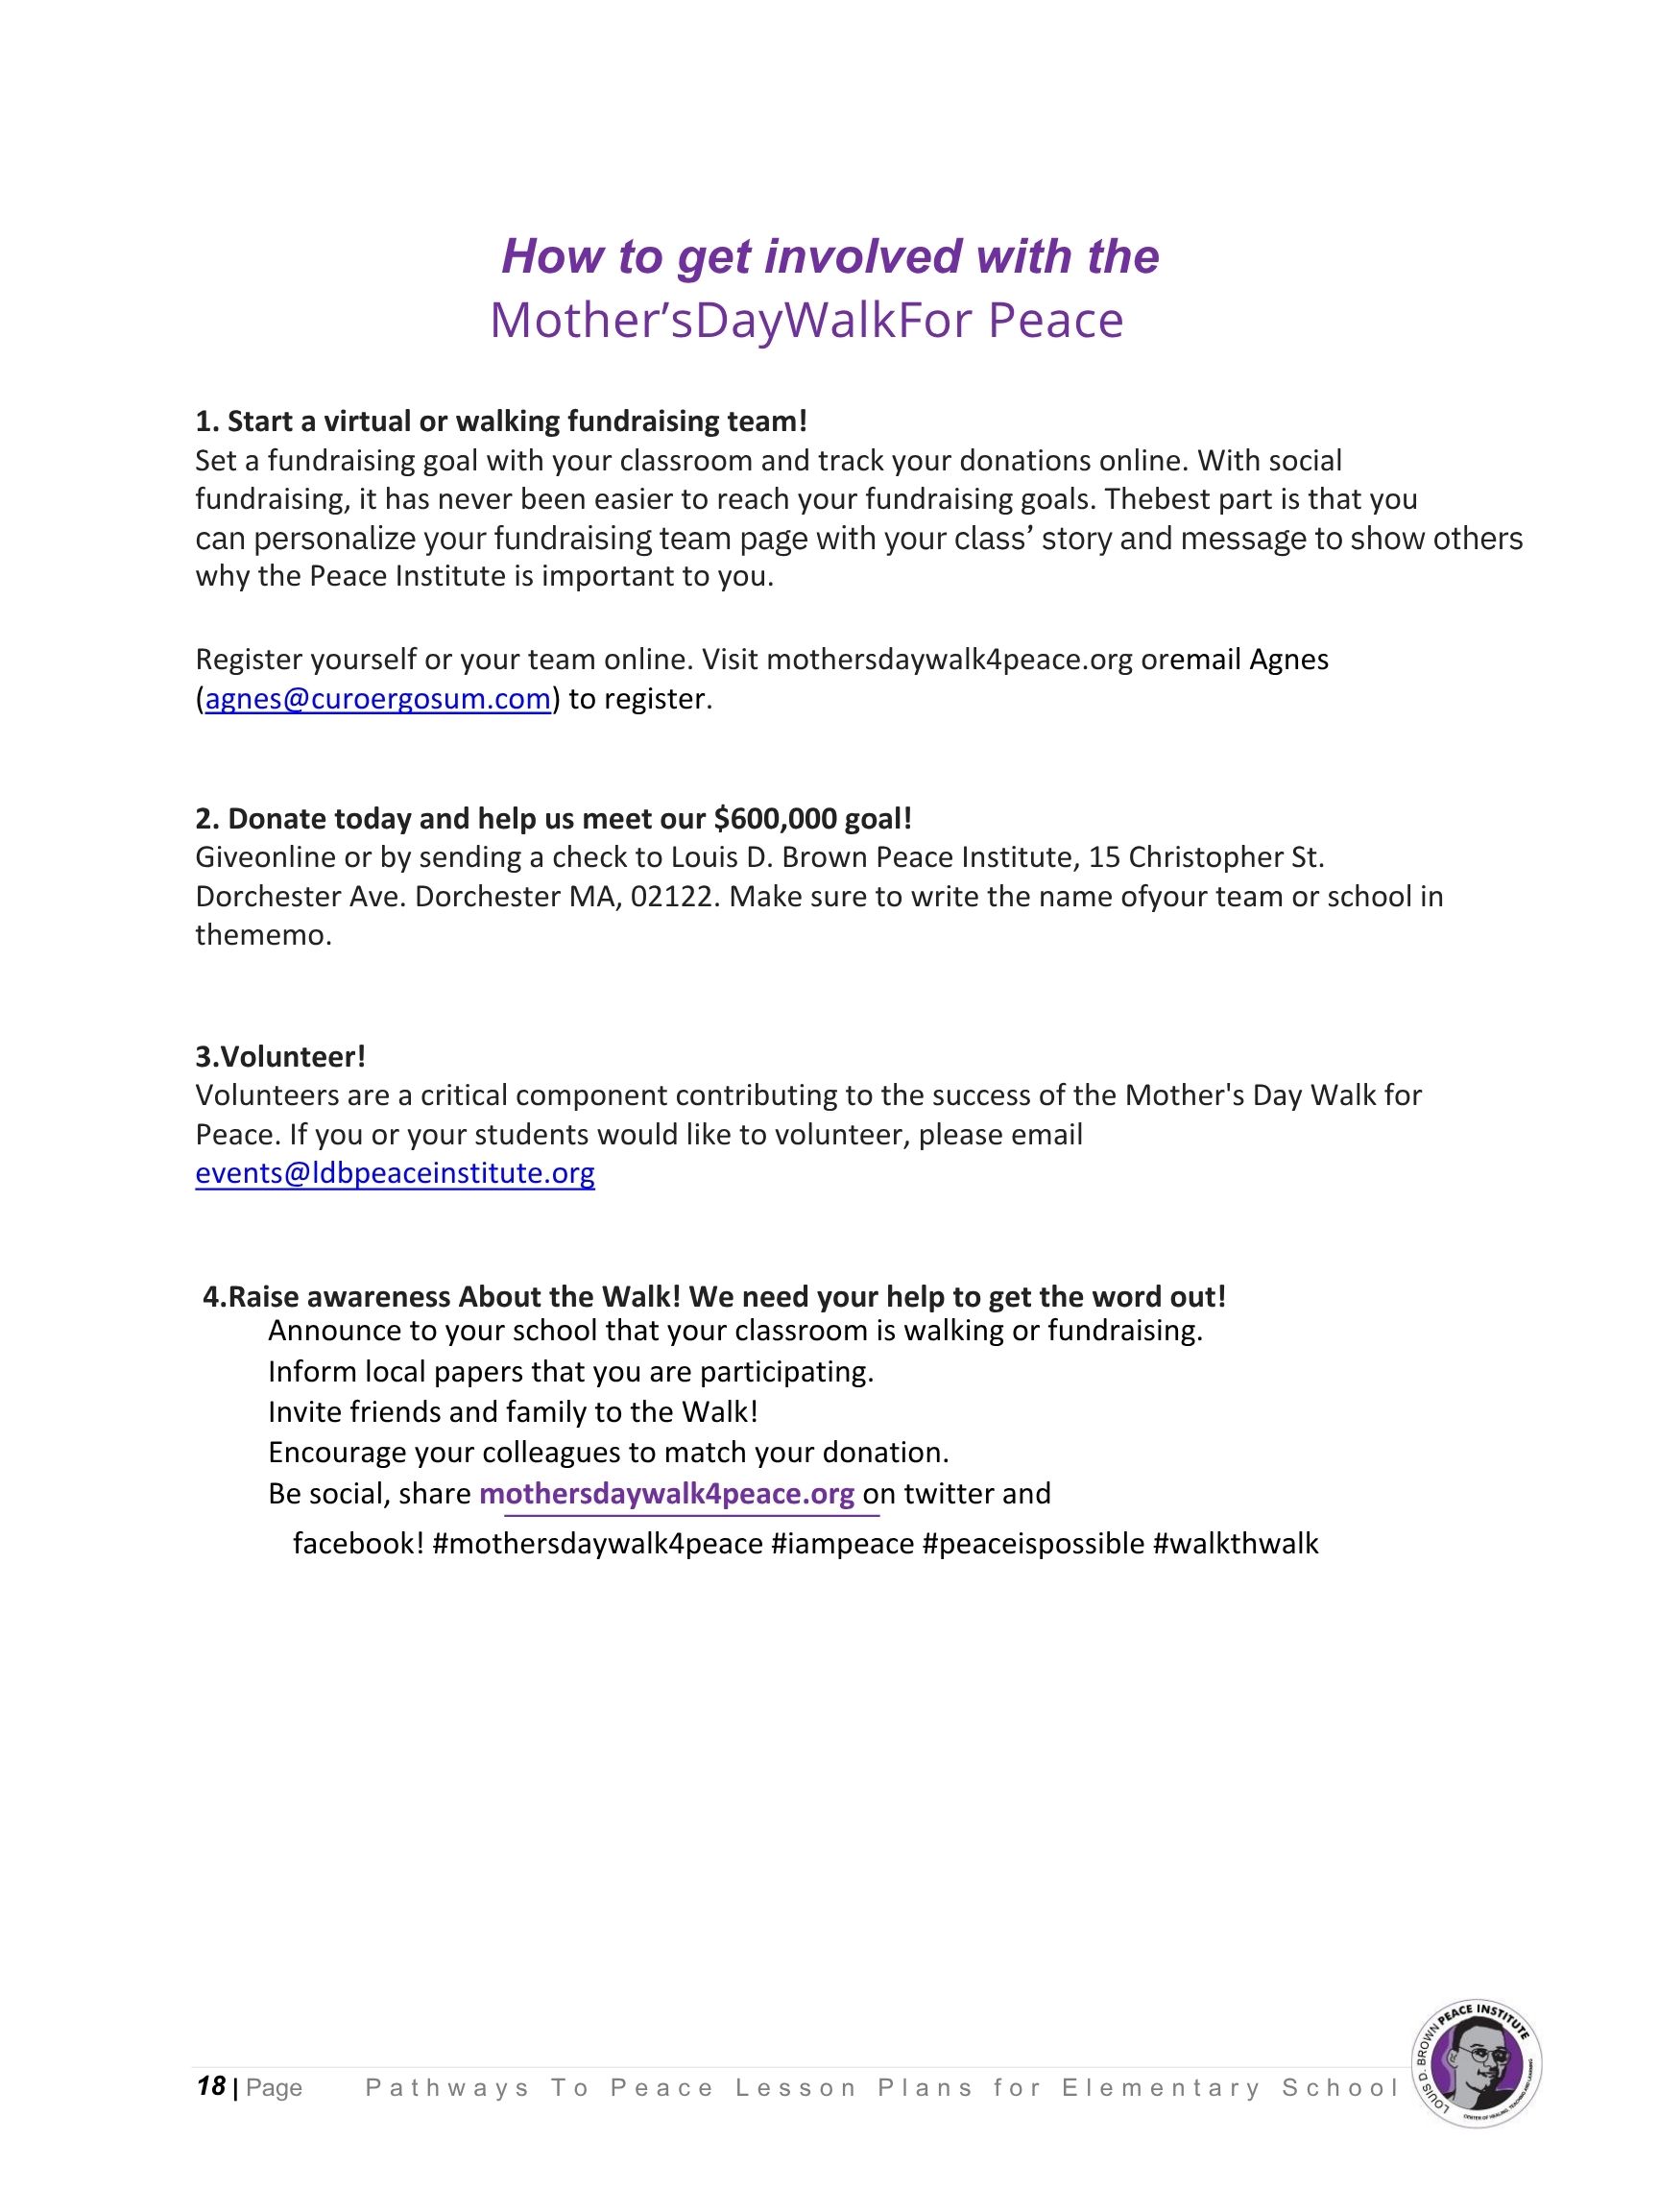
Printed copies of “How to get involved with the Mother’s Day Walk for Peace.” (Provided Below)
Tape or other resource to hang materials
Time: 45-60 minutes
The Lesson Plan:
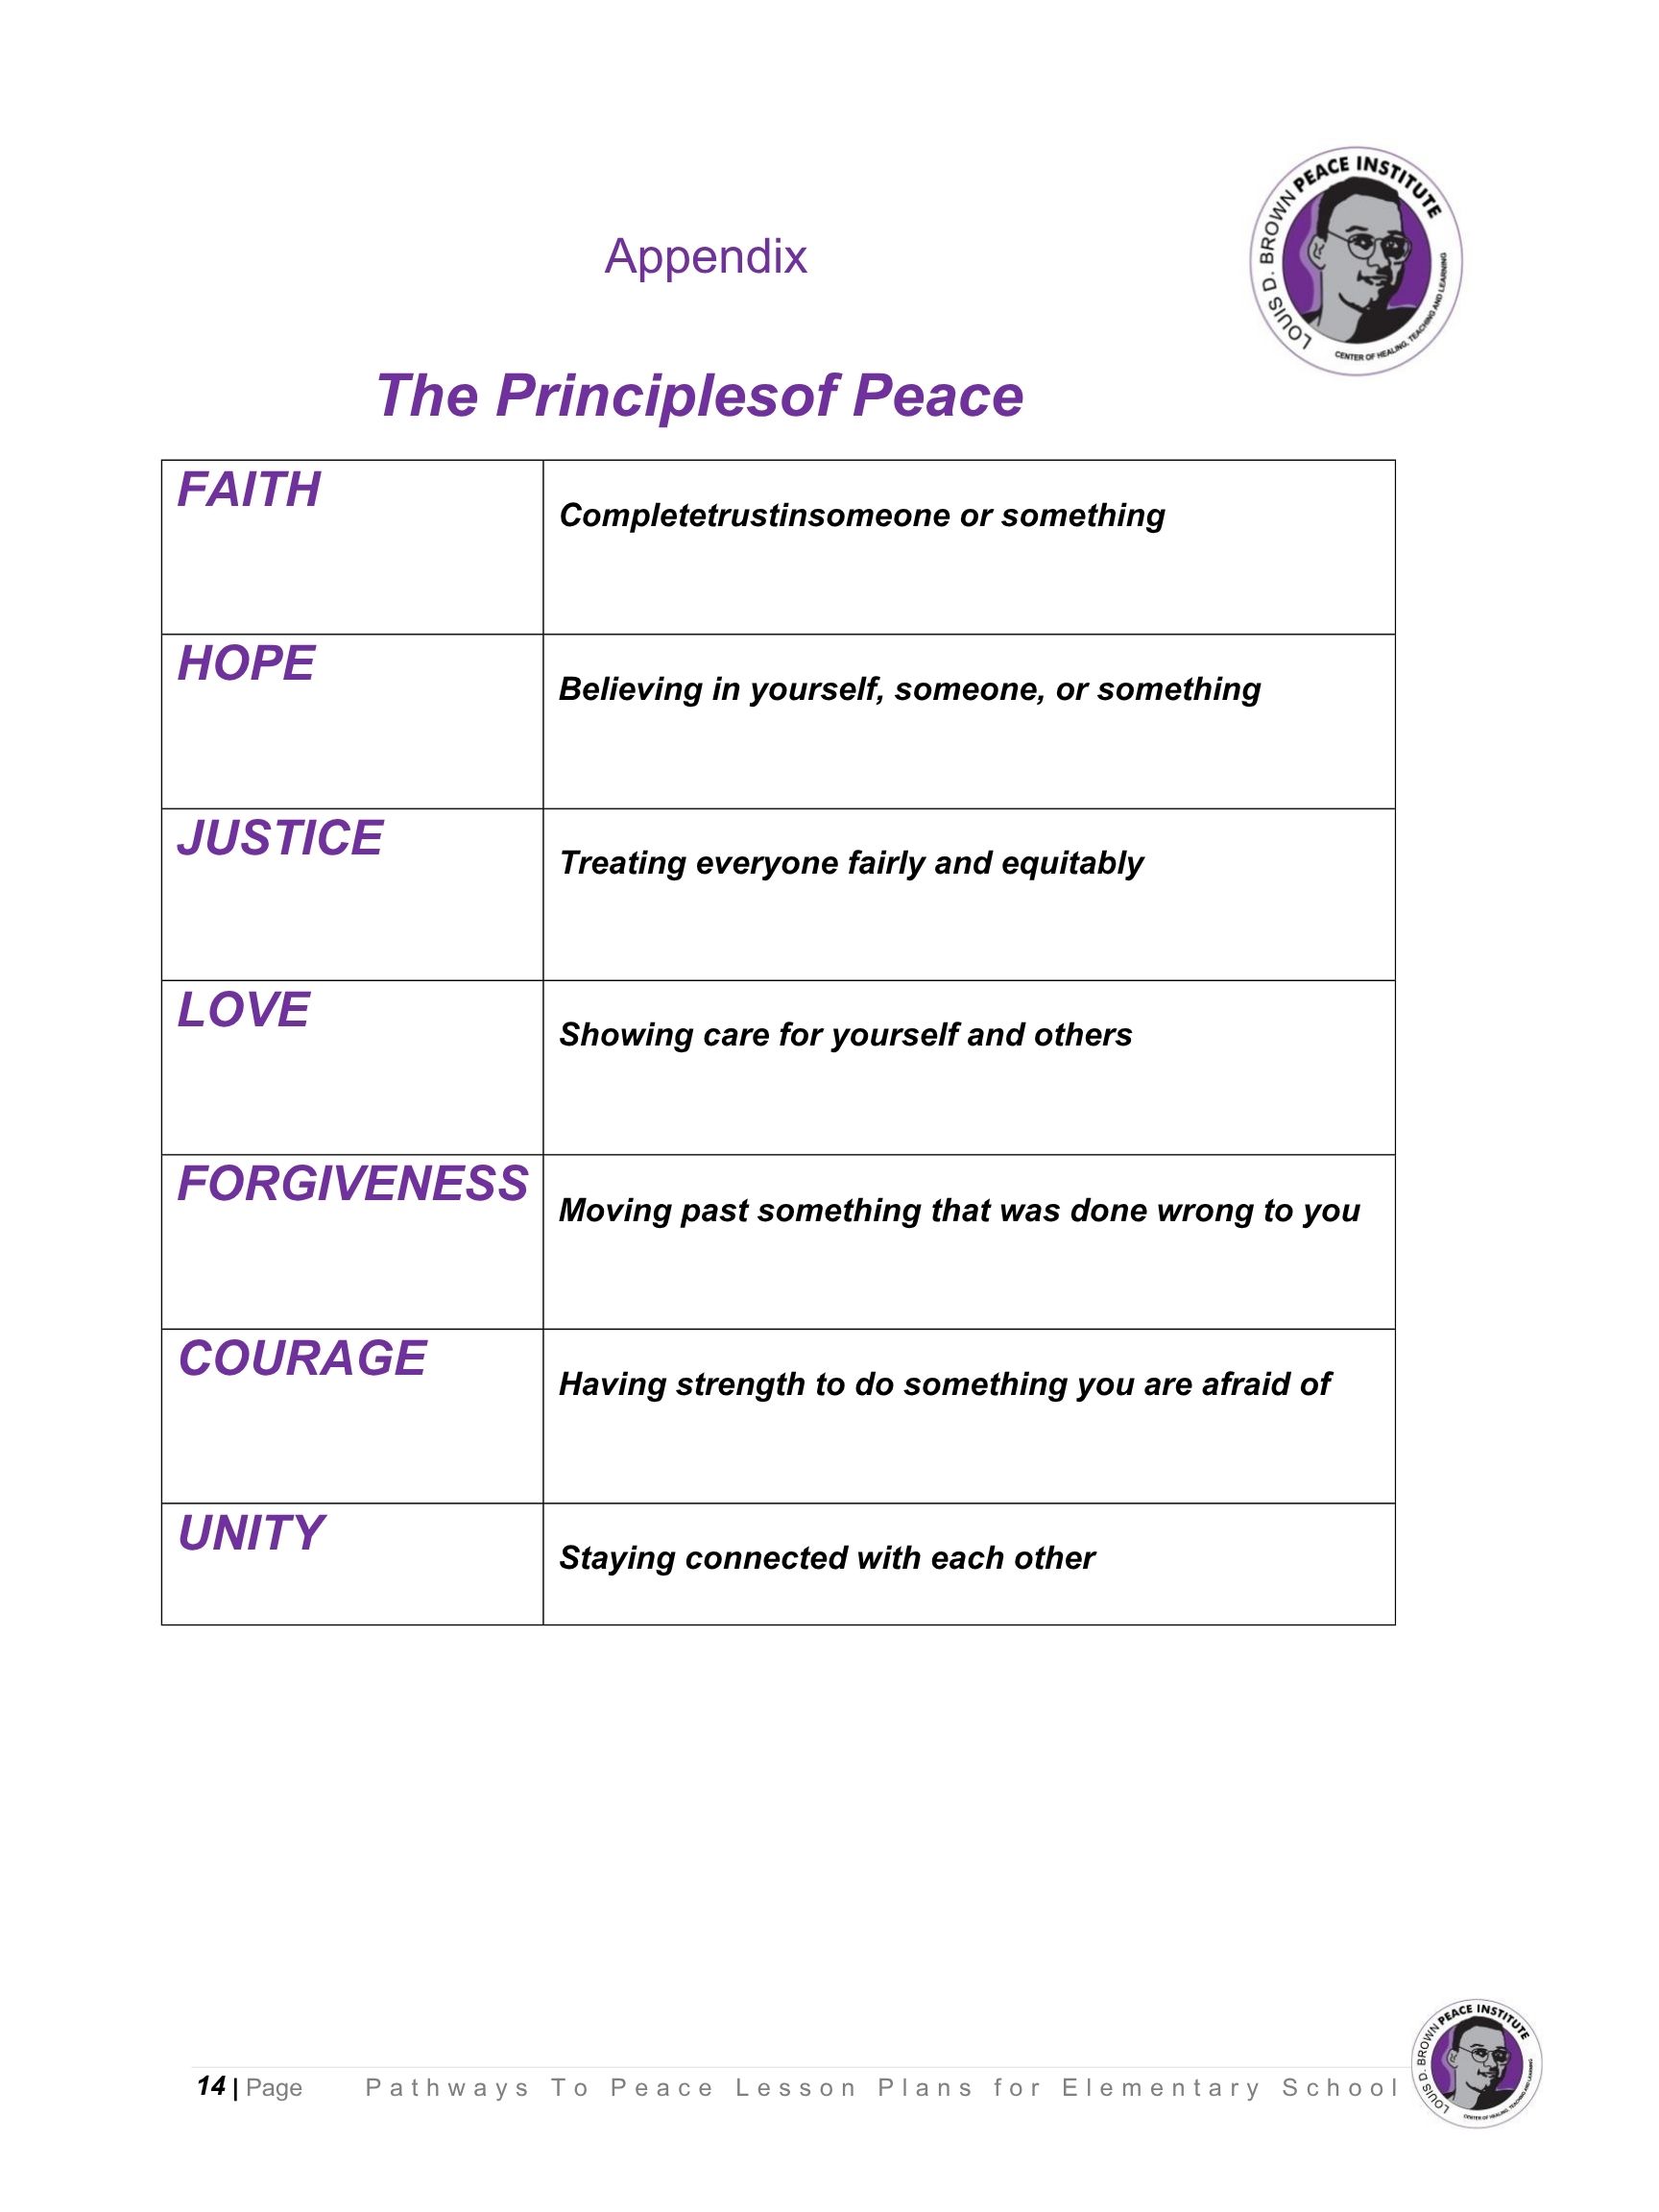
(5-10 mins) Introduction: The educator/facilitator will introduce themselves and welcome the students, and if they so choose, they can even allow for short introductions for students to share their names. Following this, the students will be read the Principles of Peace to set the tone for the lessons. The educator/facilitator must also remind the students that the lesson in class today is a set time for them to practice the Principles of Peace that they had read.
(20 mins) Mother’s Day Walk for Peace and the Story of Louis D. Brown: The educator/facilitator will begin by reading the students the story of Louis D. Brown and how his parents had started the Peace Institute. After reading this story aloud, the students will then be asked some questions to get them thinking. Here are the questions:
What kind of person was Louis? How did he help others?
How does what happened to Louis make you feel? How do you think his family felt when he passed?
What did Louis’ family do to keep his memory alive? How does the Peace Institute help the community?
(Disclaimer: The educator/facilitator has the ability to alter/cut questions that do not fit in the time frame, and also questions they do not feel comfortable asking, per the students’ response to the story itself.)
Following this discussion of Louis’ story, the educator/facilitator will then explain that an important part of the Peace Institute’s work is the yearly Mother’s Day walk for Peace. The walk is a way to bring the people together from all over the city and state to create a community where they can share love, feel unity, and have hope, which are all parts of the Principles of Peace. The students will then be encouraged to let the people within their own communities (friends and family) know about this Mother’s Day Walk for Peace, and will be given sheets of paper with information about it to bring home. Once they have discussed the contents of the sheet and have been given time to ask questions, the educator/facilitator will ask the students these questions about the Mother’s Day Walk for Peace:
Why is walking together and being together important for peace?
What other ways can you think of to work for peace in the community?
(15 Mins) Vision of a Peaceful Community:
The purpose of this section is to humanize the community and to stop the blame and shame of violence, especially on the young people who have the potential to become peacemakers of said community. In order to stop the violence and start building peace, the institute wants to share that we must recognize the strengths, assets, and resilience that are present within every community.
Instructors will ideally put students into groups of 3-4. If not possible, the size of the groups can be adjusted to better fit the group’s needs. Once they have been separated into their groups, they will be given a large piece of blank paper or posterboard. The educator/facilitator will then ask each group to work together to draw what they imagine a peaceful, happy community to look like. In order to help the students start, the educator/facilitator will give these as examples for the students to begin their drawings:
People working together
People sharing
People having jobs, houses, and happy families
Educators/facilitators are also encouraged to make sure students within each group are sharing their ideas and working collaboratively to represent the Unity section of the Principles of Peace.
(5 mins) Peace Mural:
After the groups of students have finished the drawings, the educator/facilitator will have each of the groups hand their posters and form them as one, making their very own peace mural that shows off everyone’s work together.
In a circle, the students will then all share one thing that they see happening in these images of a peaceful community that they would then like to see happening around them in their own communities to promote peace.
Here are the papers needed if you decide to include the Mother’s Day Walk for Peace portion:
Goal: The goal of this resource is to help students create a shared vision of a peaceful community and, by doing so, create a personal commitment to peacemaking in their own communities. This resource combines the arts with storytelling, a similar idea to that of the ones said in “Storytelling For Social Justice: Connecting Narrative and the Arts in Antiracist Teaching,” written by Lee Anne Bell. This resource acts as a counter-storytelling community (Bell, 2020). By allowing students to engage with Louis’ story, students move beyond concealed stories of trauma and begin to develop critical empathy and understanding, social imagination of a more inclusive community, and narrative agency to rewrite their future with new goals and ways to do so, all detailed in Bell’s book, and have the possibility to be shown by the students who complete these activities.
Relevance: Far too often, the public school system within the US creates lesson plans and guidelines that each school must abide by, neglecting to take into account the differences between states, cities, communities, etc, and how their learning might need to be shaped differently for the students as well. For educators working in communities affected by systemic inequalities or conflicts, students are often only surrounded by “stock stories” (Bell, 2020), which only focus on the violence that happens in their neighborhoods. By reshaping this and using the story of Louis D. Brown’s legacy, they are being provided with a counter-story in order to promote more critical and thoughtful dialogue about real-life issues that these students, although young, could be seeing in their own communities.
The activity allows for students to reshape and be the architects of their own communities. It allows them to also see the transition from being observers of their community into being active and aware of their surroundings, to the point where they can create their own “peaceful community,” making them finally feel like a member of it. Often we also try to shield children from the realities with which they live, and although I do understand that, in some areas, it is virtually impossible, especially now with so many children having access to social media and the internet. With that idea in mind, I wanted to share a resource that I thought captured more of what we need to be teaching from a young age, and that is peace, and how, no matter how old, we all have the ability to act on it.
Audience: The audience for this resource is any elementary school teacher working with their students to develop peace education in their classroom. I have shared these measures with my own family member who works in the public school system, teaching Kindergartners in the state of Maryland.
This resource is also for local community center leaders or coordinators specifically working with youth. This can also include the leaders of after-school care programs, as they also have direct access to the youth of the school. My family member teaching kindergarten has shared these ideas with the people who work directly with her students in the after-school care program.
References:
Bell, Lee Anne. Storytelling for Social Justice : Connecting Narrative and the Arts in Antiracist Teaching. Second edition. New York, New York ; Routledge, 2021. Print.
The activity below was adapted from the Futures Literacy Laboratory (FLL), an initiative developed by UNESCO in 2012 and currently led by the UNESCO Chair on Futures Literacy, Hanze University of Applied Sciences. The FLL is a structured, participatory workshop methodology. The Initiative provides sample agendas, activity examples, planning tips, and facilitator scripts, everything an educator needs to implement a lab independently.
To access the full resource, please click on this link.
Context:
Futures Literacy, as defined by Miller (2018), is “the capability of imagining diverse and multiple futures, and using futures as lenses through which we look at the present anew.” The future itself only exists in our imagination. As the world continues to rapidly restructure, particularly around multipolarity, declining multilateralism, and rapid technological leaps, the future, in mine and many others’ minds, feels radically uncertain.
“When we use the future, we anticipate, and how we anticipate matters, since it changes the present.”
(Damhof, 2022)
Imagining and anticipating the future can give individuals a sense of agency in the present.
The FLL is best suited for formal higher-education settings and beyond, but could be highly adaptable for advanced high school students. I would undoubtedly have benefited from this work in my high school experience. It could also be adaptable for informal community or workplace settings.
The lab is explicitly designed to work regardless of context. UNESCO has run over 115 of these labs globally with youth, policymakers, professionals, and community members. A notable peace-relevant example was a 2019 lab in Libreville, Gabon, where youth imagined “a peaceful and sustainable city by 2050,” generating over 30 new ideas that were shared with municipal policymakers.
How could it be implemented?
The FLL is structured around four phases, each building on the last. I added a pre-phase to give participants more context on futures learning and prime them for moving into the activity sections. Below is a suggested adaptation for an advanced high school/college-level course over two to three class sessions (90–120 minutes each).
The video, Futures Literacy: shaping your present by reimagining futures | Loes Damhof | TEDxYouth@Groningen, will give participants an overview of Futures Literacy and provide context and norming for the activities following.
■ Reveal:
Students surface their existing assumptions about the future through short writing prompts and pair discussions. Prompt: “What do you think the world will look like in 20 years?” The goal is not to answer correctly, but to make students’ implicit assumptions visible.
■ Reframing task:
Groups are given an unfamiliar, neither probable nor desirable future scenario (e.g., “a world where nation-states no longer exist”) and asked to make sense of it. This disrupts default thinking and opens space for new possibilities.
■ Rethink:
Students return to the original question with new perspectives. What assumptions shifted? What do they now see in the present that they didn’t before? This is where peace-relevant insights typically emerge.
■ Reflection/Debrief:
A facilitated whole-class debrief connects the experience to the broader course concept, if applicable. Students could write a short reflection connecting their futures to a real-world issue.
Time: 2–3 sessions of 90 minutes each
Materials:Playbook (free PDF), large paper or digital whiteboard (Miro), writing prompts, scenario cards
Group size: Works best with 10–30 participants in small groups of 4–6.
Pedagogical approaches that strengthen this resource
■ Experiential learning:
The lab is explicitly designed to be a “learning by doing/action-research workshop.”
■ Dialogue-based learning:
Small group discussions expose students to radically different assumptions, modeling the kind of perspective-taking central to conflict resolution.
■ Critical reflection:
Structured debriefs push students beyond the exercise itself to examine what their assumptions reveal about present-day systems and structures.
Why does it matter?
The Futures Literacy Lab supports several overlapping types of peace education. By asking “whose future is this?” the lab pushes students to reflect on who gets to imagine the future, which visions are prioritized, and which aren’t. This activity, at its core, is a reflection on peace, power, justice, and individual agency in the presence.
In my view, these activities align most with:
Global awareness
Social justice
Dialogue
Conflict prevention
Participants will gain knowledge of how anticipation and reflection shape present-day decisions, including political, economic, and social ones. Also, they gain skills in perspective-taking, systems thinking, and sense-making in a community of learning. Students may also develop attitudes of openness, individual/collective agency, and that their imagination is a tool for change.
Outreach:
As part of this assignment, I was tasked with sharing this blog post with two stakeholders and inviting them to read and comment.
■ My mentor and friend, Jewels.
In our many sessions focused on cognitive transformation, you have reiterated the need to “build a future worth creating.” This activity is using our moral imagination to reflect on that very task. Hopefully, this source provides additional language and structure to supplement the amazing work you already do.
■ The best teacher I’ve had, my Father
Hey Dad, so much of your class (he is a middle school social studies teacher) focuses on global issues and contemporary world affairs. I know how important it is to you to give students a sense of global awareness and agency. Hopefully, this resource could provide you with context, language, and structure to bring into your legendary classroom. While the resource language and the activity itself may be slightly too advanced, an iterated version in simpler language could be suitable for your classroom.
I would like to share this educational resource you can use when teaching youth about narratives and hate speech. It is called the “Case Study Iceberg”.
Relevance of this Resource
We are living in particular violent times and unfortunately, narratives against certain social, cultural and ethnic groups are being spread out, increasing the spiral of violence. The internet and social media are serving now as an amplifier of the repressive narratives behind hate speeches, and the freedom of expression is being used to justify them. We are witnessing an increase in gender backlash, a surge in antiimmigrant sentiment and more frequent attacks in the name of religion and national security. These trends are intensified by rising online polarization and disinformation, which make harmful narratives travel, unfiltered.
This affects youth in an exceptional way, since they are more avid users of these online platforms, where they can feel shielded and entitled to attack, threat, dehumanize others, and even call for violent acts to be committed. Conversely, the youth who aren’t involved in such acts are also highly exposed to such content and so is their sense of identity, belonging, safety, their self-esteem and their mental health.
Considering this current context, I have come up with the “Case Study Iceberg”, an educational resource based on the “Case Study Activity” and other tools and ideas included in the Youth4Peace Training Toolkit, created by the United Network of Young Peacebuilders (UNOY). In other words, “Case Study Iceberg” is my adaptation of the “Case Study Activity”.
The Youth4Peace Training Toolkit helps beginners and intermediate educators introduce peace and conflict concepts to young people in non-formal settings (I highly encourage you to take a look at it, by clicking on the hyperlink above, since it is a practical and comprehensive peace education resource).
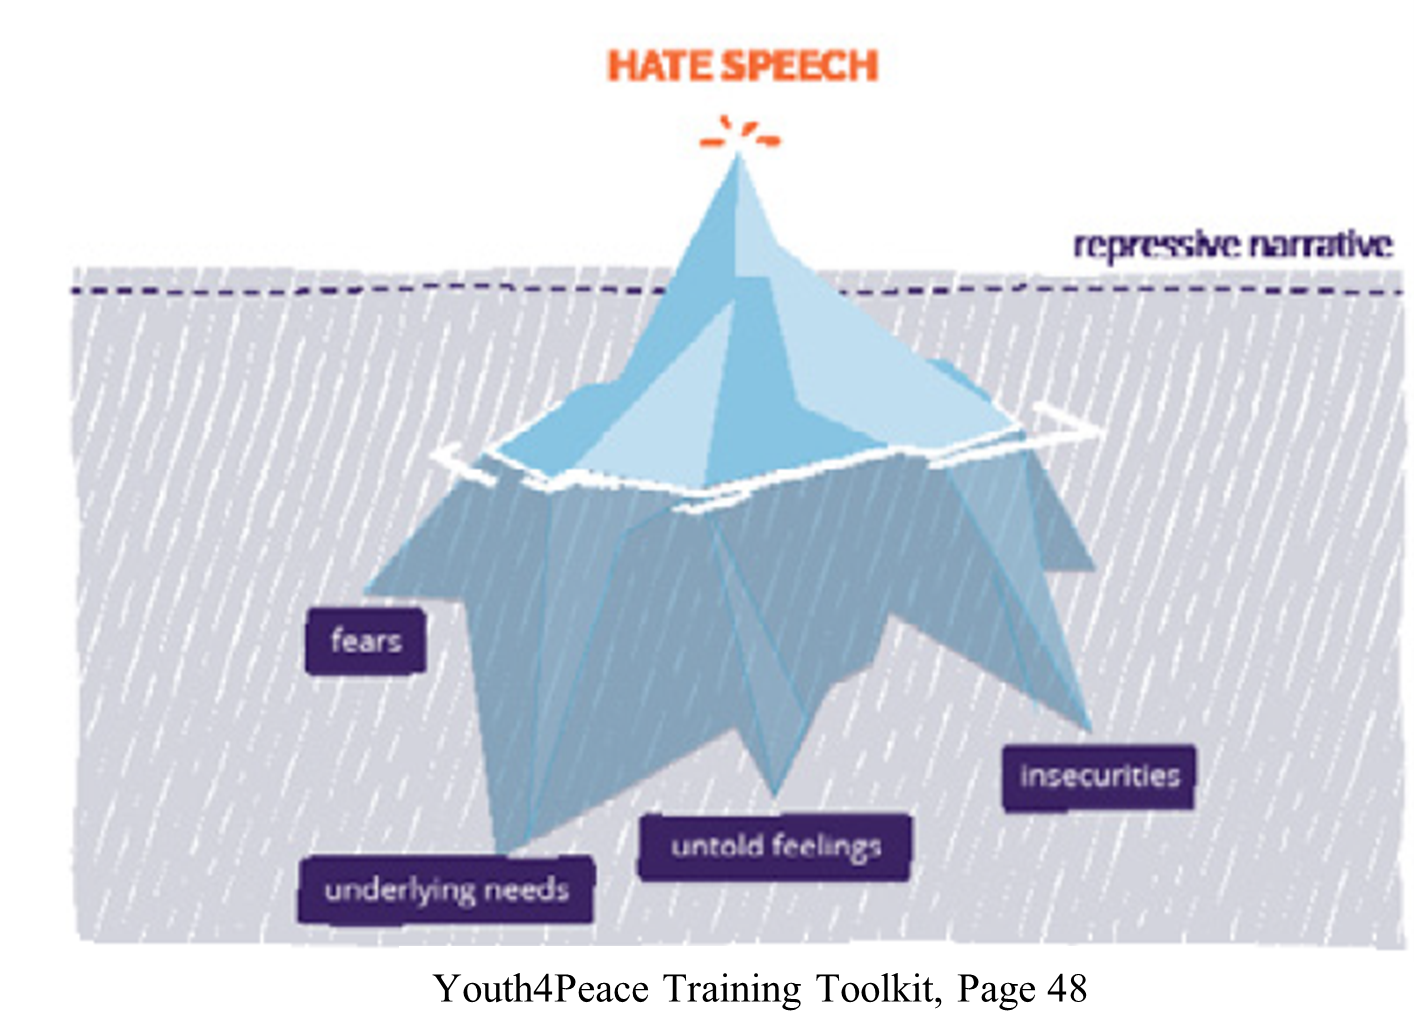
One of their lessons is about “Strategies to (re) act to hate speech narratives” and its purpose is to explain the definition of hate speech as a form of violence and learn the multiple ways youth can deal with it. To explain this, they use the symbolism of the iceberg. The list of strategies to deal with or manage hate speech are: Avoid, Draw a line, Report, Refute, Alternative (transformation) and, Dialogue Transformation (See page 39 of the Toolkit).
About my adaptation
I think the “Case Study Activity” can be very useful if educators just want to convey theory about narrative and tools to respond to forms of harm such as hate speeches. But it is possible to bring a more transformative approach to it by using the iceberg image to promote global agency, critical thinking, empathy and help avoid or reduce conflict. The analysis of such symbol can lead participants from cognitive to experiential learning by reflecting on what’s underneath the visible part of the iceberg. The humanization of the other and the use of strategies that stem from that humanization process are the ultimate learning goals of this resource.
If your educational work aims to transform violence and promote peace, I think my adaptation to the “Case Study Activity”, the “Case Study Iceberg” will fit perfectly with you and your students.
Scenarios
When creating the scenarios think of current realities and themes that affect the youth you work with, for instance: bullying, ethnic identity, sense of belonging, gender. Examples of the scenarios can be:
In a Snapchat school group, someone posts: “Why are people like you in this group? Go back to your country!
On a viral Tik-Tok video a famous influencer showed a group of high school students wearing their religious/cultural garments on a science fair and they claim that “we are in a western and modern society; they should be dressed as normal people”.
On a YouTube video that shows female students in a debate panel about woman’s rights, somebody comments that “woman need to stop thinking they are better than men”.
How much time would it require to use this resource?
60-90 minutes, depending on the number of participants.
Materials
Printed images, markers, flipcharts, projectors, slides, different color sticky notes (whichever is accessible for you).
How to use it
Introduce the hate speech definition by showing the iceberg image and the strategies as well.
Place several iceberg images (they can be printed or drawn) in different spots of the room.
Show them 3 hate speech scenarios and assign one to the different groups of participants, which will be divided into targets, community members and bystanders.
Ask them to identify what is visible (words, images/memes, actions) and what might be underneath (feelings, needs, history, experiences, insecurities.) Prompt questions to help students analyze beyond what is obvious, such as: why do you think they are saying that? Are they trying to protect something? These questions will depend on the scenarios given.
Ask them to write their answers on sticky notes they will place on the iceberg image.
Invert the iceberg image (you can use a separate iceberg image) and display the list of strategies to re(act) to hate speech (printed or in a projection).
Invite them to think about what would be visible if the needs were met in a positive, healthy way or if the perception of them being unmet changed positively?
Ask them again to write their answers down on (different color) sticky notes and place them on the inverted icebergs.
Now invite them to think, from their role or position, (targets, community members and bystanders). Ask them to answer on the strategies they would apply to deal with the hate speech.
Invite them to share their ideas with the whole group.
Debrief questions. You can use some of the questions included in the Toolkit such as: How did you feel during the activity? Which scenarios did you find most difficult to respond to and why? Has the activity made you look at hate speech in a different way?
Additions
I would even be more ambitious and add a lesson on Nonviolent Communication (See pages 41-42 from the Toolkit), along with the hate speech and strategies theoretical framework, to inspire students to think of more developed strategies to re(act) to hate speech.
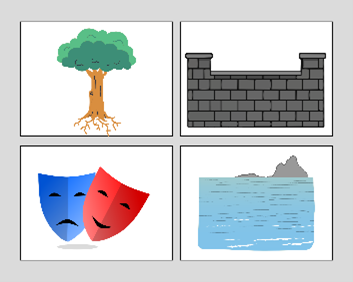
If the symbol of the iceberg doesn’t resonate or it is not too familiar to the participants, you can use other images (as long as they represent an object with visible and not visible sides). Examples: a tree, a wall, a mask or the ocean.
Trauma Sensitivity and Emotional Safety
Be trauma sensitive and consider emotional safety when you think of the scenarios and while running this activity. There is a risk of triggering emotions and hurtful lived experiences. Educators should be aware that many young people have experienced bullying, discrimination, xenophobia, misogyny, or online harassment, and even a fictional scenario can echo something deeply personal. To reduce this risk, you can:
Allow the participants to step out of the room, pass, or engage in their own way.
Avoid showing the scenarios with images and creating very specific scenarios.
Remind them they do not need to share personal or familiar experiences; there is no need to share stories if they do not want to or are nor ready for it.
Who is this resource helpful for?
This resource can be very helpful for teachers in school settings, counselors, educators in non-formal educational settings. It can be adapted to any sociocultural context. I would even say it can work with young adults, but it is specially designed for young people from 15-25 years old.
Knowledge, skills, or attitudes developed with this resource
Knowledge: about hate speech, repressive narrative, multiple ways (strategies) to deal with hate speech, nonviolent communication.
Skills: conflict analysis, critical thinking, understanding of different perspectives, nonviolent communication, responding to harm in a healthy way, humanization.
Attitudes: recognition of positive and constructive approaches to conflict, empathy, curiosity, sense of agency.
The resource’s effectiveness for building peace in an educational setting
I believe the “Case Study Iceberg” activity can be effective for building peace in an educational setting. The adaptation I have made deepens the humanization component and therefore goes beyond understanding to promote empathy and critical thinking. This resource also provides tools that can be used in real life situations to re(act) nonviolently to hate speech, which teaches them the ability to create counter narratives and address harm in a positive way, even when they are not the direct targets.
Pedagogies you can use to strength the use of this resource
Transformative Pedagogy, which would encourage youth to “critically examine their contexts, beliefs, values, knowledge and attitudes with the goal of developing spaces for self-reflection, appreciation of diversity and critical thinking”[1]
At the end of the activity, you’d be asking the participants how they felt while dong it, they just don’t think and discuss. This is Experiential Learning.
Critical Feminist Pedagogy can also strength the use of this resource. Think about feminist curiosity, which allows us to position ourselves where the other stands and find what’s behind what we can see.
Types of Peace Education that are most supported by this resource
Comments
Please leave any comments about how useful you think this resource is for peace education. Would you use it? What adaptations or suggestions would you make? Do you have any other particular comments about it?
Audience
I think this resource can be useful for many stakeholders, but I would like to invite two people who can benefit a lot from it (and from the Peace Learners website), considering the type of work they do. These people are:
Isabella Cuevas: She is a student at the Carter School for Peace and Conflict Resolution who is about to graduate. She works as a facilitator with young people living in vulnerable conditions, and she is a member of Legacy International Second Story.
Daniel Ortiz: He is a Rover Scouter from a Scout group of Salvador. He works with young people from 18 to 25 years old, on the creation of projects oriented to impact the community and the Scout’s clan promoting dialogue, respect, empathy, tolerance, healthy interpersonal relationships, and global agency to foster conflict resolution and acts of service.
Content: This resource is a TED talk titled “Every kid needs a champion” by Rita Pierson, available on YouTube.
Context: Those who could benefit from this resource include current and future youth educators and facilitators.
Goal: To remind educators that the relationships they build with students not only leave a lasting impact but also encourage students to enjoy learning. Students who have positive relationships with teachers are more likely to be better problem solvers and more resilient (Rimm-Kaufman, 2025) which are traits that increase conflict competency.
Suggested Implementation: This video could be implemented in a mid-year training of middle school educators. I suggest that Brené Brown’s “Empathy vs. Sympathy” animated short video on YouTube can be used as a supplemental material in the following lesson plan:
Materials:
Computer and projector or screen that YouTube can be displayed on
Whiteboard/flipchart/blackboard/screen that can be written on and kept up throughout session
Notebooks or paper and writing utensils for each participant to use for reflection
Time: 65 minutes
(10 minutes) Facilitator: [Introduce yourself, give a chance for participants to introduce themselves either one at a time, if there are less than 15 participants, or to the colleagues they are sitting with, if there are more than 15 students.] Today’s session will be about 45 minutes long and focuses on the conscious relationships we build with our students. I want to start today’s session by showing you all a short TED talk by Rita Pierson. While watching, please write down any quotes that stand out to you. If nothing stands out, you don’t need to write anything down.
(8 mins) Facilitator: display video on screen and have participants watch it together:
(5-7 mins) Facilitator: Instruct participants to turn to a colleague and share a quote they wrote down (if they wrote one), and in 30 seconds explain its importance. Then, ask 3 participants: Does anyone want to share the quote they wrote down? If so, what is it and why did you write it down?
Facilitator: Write any quotes on a whiteboard/flipchart/screen that participants can see through the remainder of the session
(2 mins) Facilitator: I wanted to share this video to remind us all of the basis of education: relationships. The students in our classes can either leave school encouraged to keep learning new things and approaching the world with excitement, or they can walk away with hatred for learning and distrust for the education system. We make that difference.
(2 mins) Facilitator: Remind participants of the importance of empathy as an educator by stating: “Rita Pierson reminds us that connection is part of being an educator. But connection requires empathy. Let’s think about times when our classrooms/students/workshops/etc. could benefit from consciously showing empathy.”
(8 mins) Facilitator:Ask participants to turn to the same colleague and think of a student they have struggled to connect with this year. Why do you haven’t been able to connect? What behaviors and emotions have blocked this connection? How might your actions have prohibited you from connecting with that student? (Participants should use pseudonyms for students)
Inform participants when they have 4 minutes left and should swap who is sharing. If someone cannot find a partner, ask “Whoever doesn’t have a partner put your hand in the air” and if there is an odd number of participants, make one group of three.
It may be beneficial to write the above questions on the whiteboard/flipchart/screen so that participants can easily refer to them.
(30 sec) Facilitator: “Thank you for sharing, everyone! Now, let’s remind ourselves of what empathy means in this animated short video explanation from Brené Brown.”
(3 mins) Facilitator: play Brené Brown’s “Empathy vs. Sympathy” animated short on YouTube:
(5 mins) Facilitator: lead group discussion using the following question:
According to your experiences, what is the difference between empathy and sympathy? (This question aims to bring participants into their own experiences and think about situations where someone showed them sympathy rather than empathy and how that made them feel.)
(5 mins) Facilitator: lead independent reflection on the following questions: (Participants should write their answers in their notebooks/on a piece of paper.)
Which response (sympathy or empathy) do you find yourself defaulting to with struggling students, and why?
What might it look like to respond with empathy to the student you thought of earlier in this session?
(2 mins) Facilitator: I want to highlight tips that other educators have provided for fostering positive relationships with students: (Provide participants with the link to this website to learn more: https://www.apa.org/education-career/k12/relationships )
“Show your pleasure and enjoyment of students.
Interact with students in a responsive and respectful manner.
Offer students help (e.g., answering questions in timely manner, offering support that matches students’ needs) in achieving academic and social objectives.
Help students reflect on their thinking and learning skills.
Know and demonstrate knowledge about individual students’ backgrounds, interests, emotional strengths and academic levels.
Avoid showing irritability or aggravation toward students.
Acknowledge the importance of peers in schools by encouraging students to be caring and respectful to one another.” (Rimm-Kaufman, 2025)
(7 mins) Facilitator: Now, think back to the student you had in mind at the start of this training. I want you all to brainstorm one concrete action you will take this week to support that student’s learning and show you believe in them. After you think of your action, talk with the same colleague from the start of this session and ask them to give you constructive criticism.
(5 mins) Facilitator: Now, as a closing activity, turn to the colleague you have been speaking to throughout this class, exchange emails, and set a calendar reminder in three weeks to send a reflection email on how implementing the action you brainstormed in this session has been going in your classroom. Title this reflection email as “I tried it…” and hold each other accountable for sending those reflections!
(2 mins) Facilitator closing remarks: Building peace starts in the classroom. Research has repeatedly shown that student-teacher relationships have a lasting impact (Rimm-Kaufman, 2025) which means that fostering a positive and supportive relationship with students is the foundation of forming the next generation of learners and leaders. As educators, we need to focus on the relationships we are building with students and be proactive in the atmospheres we foster in our classrooms. Remember, “teaching and learning should bring joy” (Rita Pierson).
Audience: I have shared this resource with a friend of mine who is a TA and a director of an organization I volunteer for that does ESL lessons for refugees. I hope this will be useful for them!
The following content and activity were inspired by the book Your Brain on Art: How the Arts Transform Us, written by Ivy Ross and Susan Magsamen. You can access the book for purchase here or visit their website here.
Content: Please watch the video above to see the primary synopsis of this book as well as how educators can work to activate its lessons in their own curriculum. In addition to the concepts presented in this video is the Aesthetic Mindset. The Aesthetic Mindset is the way in which a person is aware of the arts and aesthetics around them and the level of purposefulness to which they apply these ideas in their lives. It analyzes aesthetic responsiveness in a person. The purpose of this analysis is to draw attention to areas that people may not be fully activating their senses in the arts and aesthetics, allowing them to seek out ways that they can purposefully seek more creative opportunities in the world. For non-art educators, especially, an appreciation and recognition of the arts is important in curriculum development because it allows for creative learning development which leads to students being more dedicated to the learning process.
I discovered this book after speaking with a children’s educational development professional who works on developing media for youth. Her aim is to ensure that kids see themselves as learners who love to learn, and she recommended the book to me as I am interested in youth curriculum development. My focus in particular is on arts-based learning, and this book illuminated many helpful concepts to me that I plan on exploring further. Within the realm of building peace in an educational setting, I believe that the use of arts in peacebuilding practices is essential, as it offers creative solutions to problems. Especially for youth, arts-based approaches can offer them outlets for their ideas and promote embodied practices.
Context: Use of this book and implementation of its ideas are best suited for non-art teachers who teach high school. As stated in the book, “artistic expression and the creative process enhance cognitive abilities, foster greater self-awareness, and help teens regulate their emotions.” Teachers who teach in high school are able to develop new ways of thinking for teenagers that can assist in their social and professional development as well as help activate their students’ senses before they leave the education system. While the ideas presented in the book can, and often should, be implemented at the community level, for the sake of the activities presented below, an educational setting is more appropriate. That being said, for educators who engage in after school programming or sports, these opportunities can be implemented in these contexts as well.
Ways to Use This Resource: Summary: For non-art educators, I recommend reading this book and applying some of its key education-related content to your lesson plans. To start, take the aesthetic mindset index quiz that is outlined below. Once you have an understanding of the level of arts and aesthetics appreciation you currently have, look at the following three lesson plan suggestions based on your results. Each plan will have a series of recommendations and examples of ways to improve your curriculum to activate both your arts appreciation and your students. Challenge yourself to spend 30-45 minutes looking at your current curriculum and finding ways to integrate some of these elements into your lessons.
Time: Aesthetic Mindset Index Quiz – 5 minutes Current Curriculum Overview and Changes – 30 – 45 minutes
Materials: – Aesthetic Mindset Index – Computer – Past or current curriculum – Pen and notepad – A quiet space to contemplate and reflectively think
Learning Objectives: – To understand your current arts and aesthetics shortcomings and gain recommendations suited to your experience – To better connect with and understand the application of the arts in non-art courses – To develop content and curriculum revisions that will support your students
Activity Overview: Aesthetic Mindset Index Activity (5 minutes) To complete the quiz online, click here. Below is a modified transcription of the quiz. Feel free to print out the table below and fill it in physically or copy it to your computer to complete digitally. Getting a higher or lower number does not make you inherently good or bad, but rather signals areas of strength and growth.
Access the downloadable and printable table here to fill out for the activity. This will allow you to answer the questions as well as score yourself. Once scored, refer to the curriculum overview and changes for suggestions.
Current Curriculum Overview and Changes (30 – 45 minutes):
For educators who have an Aesthetic Appreciation score that is 3 or lower: A lower aesthetic appreciation score indicates that a person may not be as aware or responsive to the impact of aesthetics in their environment. In the current world we live in where everything is fast paced, it can be difficult to slow down and be intentional in recognizing the beauty in moments or places. Developing a stronger aesthetic appreciation helps strengthen these skills and promotes critical thinking and emotional intelligence in students.
Recommendations to adjust the curriculum to address aesthetic appreciation include the following: – Environmental Education: Implementing elements within the curriculum that force students to slow down and experience the beauty of their lived environments. Examples include nature studies or sustainability lessons. – Cultural Exposure: Increasing cultural awareness and exposure to different traditions will widen students’ understanding of what constitutes beauty and art. Examples include World Culture Days. – Mindfulness Exercises: Promoting mind-body awareness in students will allow them to engage more of their senses and focus on the details that surround them. Examples include grounding exercises at the start of class and breathing exercises integrated into more stressful lessons.
For educators who have an Intense Aesthetic Experience score that is 3 or lower: A lower intensity aesthetic experience score shows that a person responds to aesthetic experiences on a less powerful scale. As a result, they may not reap the full benefits that the aesthetics offer within the field of education. As it stands, aesthetics are important to promote innovation and emotional well-being alongside personal development. They do so by stimulating the imagination, evoking emotions, and refining perceptions of others. Aesthetic responses are learned reactions that align with societal and cultural beliefs. As a result, teaching aesthetics and increasing students’ aesthetic reactions allow for critical reflection and meaning-making to occur in the classroom. Once students gain familiarity with pulling meaning from sources of aesthetics, they are able to translate these skills into other subjects.
Within the scope of education, developing an intense aesthetic experience can manifest in the following ways: – Rethinking Examinations: Instead of focusing on timed exams, integrate oral and participatory projects into your curriculum. Examples include oral presentations, case studies, and peer assessments of homework. – Apply Gamification: Several educational platforms have taken on elements of online gaming to incentivize homework and additional work toward students. Examples include Kahoot! and Duolingo.
For educators who have a Creative Behavior score that is 3 or lower: The lower creative behavior score displays a lack of art-making on the educator’s end. However, I would like to propose that the very act of curriculum development is considered an art. A way to further activate this process and integrate art-making and creativity into the curriculum can be achieved in a myriad of ways. When creative behaviors are added to lesson plans, students can delve deeper into their interests and gain insights into their readiness and learning profile.
Ways that educators can implement creativity in the curriculum are the following: – Doing Differentiated Instruction: This approach means that the educator uses multiple approaches to learning that individually fit with students to support them best. This can extend to both the content and the process of learning. Examples include using embodied movements to explain scientific or mathematical concepts. – Emphasize the Process, Not the Product: In lessons that have clear academic achievement benchmarks that you have to hit, ensure that your students engage deeply in the process of learning rather than attempting to only do well during the end examination. Examples of implementing this include having students lead lessons for the day or teach their concepts to other students.
Goal: The goal of this resource is to expand educators’ understanding of the importance of adding the arts to their curriculum, as well as help them gain clarity on their personal shortcomings in art appreciation. Opening up the possibility to edit curriculum to match the recommendations above offers ways for educators to broaden their lesson plans to embrace the arts despite not belonging to an arts field. Within the realm of peace education, implementing these approaches to curricula opens up strategic arts-based peacebuilding techniques, such as familiarizing youth with embodied practices that allow them to reclaim their body and become more grounded in their perspectives (Shank and Schirch, 2008). In addition, the arts in curricula help transform worldviews and offer alternative approaches to resolving issues.
Audience: The contents of this post will be sent to the aforementioned educational development specialist as well as a curriculum developer.
References: Shank, M. and Schirch, L. (2008), Strategic Arts-Based Peacebuilding. Peace & Change, 33: 217-242. https://doi.org/10.1111/j.1468-0130.2008.00490.x Laura D’Olimpio, Aesthetica and eudaimonia: Education for flourishing must include the arts, Journal of Philosophy of Education, Volume 56, Issue 2, April 2022, Pages 238–250, https://doi.org/10.1111/1467-9752.12661