Case Study Iceberg

By: Kathia López


Hello, Peace Learners!

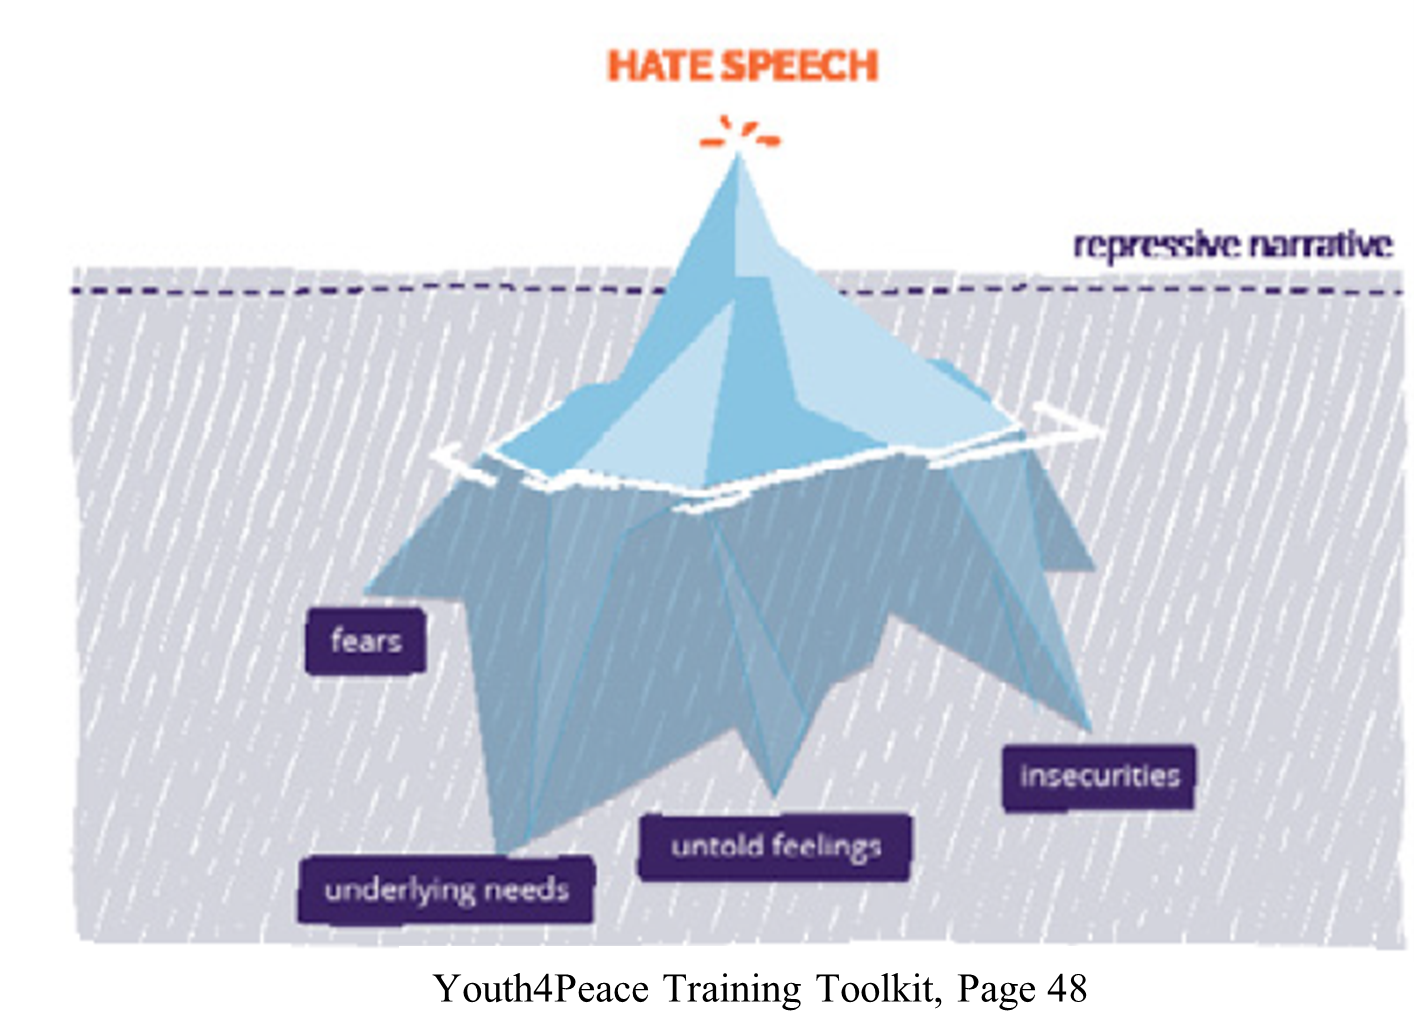
I would like to share this educational resource you can use when teaching youth about narratives and hate speech. It is called the “Case Study Iceberg”.

Relevance of this Resource

We are living in particular violent times and unfortunately, narratives against certain social, cultural and ethnic groups are being spread out, increasing the spiral of violence. The internet and social media are serving now as an amplifier of the repressive narratives behind hate speeches, and the freedom of expression is being used to justify them. We are witnessing an increase in gender backlash, a surge in antiimmigrant sentiment and more frequent attacks in the name of religion and national security. These trends are intensified by rising online polarization and disinformation, which make harmful narratives travel, unfiltered.

This affects youth in an exceptional way, since they are more avid users of these online platforms, where they can feel shielded and entitled to attack, threat, dehumanize others, and even call for violent acts to be committed. Conversely, the youth who aren’t involved in such acts are also highly exposed to such content and so is their sense of identity, belonging, safety, their self-esteem and their mental health.

Considering this current context, I have come up with the “Case Study Iceberg”, an educational resource based on the “Case Study Activity” and other tools and ideas included in the Youth4Peace Training Toolkit, created by the United Network of Young Peacebuilders (UNOY). In other words, “Case Study Iceberg” is my adaptation of the “Case Study Activity”.

The Youth4Peace Training Toolkit helps beginners and intermediate educators introduce peace and conflict concepts to young people in non-formal settings (I highly encourage you to take a look at it, by clicking on the hyperlink above, since it is a practical and comprehensive peace education resource).

One of their lessons is about “Strategies to (re) act to hate speech narratives” and its purpose is to explain the definition of hate speech as a form of violence and learn the multiple ways youth can deal with it. To explain this, they use the symbolism of the iceberg. The list of strategies to deal with or manage hate speech are: Avoid, Draw a line, Report, Refute, Alternative (transformation) and, Dialogue Transformation (See page 39 of the Toolkit).

About my adaptation

I think the “Case Study Activity” can be very useful if educators just want to convey theory about narrative and tools to respond to forms of harm such as hate speeches. But it is possible to bring a more transformative approach to it by using the iceberg image to promote global agency, critical thinking, empathy and help avoid or reduce conflict. The analysis of such symbol can lead participants from cognitive to experiential learning by reflecting on what’s underneath the visible part of the iceberg. The humanization of the other and the use of strategies that stem from that humanization process are the ultimate learning goals of this resource.

If your educational work aims to transform violence and promote peace, I think my adaptation to the “Case Study Activity”, the “Case Study Iceberg” will fit perfectly with you and your students.

Scenarios

When creating the scenarios think of current realities and themes that affect the youth you work with, for instance: bullying, ethnic identity, sense of belonging, gender. Examples of the scenarios can be:

  1. In a Snapchat school group, someone posts: “Why are people like you in this group? Go back to your country!
  2. On a viral Tik-Tok video a famous influencer showed a group of high school students wearing their religious/cultural garments on a science fair and they claim that “we are in a western and modern society; they should be dressed as normal people”.
  3. On a YouTube video that shows female students in a debate panel about woman’s rights, somebody comments that “woman need to stop thinking they are better than men”.

How much time would it require to use this resource?

60-90 minutes, depending on the number of participants.

Materials

Printed images, markers, flipcharts, projectors, slides, different color sticky notes (whichever is accessible for you).

How to use it

  1. Introduce the hate speech definition by showing the iceberg image and the strategies as well.  
  2. Place several iceberg images (they can be printed or drawn) in different spots of the room.
  3. Show them 3 hate speech scenarios and assign one to the different groups of participants, which will be divided into targets, community members and bystanders.
  4. Ask them to identify what is visible (words, images/memes, actions) and what might be underneath (feelings, needs, history, experiences, insecurities.) Prompt questions to help students analyze beyond what is obvious, such as: why do you think they are saying that? Are they trying to protect something? These questions will depend on the scenarios given.
  5. Ask them to write their answers on sticky notes they will place on the iceberg image.
  6. Invert the iceberg image (you can use a separate iceberg image) and display the list of strategies to re(act) to hate speech (printed or in a projection).
  7. Invite them to think about what would be visible if the needs were met in a positive, healthy way or if the perception of them being unmet changed positively?
  8. Ask them again to write their answers down on (different color) sticky notes and place them on the inverted icebergs.
  9. Now invite them to think, from their role or position, (targets, community members and bystanders). Ask them to answer on the strategies they would apply to deal with the hate speech.
  10. Invite them to share their ideas with the whole group.
  11. Debrief questions. You can use some of the questions included in the Toolkit such as: How did you feel during the activity? Which scenarios did you find most difficult to respond to and why? Has the activity made you look at hate speech in a different way?

Additions

I would even be more ambitious and add a lesson on Nonviolent Communication (See pages 41-42 from the Toolkit), along with the hate speech and strategies theoretical framework, to inspire students to think of more developed strategies to re(act) to hate speech.

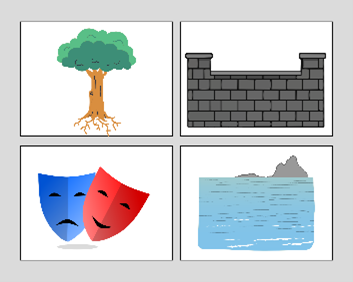
If the symbol of the iceberg doesn’t resonate or it is not too familiar to the participants, you can use other images (as long as they represent an object with visible and not visible sides). Examples: a tree, a wall, a mask or the ocean.

Trauma Sensitivity and Emotional Safety

Be trauma sensitive and consider emotional safety when you think of the scenarios and while running this activity. There is a risk of triggering emotions and hurtful lived experiences. Educators should be aware that many young people have experienced bullying, discrimination, xenophobia, misogyny, or online harassment, and even a fictional scenario can echo something deeply personal. To reduce this risk, you can:

  • Allow the participants to step out of the room, pass, or engage in their own way.
  • Avoid showing the scenarios with images and creating very specific scenarios.
  • Remind them they do not need to share personal or familiar experiences; there is no need to share stories if they do not want to or are nor ready for it.

Who is this resource helpful for?

This resource can be very helpful for teachers in school settings, counselors, educators in non-formal educational settings. It can be adapted to any sociocultural context. I would even say it can work with young adults, but it is specially designed for young people from 15-25 years old.

Knowledge, skills, or attitudes developed with this resource

  • Knowledge: about hate speech, repressive narrative, multiple ways (strategies) to deal with hate speech, nonviolent communication.
  • Skills: conflict analysis, critical thinking, understanding of different perspectives, nonviolent communication, responding to harm in a healthy way, humanization.
  • Attitudes: recognition of positive and constructive approaches to conflict, empathy, curiosity, sense of agency.

The resource’s effectiveness for building peace in an educational setting

I believe the “Case Study Iceberg” activity can be effective for building peace in an educational setting. The adaptation I have made deepens the humanization component and therefore goes beyond understanding to promote empathy and critical thinking. This resource also provides tools that can be used in real life situations to re(act) nonviolently to hate speech, which teaches them the ability to create counter narratives and address harm in a positive way, even when they are not the direct targets.

Pedagogies you can use to strength the use of this resource

  • Transformative Pedagogy, which would encourage youth to “critically examine their contexts, beliefs, values, knowledge and attitudes with the goal of developing spaces for self-reflection, appreciation of diversity and critical thinking”[1]
  • At the end of the activity, you’d be asking the participants how they felt while dong it, they just don’t think and discuss. This is Experiential Learning.
  • Critical Feminist Pedagogy can also strength the use of this resource. Think about feminist curiosity, which allows us to position ourselves where the other stands and find what’s behind what we can see.

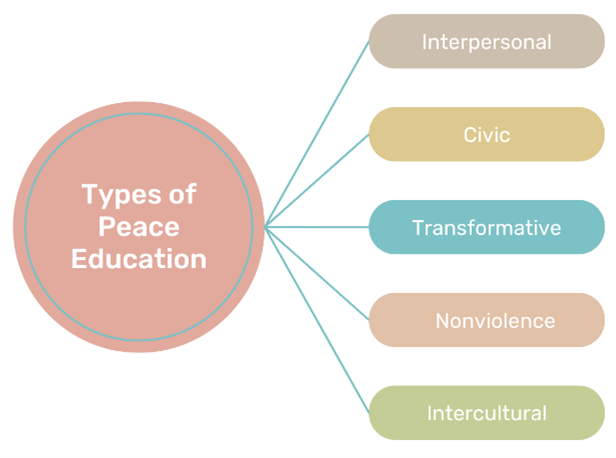
Types of Peace Education that are most supported by this resource

Comments

Please leave any comments about how useful you think this resource is for peace education. Would you use it? What adaptations or suggestions would you make? Do you have any other particular comments about it?

Audience

I think this resource can be useful for many stakeholders, but I would like to invite two people who can benefit a lot from it (and from the Peace Learners website), considering the type of work they do. These people are:

  1. Isabella Cuevas: She is a student at the Carter School for Peace and Conflict Resolution who is about to graduate. She works as a facilitator with young people living in vulnerable conditions, and she is a member of Legacy International Second Story.
  2. Daniel Ortiz: He is a Rover Scouter from a Scout group of Salvador. He works with young people from 18 to 25 years old, on the creation of projects oriented to impact the community and the Scout’s clan promoting dialogue, respect, empathy, tolerance, healthy interpersonal relationships, and global agency to foster conflict resolution and acts of service.

I hope this resource is useful for you!!!


[1] You can learn more about Transformative Pedagogy by reading the “Transformative Pedagogy for Peace-Building: A Guide for Teachers” created by the UNESCO and the International Institute of Capacity Building in Africa. Transformative pedagogy for peace-building: a guide for teachers – UNESCO Digital Library

Teaching and Learning Should Bring Joy

By Lina Bondesson

Content: This resource is a TED talk titled “Every kid needs a champion” by Rita Pierson, available on YouTube. 

Context: Those who could benefit from this resource include current and future youth educators and facilitators. 

Goal: To remind educators that the relationships they build with students not only leave a lasting impact but also encourage students to enjoy learning. Students who have positive relationships with teachers are more likely to be better problem solvers and more resilient (Rimm-Kaufman, 2025) which are traits that increase conflict competency. 


Suggested Implementation: This video could be implemented in a mid-year training of middle school educators. I suggest that Brené Brown’s “Empathy vs. Sympathy” animated short video on YouTube can be used as a supplemental material in the following lesson plan: 

Materials:  

  • Computer and projector or screen that YouTube can be displayed on 
  • Whiteboard/flipchart/blackboard/screen that can be written on and kept up throughout session 
  • Notebooks or paper and writing utensils for each participant to use for reflection 

Time: 65 minutes 

(10 minutes) Facilitator: [Introduce yourself, give a chance for participants to introduce themselves either one at a time, if there are less than 15 participants, or to the colleagues they are sitting with, if there are more than 15 students.] Today’s session will be about 45 minutes long and focuses on the conscious relationships we build with our students. I want to start today’s session by showing you all a short TED talk by Rita Pierson. While watching, please write down any quotes that stand out to you. If nothing stands out, you don’t need to write anything down. 

(8 mins) Facilitator: display video on screen and have participants watch it together:

(5-7 mins) Facilitator: Instruct participants to turn to a colleague and share a quote they wrote down (if they wrote one), and in 30 seconds explain its importance. Then, ask 3 participants: Does anyone want to share the quote they wrote down? If so, what is it and why did you write it down?  

  • Facilitator: Write any quotes on a whiteboard/flipchart/screen that participants can see through the remainder of the session 

(2 mins) Facilitator: I wanted to share this video to remind us all of the basis of education: relationships. The students in our classes can either leave school encouraged to keep learning new things and approaching the world with excitement, or they can walk away with hatred for learning and distrust for the education system. We make that difference. 

(2 mins) Facilitator: Remind participants of the importance of empathy as an educator by stating: “Rita Pierson reminds us that connection is part of being an educator. But connection requires empathy. Let’s think about times when our classrooms/students/workshops/etc. could benefit from consciously showing empathy.” 

(8 mins) Facilitator: Ask participants to turn to the same colleague and think of a student they have struggled to connect with this year. Why do you haven’t been able to connect? What behaviors and emotions have blocked this connection? How might your actions have prohibited you from connecting with that student? (Participants should use pseudonyms for students) 

  • Inform participants when they have 4 minutes left and should swap who is sharing. If someone cannot find a partner, ask “Whoever doesn’t have a partner put your hand in the air” and if there is an odd number of participants, make one group of three. 
  • It may be beneficial to write the above questions on the whiteboard/flipchart/screen so that participants can easily refer to them. 

(30 sec) Facilitator: “Thank you for sharing, everyone! Now, let’s remind ourselves of what empathy means in this animated short video explanation from Brené Brown.” 

(3 mins) Facilitatorplay Brené Brown’s “Empathy vs. Sympathy” animated short on YouTube:

(5 mins) Facilitator: lead group discussion using the following question: 

  • According to your experiences, what is the difference between empathy and sympathy? (This question aims to bring participants into their own experiences and think about situations where someone showed them sympathy rather than empathy and how that made them feel.) 

(5 mins) Facilitator: lead independent reflection on the following questions: (Participants should write their answers in their notebooks/on a piece of paper.) 

  • Which response (sympathy or empathy) do you find yourself defaulting to with struggling students, and why? 
  • What might it look like to respond with empathy to the student you thought of earlier in this session? 

(2 mins) FacilitatorI want to highlight tips that other educators have provided for fostering positive relationships with students: (Provide participants with the link to this website to learn more: https://www.apa.org/education-career/k12/relationships )

  • “Show your pleasure and enjoyment of students. 
  • Interact with students in a responsive and respectful manner. 
  • Offer students help (e.g., answering questions in timely manner, offering support that matches students’ needs) in achieving academic and social objectives. 
  • Help students reflect on their thinking and learning skills. 
  • Know and demonstrate knowledge about individual students’ backgrounds, interests, emotional strengths and academic levels. 
  • Avoid showing irritability or aggravation toward students. 
  • Acknowledge the importance of peers in schools by encouraging students to be caring and respectful to one another.” (Rimm-Kaufman, 2025) 

(7 mins) FacilitatorNow, think back to the student you had in mind at the start of this training. I want you all to brainstorm one concrete action you will take this week to support that student’s learning and show you believe in them. After you think of your action, talk with the same colleague from the start of this session and ask them to give you constructive criticism. 

(5 mins) FacilitatorNow, as a closing activity, turn to the colleague you have been speaking to throughout this class, exchange emails, and set a calendar reminder in three weeks to send a reflection email on how implementing the action you brainstormed in this session has been going in your classroom. Title this reflection email as “I tried it…” and hold each other accountable for sending those reflections! 

(2 mins) Facilitator closing remarks: Building peace starts in the classroom. Research has repeatedly shown that student-teacher relationships have a lasting impact (Rimm-Kaufman, 2025) which means that fostering a positive and supportive relationship with students is the foundation of forming the next generation of learners and leaders. As educators, we need to focus on the relationships we are building with students and be proactive in the atmospheres we foster in our classrooms. Remember, “teaching and learning should bring joy” (Rita Pierson). 

Suggested Implementation Plan Resources

Pierson, R. (2013, May 3). Every Kid Needs a Champion. YouTube. https://youtu.be/SFnMTHhKdkw?si=rtgsv0riux9m2Bm1
Brown, B. (2016, April 1). Brené Brown on Empathy vs Sympathy. YouTube. https://www.youtube.com/watch?v=KZBTYViDPlQRimm-Kaufman, S. (2025, March 5). Improving students’ relationships with teachers. American Psychological Association. https://www.apa.org/education-career/k12/relationships 

Audience: I have shared this resource with a friend of mine who is a TA and a director of an organization I volunteer for that does ESL lessons for refugees. I hope this will be useful for them!

What Can You Learn by Asking?

A Lesson/Facilitation Plan for Practicing Open-Ended Questions

This lesson/facilitation plan is an adaptation of “Open Questions – Role Play,” an exercise by William Chadwick that is available for free via https://www.sessionlab.com/methods/open-questions-role-play.

Learning Objectives

  • Learn about open-ended questions and the difference between open-ended questions and close-ended/leading questions
  • Develop confidence with asking open-ended questions
  • Practice listening to understand and respond
  • Consider the value of open-ended questions in conflict resolution facilitation

Context

This lesson/facilitation plan is appropriate for formal and informal settings, from middle- and high-school peer mediation workshops/clubs/classes to college and graduate courses to adult workplaces or community groups. It may be useful in any group setting in which instructors/facilitators are seeking to help participants learn to ask better questions, listen more closely to others, and/or prepare to serve as facilitators or mediators of some kind. As described below, this activity will work best when there are at least two instructors/facilitators. A single instructor/facilitator may modify the activity if needed, and there are suggestions below for that modification.

Materials

  • Paper/notecard and writing utensil for each participant
  • Timer
  • Optional:
    • Slides, poster, and/or handout with information about open-ended questions
    • Slides, poster, and/or handout with a list of potential fun facts for participants to choose from and instructions for the activity
    • Slides, poster, and/or handout with a written example of the activity (such as the one supplied below)

Time

Expect to spend at least 30 to 45 minutes on this activity, depending on the size of the group.

Room Set-Up

Place (or ask the participants to help place) 6 to 12 chairs (with or without desks/tables) in a semicircle, all facing towards the inside. Place one chair (with or without a desk/table) in front of the opening of the semicircle and make sure that it is facing the semicircle. If the class/group is too large to fit in the semicircle, have other chairs outside of the semicircle and explain that everyone will get a turn in the semicircle.

Background and Preparation

Invite the participants (or the first group of participants) to sit in the semicircle.

If there are people who do not fit in the semicircle, explain that those who are not in the semicircle are responsible for observing the action in the semicircle.

Tell the group that they will be practicing the facilitation tool of asking open-ended questions, which is a really important skill when you are trying to understand someone else’s experiences and perspective.

Explain that open-ended questions are questions that do not have yes-or-no answers and that are not leading or loaded. They often begin with “who,” “what,” “when,” “where,” “why,” or “how.” Using “why” can be tricky because the other person may see the question as judgmental, but “why” questions can also be valuable, when asked in the right situation and with the right tone.

Share examples of open-ended questions and close-ended/leading questions and discuss the difference and the value of open-ended questions. One example pair of questions is “How did that make you feel?” (open-ended) vs. “Were you scared?” (close-ended/leading).

Ask the group for their thoughts on the value of open-ended questions.

The Activity

The following lesson/facilitation plan refers to the co-teacher/assistant/co-facilitator as “Ms. Terry.” The name “Ms. Terry” is just a placeholder for personalization and ease of reference in this lesson/facilitation plan. If you have a co-teacher/assistant/co-facilitator, replace “Ms. Terry” and her pronouns with your co-teacher/assistant/co-facilitator’s name and pronouns throughout the instructions. If you are leading this activity without a co-teacher/assistant/co-facilitator, replace “Ms. Terry” and her pronouns with “a/the volunteer” (or something similar) and explain that the volunteer will change with each round.

The following script explains the activity. Feel free to personalize it and modify it as you see fit.

Ms. Terry will leave the room shortly and, while Ms. Terry is outside, the class/group will collectively decide on one fact that they would like to know about her.

I will provide you with a list of fun fact questions to choose from, and I hope to achieve a quick consensus or do a little vote (if needed). Remember that there will be multiple rounds, so there will be a chance to use several different questions.

  • Note to the instructor/facilitator: See the next section for some fun fact question ideas.

Once the class has decided on a fun fact, Ms. Terry will return and sit in the chair in front of the semicircle. She will start off the activity by making a random statement. She might share something she did earlier in the day, something she recently saw, or some other observation.

Next, the first person in the semicircle will ask Ms. Terry an open-ended question based on her initial statement.

Ms. Terry will answer the question, and then the next person will ask a new open-ended question based on Ms. Terry’s answer to the previous question.

This question-and-answer session will continue until the group is able to steer the conversation to the point at which someone is able to ask the original question of interest or the round reaches the 10-minute mark, whichever comes first. If the round reaches the 10-minute mark without getting to the question of interest, the group will share the question they were trying to get to, and the class/group will start a new round.

There will be no random participation in the semicircle. You will have a turn to ask a question based on the order in which you are sitting. If we make it all the way around the semicircle, we’ll go back to the first person in the semicircle.

If one of you asks Ms. Terry a closed or leading question, I will speak up and ask you to reframe your question so that it is open-ended. I will also step in if someone asks a question that is not based on Ms. Terry’s last statement.

Ms. Terry will leave the room again at the end of each round to give the group the chance to decide on another fun fact question, and then we’ll start a new round.

Notes for the Instructor/Facilitator

If there are observers, you can keep them engaged and provide them with another way to learn by tasking them with raising their hand if they notice that someone in the semicircle has asked a close-ended or leading question or if someone has asked a question that does not relate to the answer Ms. Terry provided for the previous question.

For the list of fun facts, favorites are often popular and can be appropriate for all ages, but you are not limited to posing questions related to favorites. Other questions are also appropriate and interesting. Example questions include the following:

  • What is your favorite animal?
  • What is your favorite candy/food?
  • What is your favorite holiday?
  • What is your favorite color?
  • What is your favorite TV show/book/movie?
  • What is a place you really want to visit?
  • If you could go back in time, which historical era would you choose to visit?
  • What is your biggest (non-serious) fear/superstition/pet peeve?
  • What is the first job you ever wanted/dreamed of as a little kid?
  • Who is a famous person you admire?

If you are leading this activity without a co-teacher/assistant/co-facilitator, you may choose not to provide the group with a list of fun fact questions (instead just having the class/group come up with options themselves) so that the potential volunteers to serve in the Ms. Terry role, who should change with every round, will not see the list of options.

Set a timer for 10 minutes at the beginning of each round and intervene as necessary (as described above) throughout the round.

Once Ms. Terry answers the participants’ original question or a round reaches the 10-minute mark, congratulate all involved and pass out paper and writing utensils so that participants can take a moment to record their thoughts and feelings.

If the class/group was too large to fit into the semicircle, have the participants who asked at least one question in the previous round swap places with observers and start a new round, sending Ms. Terry out of the room again while the participants decide on a new fun fact to learn about her.

If you are leading this activity without a co-teacher/assistant/co-facilitator, you may ask for a new volunteer to take the place of the previous round’s volunteer at this time.

In each round, start from a different place in the semicircle.

It may be helpful to provide the participants with an example, whether by reading aloud and/or by passing around a handout with a written example. One potential example is below. If you share the example below with the participants, it may be helpful to note that a real round may be longer or shorter than this example. Additionally, if you share the example below, feel free to replace Ms. Terry with the name of the person who will take on that role in your activity, or you can use the generic “Volunteer.”

Example

While Ms. Terry is outside the room, the participants decide that they would like to learn Ms. Terry’s favorite holiday. Now, Ms. Terry has returned and the question-and-answer activity begins.

Ms. Terry: Over the weekend, I played in a basketball tournament.

Participant 1: Where did the tournament take place?

Ms. Terry: It was in a community center in Somewhere, about a 30-minute drive away.

Participant 2: How did you get there?

Ms. Terry: My teammate picked me up, and then we picked up another teammate, so there were three of us in the car.

Participant 3: What did the three of you do in the car during the drive?

Ms. Terry: We talked to each other about our weeks, our jobs, our families, and the news. We had a nice time chatting and laughing.

Participant 4: What makes you laugh?

Ms. Terry: Oh, we’ve known each other for several years and we tease each other and joke about different things in our lives and in the news. I think it’s important to be able to laugh at yourself and with your friends.

Participant 5: Who do you like to laugh with the most?

Ms. Terry: I probably like to laugh the most with my family and my best friends. We’re all so comfortable with each other and we know how to really make each other laugh and how to laugh with and at each other and ourselves.

Participant 6: Who is in your family?

Ms. Terry: My family consists of my parents, my brother, my sister, my brother-in-law, my niece, my nephew, and a bunch of cousins and aunts and uncles.

Participant 7: Besides joking and laughing, what do you like to do with your family?

Ms. Terry: We like to cook and play games.

Participant 8: When do you like to cook and play games with your family?

Ms. Terry: We cook and play games pretty much anytime we are together at someone’s home.

Participant 1: When do you gather at someone’s home?

Ms. Terry: My closest family gathers together relatively frequently because we’re pretty close. More people join in for birthdays and holidays and other special occasions.

Participant 2: What is your favorite holiday?

Ms. Terry: My favorite holiday is Thanksgiving. I love how everyone comes and we talk about what we’re grateful for, plus there is a lot of time for cooking and playing games together.

Participant Debrief

After completing at least three rounds, shift to the debrief. Although appropriate debrief questions will vary depending on the age of the participants and the purpose of the activity, there are a few questions, identified below, that will likely be useful to all groups.

Was this easier or harder than you thought it would be?

To break up the activity, it may be helpful to ask participants to place themselves along a spectrum for this question, indicating that participants who thought that the activity was much easier than expected should go to one side of the room, those who thought that it was much harder than expected should go to another, and those who felt that it was about what they expected or somewhere else in the middle should place themselves in the room according to their experience. Then, you may choose to ask some people to explain why they chose to stand in the particular spot they picked.

After completing the activity and participating in the debrief up to this point, what do you think is the value of using open-ended questions when conflicts arise? How might you use open-ended questions to deal with rumors? How might you use open-ended questions when a group of people is trying to work together for the first time?

When you asked your questions, you were trying to steer Ms. Terry in a certain direction. Do you think this sort of questioning is okay in a real facilitation situation? If so, when and how would you decide to do this?

Additional Resources

For more information about open-ended questions, take a look at any of the following articles (presented in alphabetical order, not in order of preference).

Perspective-Taking

Introduction for Educators

An old and well-known parable tells the story of a group of blind men and an elephant. Originating in the Indian subcontinent, many versions have evolved over time, but each telling carries the same core element:

A group of blind men encounters an unfamiliar animal – something they are told is called an elephant. Curious about the creature but unable to see its form, they resolve to learn what it is by touch. Reaching out, each man felt a different part of the animal. The first man’s hand fell on the trunk – he proclaimed that the animal must be like a thick snake. The second man’s hand reached out toward a leg, arguing instead that the elephant must be like a pillar – a tree. Another, feeling the wing-like shape of the ear, quibbled that the elephant must be like a bat, to the disagreement of the man touching the tail, who stated the elephant was rope-like. So on and so forth, each man stepped forward, felt another part of the animal, and declared its nature. Lacking knowledge of the whole picture, however, none truly knew the elephant.

The moral of the story is to problematize the truth each man arrives at with their limited perception. While their subjective experiences may be real for them, that does not constitute an objective truth of the elephant itself. To bring the story into focus with the concept of perspective-taking, in some versions, the blind men gather together to share their experiences to create a greater picture of the elephant as a whole, arriving at a shared truth. By understanding what the other participants were doing and their rationale behind it allowed them to incorporate a broader and more creative understanding of the elephant.Perspective-taking, the “active cognitive process of imagining the world from another’s vantage point or imagining oneself in another’s shoes to understand their visual viewpoint, thoughts, motivations, intentions, and/or emotions,” is a process by which we can “try on” another’s perspective. It has important implications for cognitive development, and can broadly benefit social interactions and conflict, yet it also has elements that can be problematic in groups and organizations.[1] This activity, designed for educators working with high school or college students and organizational facilitators, seeks to teach what perspective-taking is and is not, its potential benefits, and its challenges and pitfalls


[1] Ku, G., Wang, C. S., & Galinsky, A. D. (2015). The promise and perversity of perspective-taking in organizations. Research in Organizational Behavior, 35, 79–102. https://doi.org/10.1016/j.riob.2015.07.003

Overview

Learning Goals

The goal of this workshop is to help participants:

  • Practice visual and conceptual perspective-taking to understand how to apply it in their everyday lives.
  • Understand how it can generate shared understanding and creative solutions to problems.
  • Understand some of the pitfalls of perspective-taking, including stereotyping, caricature, and preferential treatment.

Importance in Peace Education

Perspective-taking is an important element in peace education as it can help us to better understand the motivations of others as well as their worldviews on values such as justice, mercy, and equity. At its best, perspective-taking can reduce stereotyping and prejudice, improve the potential for creative solutions to conflict, and evoke empathy between adversaries in conflict. Conversely, in certain contexts, perspective-taking can increase prejudices and stereotyping, lead to preferential treatment, and deepen conflicts. Understanding how perspective-taking works, as well as the elements contributing to its positive and negative outcomes, can help individuals, leaders, and organizations navigate conflict constructively.

Target Audience

This workshop is designed for high-school-aged students and above. Aside from its use as a conceptual skill, perspective-taking is a developmental skill that children learn as they grow into adulthood. Drawing from Piaget’s theory of cognitive development, perspective-taking as a developmental skill takes shape from ages seven to twelve but improves as time goes on. Accordingly, this workshop assumes that the basic skillset of perspective-taking is already present, with the activity exploring that skill and its complexities.

Accessibility Note

Current research notes that some people with attention deficit hyperactivity disorder, comorbid with conduct disorders, or autism, may have difficulty engaging in perspective-taking[1]. While there is new research exploring teaching perspective-taking these populations[2], those approaches are beyond the scope of this workshop. As such, this exercise may not be suitable for groups with these individuals.


[1] See: Marton, I., Wiener, J., Rogers, M., Moore, C., & Tannock, R. (2009). Empathy and Social Perspective Taking in Children with Attention-Deficit/Hyperactivity Disorder. Journal of Abnormal Child Psychology, 37(1), 107–118. https://doi.org/10.1007/s10802-008-9262-4 or Reed, T., & Peterson, C. (1990). A comparative study of autistic subjects’ performance at two levels of visual and cognitive perspective taking. Journal of Autism and Developmental Disorders, 20(4), 555–567. https://doi.org/10.1007/BF02216060

[2] Pearson, A., Ropar, D., & Hamilton, A. (2013). A review of visual perspective taking in autism spectrum disorder. Frontiers in Human Neuroscience, 7. https://www.frontiersin.org/articles/10.3389/fnhum.2013.00652

Timing and Phases

This workshop consists of three phases, totaling about 60-90 minutes:

  • Phase 1 (10-15 Minutes): Introduces perspective-taking as an idea through visual perspective-taking, using optical illusions and an image of a dove to bridge the visual and conceptual.
  • Phase 2 (20-30 Minutes): Engages participants in exploring their own responses to a scenario, followed by a discussion on different elements informing their perspectives.
  • Phase 3 (30-45 Minutes): Participants revisit the scenario, role-playing slight modifications to their perspectives. This is followed by discussion questions and reflection.

Recommended Group Size

This exercise can accommodate various group sizes, with more participants requiring more time for each phase. However, a minimum of 4 to 5 participants is recommended to allow for a diversity of answers.

Materials Needed

The optical illusions for the first phase are provided here, though similar interpretive illusions can be utilized for the same effect. For the second and third phases, a whiteboard and sticky notes or a virtual platform with whiteboard and sticky note capacity is ideal so that participants can see responses. However, reading the scenarios aloud and having participants write their answers themselves is also feasible. Additionally, there are two handouts found in this document that are meant to be used in Phase 2 onward.

Potential Modifications

  • Different optical illusions can be employed to give participants increased experience in visual perspective-taking. Additionally, in face-to-face settings, having students engage with a complex physical object in a circle is another way to explore visual perspective-taking.
  • In large groups, Phases 2 and 3 can be done in small groups of 5 or more people.
  • A fourth phase, exploring real-life or historical scenarios and conflicts, can be implemented using the ideas discussed in the prior phases. This can allow educators to incorporate this exercise into existing curriculum.

Additional Resources


Phase 1: Visual Perspective-Taking

The first phase of this activity seeks to ground the process of perspective-taking using a visual approach, which can provide a foundation for what the participants will engage in later in subsequent phases. Visual perspective-taking is thought to emerge before conceptual perspective-taking[1], so its process may be more familiar to participants than its conceptual counterpart.


[1] Gabbe, A., & Marquis, C. (1996). The Emergence of Visual and Conceptual Perspective-Taking Abilities in Three and Four-Year-Old Children. https://doi.org/10.1184/R1/6712607.v1

Process

Have students look at the following images, responding with what they see in each image.

Some possible interpretations:

  • Two fish swimming in the sea
  • A woman looking to the left

Some possible interpretations:

  • An elderly man and woman facing each other
  • A younger man and woman sitting in a landscape scene
  • A candlestick or chalice

Discussion Questions

  • What did you see in each image?
  • Do you see anything else in the image?
  • If you did not see something that someone else saw, can you adjust what you are looking at to find what they identified?
  • Why do you think you saw what you did in the images?

Lecture Notes

  • Perspective-taking is the process by which we try on a different perspective to gain greater information about the world around us.

A common way we engage in perspective-taking is visually, wherein our position in the world determines how we interpret what is there. For example, take a look at this image:

This sculpture by the artist Michael Murphy is made from a series of floating balls. From one angle, all we can see is the cone of balls. However, by standing at the right place in the room, the balls resolve into the image of an eye.

In addition to its visual dimension, perspective-taking also has a conceptual component, where we ascribe ideas, meaning, and motivation to objects and actions. For example, take a look at this sculpture, also created by Michael Murphy:

Reflection Questions

Ask the participants to reflect on the following questions quietly to themselves:

  • What do you see in this image?
  • What does this image mean to you?
  • What do you think the artist was trying to portray in this image?
  • Is there another way this image could be interpreted?

Finishing up Phase 1

  • By taking on a different perspective, we can gain new information about a situation or expand our understanding of possible interpretations.
  • Visually, this can help us make sense of scenes and images.
  • Conceptually, it can allow us to better interpret and understand the actions, motivations, and intentions.
  • In the next phase, we will explore our own interpretations of a series of scenarios, then reflect on those interpretations.

Additional Resource:

Visual Perspective Taking” An article and YouTube video discussing different elements of visual perspective-taking.


Phase 2: Interpreting Conceptual Perspectives

The second phase of this activity explores participants’ responses to three different scenarios. In this phase, the participants are focused on reflecting on their responses, which will be revisited in the third phase as they imagine differences in their own perspectives.

Process

  • Distribute a set of sticky notes and writing utensils to each participant.
  • Prepare a whiteboard space with the scenario and provide space to allow participants to place their sticky notes on each section.
  • For each of the following scenarios, have the participants write their answers to the questions on sticky notes, then place them in the appropriate section.
  • After the participants have finished with the scenario, use the subsequent Guided Conversation sections to reflect on the answers.

Scenario

James is caught stealing from Steve’s store. Steve calls the police, but not before physically assaulting James. When the police arrive, they arrest James and send him to jail.

Have the participants use three sticky notes, writing the name of each actor in the scenario at the top (Emile, Steve, the police). Then, have them answer the following questions for each actor:

  1. Was what they did morally right? What influenced this conclusion?
  2. Why do you think the actor engaged in their particular action?
  3. What do you think was the most important factor influencing the actor’s actions?

Guided Conversation

Take five minutes to allow the participants to reflect on everyone’s responses. Then, open the discussion with the following questions:

  • Was there anything surprising about the responses?
  • Was there anything you anticipated in the responses?
  • Were there any responses you did not understand?
  • Were there any responses you disagreed with, and why?

As you progress through the reflection questions, highlight in the discussion different elements of perspectives that may come up, such as the dimensions found on the handouts found on the following pages:

Lecture and Additional Resources

When the reflection questions have been answered or time constraints require moving on, distribute the handouts to each participant and discuss how each dimension plays a part in affecting perspective-taking. The third phase will allow participants to generate their own interpretations of these handouts, with broader meaning generated in the reflection portion of the exercise. However, here are some additional resources to provide additional information on the subject:


Phase 3: Playing with Perspective

This final phase revisits the scenario in Phase 2, having participants imagine slight alterations to the situation to explore each of the dimensions listed in the first handout.

Process

Like Phase 2, a whiteboard is used alongside sticky notes to collect participants’ answers in this phase. Have participants write their answers and post them to the whiteboard for each of the four alternative scenarios. After the scenarios are explored, there is a second reflective conversation.

Scenarios

For each scenario, have the participants use three sticky notes, writing the name of each actor in the scenario at the top. Then, have them answer the following questions for each actor:

  • Was what they did morally right? What influenced this conclusion?
  • Did the change in the scenario change your previous answer? How and why?
  • What do you think is the most important factor affecting perspective in this new scenario?

Scenario 1

Emily is caught stealing from Steve’s store. Steve calls the police, but not before physically assaulting Emily. When the police arrive, they arrest Emily and send her to jail.

Scenario 2

In this scenario, imagine that you are a law enforcement officer responding to the situation. James is caught stealing from Steve’s store. Steve calls the police, but not before physically assaulting James. When the police arrive, they arrest James and send him to jail.

Scenario 3

James is caught stealing from Steve’s store. This is the fifth time Steve has caught James stealing this month. Steve calls the police, but not before physically assaulting James. When the police arrive, they arrest James and send him to jail.

Scenario 4

James, desperate to feed his family, is caught stealing food from Steve’s grocery store. Steve calls the police, but not before physically assaulting James. When the police arrive, they arrest James and send him to jail.

Reflection and Guided Conversation

After the participants have completed the scenarios and posted their sticky notes, give them five minutes to review the responses. Then, have them reflect on the following questions in a group discussion:

  • How did the answers change in each scenario? Did you notice anything surprising?
  • What dimension of perspective-taking might apply to each scenario?
  • Did you notice any stereotyping, caricature, or preferential treatment in the answers?
  • How might perspective-taking affect how you look at incidents or events in the world?
  • How might perspective-taking benefit you when dealing with conflict?
  • Are there any risks or drawbacks to engaging in perspective-taking?

Materials

Emotional Intelligence and Social Change: A Conflict skills and Peacemaking Activity

Designed by Haley Nelson

Background Information/Content

Social-emotional intelligence is central to group dynamics and conflict. Yet, the exploration of emotional intelligence has historically been neglected in conflict resolution and peacebuilding conversations. The absence of emotional intelligence in conflicts can hinder the ability of group members to navigate conflict, empathize with others, and manage relationships (Schwarz, 2002). When emotional intelligence is considered at the educational, community, or organizational level, group members can learn to harness emotion as a community and relationship-building tool. 

This activity explores emotional intelligence in the context of peace education. This resource draws inspiration from psychology surrounding basic emotions, emotional wheels, and the origin of emotion, as well as conflict resolution and peacebuilding research on emotions and conflict. This activity will support groups in building emotional intelligence on the individual and social levels. This activity is best suited for groups with a common goal, such as classrooms, community organizations, and the workplace. 

Context

This activity is best suited for high school students, college-age students, and adults. The formality of this activity can be adapted to various education settings but is neutral in its current form. The activity consists of two phases and will take approximately 30 minutes per phase. The length of this activity may vary based on the depth of conversation and volume of participation.

The recommended group size for this activity is 4-10 people. Increased group size will increase duration, allowing for productive discussion among group members. This activity would be best supported by materials such as sticky notes, note cards, and a whiteboard. However, this exercise can be completed via discussion if these resources are unavailable.  

Implementation

Phase 1: (30-45 minutes)

  • Introduction (2-3 minutes):
    • Check-in on how everyone feels and provide context for the activity. The purpose of this introduction is to reveal that the activity will encourage participants to explore and feel daily emotions and tensions. The facilitator should consider establishing a controlled environment where participants can explore emotions safely. An introductory example is below:
      • “We are going to discuss emotional intelligence today. We will create a respective space where real emotions will be felt. We will go through a simulation designed to stimulate emotions in scenarios we feel and experience in our daily lives. If you feel the need to leave the space and take a moment for yourself at any time, please do so.”
    • Describe the importance of emotional intelligence when managing conflict.
  • Description of the simulation (2-3 minutes):
    • Provide a scenario, context, and discussion topic for the audience to navigate. For example, a dinner party discussing travel destinations will generate conversation and allow participants a neutral space to explore group dynamics.Assign behavioral traits to participants randomly: Each participant will be assigned a behavioral trait designed to generate tension, such as disruptive talking, withdrawn behavior, and overconfidence.
      • Remind the audience of the difference between behavior and emotions, acknowledging that the two might contrast during the activity.
    • Open conversation for any questions before beginning.
  • Simulation (5-10 minutes)
    • During the simulation, the participants will navigate conversation based on the context and behavioral traits provided. The group may find conversation challenging to navigate. The goal of the activity is to stimulate emotions based on the role assigned, the conversations at hand, or the simulation process itself.
  • Reflection: (5 minutes)
    • Take a moment to check in with participants. Ask the audience to write down the emotions 1. They experienced during the role play, and 2. Behaviors that might indicate others’ emotions during the role play.
    • After listing these observations on a notecard or sticky note, ask participants to hold on to their observations for later conversation (allowing for further engagement).
  • Individual level emotional intelligence? (10 minutes)
    • Define emotional intelligence and explore this definition with the group. This is an excellent opportunity to explore the meaning behind emotional intelligence and clarify any questions regarding emotional intelligence with the group.
    • After defining emotional intelligence, ask group members to share the emotions they experienced during the activity with the group. Ask the participants to refrain from group observations until later.
      • Explore the dynamic of emotions as they arise:
        • Did members experience multiple emotions? Were those emotions in harmony with one another? Did emotions contrast with each other?
  • Clarifying emotions (5-10 minutes):
    • Explore the six types of basic emotions with the group: happiness, sadness, fear, disgust, anger, and surprise. Then, explore emotions surrounding each category and how they can be clarified. For example: if a group member said they felt anxious during the activity, that emotion is rooted in fear. If a group member said they felt confused during the activity, that emotion is rooted in surprise. Provide examples for the group, then encourage them to clarify their shared emotions.
    • Many people, especially adults, will provide cognitive responses instead of emotions when asked how they feel. When asked what emotions they experienced during the activity, a cognitive response might sound like, “conversations about travel destinations made me want to explore the world more.” Encourage using the emotional wheel to assist participants in shifting from cognitive responses to emotional responses. Ask the participant which emotion is closest to their shared responses and explore the differences between emotion and cognition.

Phase 2: (20-30 minutes)

  • Social-emotional intelligence (5-10 minutes)
    • Ask the participants to return to their group observational notes from the simulation. Consider what cues clued participants in on how others might have been feeling.Provide an example of clarifying social emotions for the group:
      • “I noticed that you were quiet after being interrupted. Did you feel sad after that interaction?” Remind the group to use core emotion vocabulary (i.e., happiness, sadness, fear, disgust, anger, surprise). 
      Allow group members to share their observations. 
    • Open a conversation to ask how accurate their observations were.
      • Why were my observations accurate/inaccurate? How can I better observe the emotions in groups moving forward? 
  • Further discussion: (15-20 minutes)
    • Allow the group to discuss their experience with the activity in depth. Some guiding questions might include the following:
      • How aware were you in the moment of your emotions? Others? 
      • Did you feel that other people’s emotions influenced yours? How? 
      • What were your reactions to emotions in the space? How/did you respond?
      • How might you manage your reactions to emotions in the future?
      • How difficult was it to clarify your emotions? 

Ways to further curate this resource:

  • Pedagogies that may strengthen this resource involve increased participant freedom and involvement. The facilitator of this exercise might increase participant freedom by:
    • Encouraging group members to create their own activities to stimulate everyday emotions.
    • Allowing group members to redefine emotional intelligence for themselves based on shared interests.
    • Involving artistic approaches to exploring emotions such as paintings, photographs, and music. This might involve emotional responses to the creation of artwork or the observation of artwork.

Goal

This activity focuses on individual and social-emotional intelligence. As an introduction to emotional intelligence, this activity seeks to help group members identify their emotions and clarify the origin of their emotions. At the group level, this activity seeks to increase awareness of group dynamics through observations and clarification of emotion. This activity aims to foster empathy and connection within a group by discussing the relationship between individual and social emotions. 

After this activity, participants should be able to:

  • Understand the meaning and importance of emotional intelligence.
  • Clarify everyday emotions into the six core emotions.
  • Have increased awareness of the connection between individual and social emotions. 

Resources

Further reading on emotions and insight into social-emotional intelligence:

Cherry, K. (2022, December). The 6 types of basic emotions and their effect on human behavior. Verywell Mind. Retrieved 2022, from https://www.verywellmind.com/an-overview-of-the-types-of-emotions-4163976 

The Junto Emotion Wheel. The Junto Institute. (2022). Retrieved 2022, from https://www.thejuntoinstitute.com/emotion-wheels/ 

Schwarz, R. (2002). Ch 12: Dealing With Emotions. In The skilled facilitator: A comprehensive resource for consultants, facilitators, managers, trainers, and coaches. essay, Jossey-Bass. 

“Dancing in the Dissonance” – A Conflict Resolution Skills Activity

Designed by Audrey Williams

I. Introduction

The goal of the “Dancing in the Dissonance” activity is to introduce the concept of “dissonance” as a tool to build curiosity and respect for difference in shared meaning-making spaces. The activity draws on narrative and musical tools for conflict resolution to build a better understanding of how people make meaning both individually and as part of a group. By the end of the activity, participants should have a better appreciation for how curiosity, complexity, and difference relate to healthy experiences of conflict.

By working with a pre-selected song to make and share meaning around sonic representations of conflict, participants will have the chance to ponder how meaning making happens on multiple levels, including:

  • on the level of the individual;
  • on the level of the group; and
  • on the level of the message between artist and audience.

This activity can be carried out in settings where participants already know each other as well as in settings where participants are just meeting each other for the first time. This activity involves a pre-class work expectation, and so it should be used in contexts where the facilitator has enough advance connection with participants to send pre-class materials to them.

At each stage, the activity is designed to help participants build greater appreciation for the flexibility and adaptability of meaning while also exercising their curiosity about how people can have different experiences of the same phenomena. Participants will learn how to see dissonance as an invitation to curiosity, and will walk away with an understanding of how to use curiosity to navigate difference in a generative, rather than destructive, way.


Continue reading

Conflict System Mapping

Background: In researching for my conflict resolution skills session assignment, I stumbled across a book, Making Peace Last, that takes the concept of systems thinking – one I originally grappled with during my master’s program in city and regional planning – and meshes it with peacebuilding. In the book, author Robert Ricigliano explains the paradox of macro-micro conflict, which is best summed up in this quotation he highlights:

All the good peace work being done should be adding up to more than it is. The potential of all these efforts is not being realized.” – Mary Anderson and Lara Olson

Continue reading

Privilege Walk Lesson Plan

Privilege Walk Lesson Plan

Introduction:

Many educators and activists use privilege walks as an experiential activity to highlight how people benefit or are marginalized by systems in our society. There are many iterations of such walks with several focusing on a single issue, such as race, gender, or sexuality. This particular walk is designed with questions spanning many different areas of marginalization, because the goal of this walk is to understand intersectionality. People of one shared demographic might move together for one question but end up separating due to other questions as some move forward and others move back. This iteration of the privilege walk is especially recommended for a high school classroom in which the students have had time to bond with each other, but have never taken the time in a slightly more formal setting, i.e., led by a facilitator, to explore this theme. It is a good tool for classes learning about privilege or social justice and could also be used to discuss intersectionality in classes that have the danger of singling out a single aspect of social injustice. It is important that the students or group members are already acquainted and are not doing this activity as strangers, since an immense amount of trust in the people and the environment are needed to help people feel comfortable with acknowledging that certain statements apply to them.

Many people with certain privileges never notice them, because they are so woven into the mainstream that those who have them cannot see them. For youth, understanding and acknowledging privileges is key to understanding why and how they react and perceive their surroundings. The capacity for youth to objectively reflect on their interactions with the world will be invaluable. The focus on intersectionality in this practice will allow practitioners and students alike to understand that having one privilege does not make up for another marginalization and that every privilege or marginalization exists on a different but intersecting plane from another. This focus will help to avoid having positive developments being derailed by debates over who is more oppressed. It also helps youth understand ideas of intersectionality and be aware of marginalized groups within the marginalized group. Privilege walks have previously been criticized for being most beneficial to straight, white, able-bodied men, since it is supposed that they learn the most and that more marginalized students are made to feel vulnerable. The particular walk posted on this page works to avoid falling into these issues and has given detailed reasoning for recommended debrief questions, since the nature of the debrief discussion can either exacerbate or alleviate some of these issues. Even though it is not a perfect exercise, the privilege walk is a less confrontational way to discuss privilege and promote reflection. It helps people to open up, literally, in steps instead of difficult to articulate words and relate to each other in a different way.

Goal:

To discuss the complicated intersections of privileges and marginalizations in a less confrontational and more reflective way.

Time:

15~20 minutes for the Privilege Walk

45~60 minutes for the debrief

Materials:

  • A wide open space, e.g., a classroom with all chairs and tables pushed back, an auditorium, or a gymnasium
  • Chairs to form a circle for the debrief
  • Painter’s tape to make an initial line for participants
  • Optional: tape or other materials to draw lines to indicate where to step back or forth

Procedures:

  • Have participants line up in a straight line across the middle of the room with plenty of space to move forward and backward as the exercise proceeds.
  • Have participants hold hands or place one hand on the shoulder of the person to their left or right depending on space constraints. Important: Make sure to ask participants if they are comfortable touching and being touched by others. If some are not, do not make them and do not make a big deal out of it.
  • You may give an explanation about the activity, how it is intended to educate about privilege, and what exactly is privilege, or you can send students into the activity with no such background.
  • Read the following to participants:
  • I will read statements aloud. Please move if a statement applies to you. If you do not feel comfortable acknowledging a statement that applies to you, simply do not move when it is read. No one else will know whether it applies to you.
  • Begin reading statements aloud in a clear voice, pausing slightly after each one. The pause can be as long or as short as desired as appropriate.
  • When you have finished the statements, ask participants to take note of where they are in the room in relation to others.
  • Have everyone gather into a circle for debriefing and discussion.

Privilege Walk Statements:

  1. If you are right-handed, take one step forward.
  2. If English is your first language, take one step forward.
  3. If one or both of your parents have a college degree, take one step forward.
  4. If you can find Band-Aids at mainstream stores designed to blend in with or match your skin tone, take one step forward.
  5. If you rely, or have relied, primarily on public transportation, take one step back.
  6. If you have attended previous schools with people you felt were like yourself, take one step forward
  7. If you constantly feel unsafe walking alone at night, take one step back.
  8. If your household employs help as servants, gardeners, etc., take one step forward.
  9. If you are able to move through the world without fear of sexual assault, take one step forward.
  10. If you studied the culture of your ancestors in elementary school, take one step forward.
  11. If you often feel that your parents are too busy to spend time with you, take one step back.
  12. If you were ever made fun of or bullied for something you could not change or was beyond your control, take one step back.
  13. If your family has ever left your homeland or entered another country not of your own free will, take one step back.
  14. If you would never think twice about calling the police when trouble occurs, take one step forward.
  15. If your family owns a computer, take one step forward.
  16. If you have ever been able to play a significant role in a project or activity because of a talent you gained previously, take one step forward.
  17. If you can show affection for your romantic partner in public without fear of ridicule or violence, take one step forward.
  18. If you ever had to skip a meal or were hungry because there was not enough money to buy food, take one step back.
  19. If you feel respected for your academic performance, take one step forward.
  20. If you have a physically visible disability, take one step back.
  21. If you have an invisible illness or disability, take one step back.
  22. If you were ever discouraged from an activity because of race, class, ethnicity, gender, disability, or sexual orientation, take one step back.
  23. If you ever tried to change your appearance, mannerisms, or behavior to fit in more, take one step back.
  24. If you have ever been profiled by someone else using stereotypes, take one step back.
  25. If you feel good about how your identities are portrayed by the media, take one step forward.
  26. If you were ever accepted for something you applied to because of your association with a friend or family member, take one step forward.
  27. If your family has health insurance take one step forward.
  28. If you have ever been spoken over because you could not articulate your thoughts fast enough, take one step back.
  29. If someone has ever spoken for you when you did not want them to do so, take one step back.
  30. If there was ever substance abuse in your household, take one step back.
  31. If you come from a single-parent household, take one step back.
  32. If you live in an area with crime and drug activity, take one step back.
  33. If someone in your household suffered or suffers from mental illness, take one step back.
  34. If you have been a victim of sexual harassment, take one step back.
  35. If you were ever uncomfortable about a joke related to your race, religion, ethnicity, gender, disability, or sexual orientation but felt unsafe to confront the situation, take one step back.
  36. If you are never asked to speak on behalf of a group of people who share an identity with you, take one step forward.
  37. If you can make mistakes and not have people attribute your behavior to flaws in your racial or gender group, take one step forward.
  38. If you have always assumed you’ll go to college, take one step forward.
  39. If you have more than fifty books in your household, take one step forward.
  40. If your parents have told you that you can be anything you want to be, take one step forward.

Debrief Questions:

During and after the Privilege Walk, participants might experience an array of intense feelings no matter their position in the front or the back. While the point of the Privilege Walk is indeed to promote understanding and acknowledgment of privileges and marginalization, it would be detrimental to end the activity with potentially traumatic or destructive emotions. The point of the debrief session is twofold. First, through the reflection provoking questions, help participants realize what exactly they were feeling and muster the courage to articulate it to each participant’s acceptable level. This process will relieve possible negative emotions, preventing possible damage. Second, as negative emotions are relieved, the debrief will help participants realize that either privileges or marginalizations are integral to the person’s being. Instead of casting off either privilege or marginalization, participants can learn how to reconcile with themselves, and through the utilization of newfound knowledge of the self, have a better relationship with themselves and others around them.

  1. What did you feel like being in the front of the group? In the back? In the middle?

At the end of the exercise, students were asked to observe where they were in the room. This is a common question to use to lead into the discussion and allows people to reflect on what happened before starting to work with those idea in possibly more abstract ways. It keeps the activity very experience-near and in the moment.

  1. What were some factors that you have never thought of before?

This asks students to reflect in a broader sense about the experiences they might not think about in the way they were presented in this activity. It opens up a space to begin to discuss their perceptions of aspects of themselves and others that they might have never discussed before.

  1. If you broke contact with the person beside you, how did you feel in that moment?

This question focuses on the concrete experience of separation that can happen during the activity. For some students, a physical aspect like this can be quite powerful. There are many iterations of the privilege walk that do not involve physical contact, but this extra piece can add another layer of experience and be an opening for very rich student responses.

  1. What question made you think most? If you could add a question, what would it be?

The first part of this question asks students to reflect more on the activity and the thoughts behind it. The second part of this question is very important for creating knowledge. Students might suggest a question about which instructors had not thought. Asking students how they would change the activity and then working to incorporate those changes is an important part of collaborative learning.

  1. What do you wish people knew about one of the identities, situations, or disadvantages that caused you to take a step back?

This question invites people who would like to share about the ways they experience marginalization. It is a good question to ensure that this part of the conversation is had. That being said, it is also important to not expect or push certain students to speak, since that would be further marginalizing them and could cause them to feel unsafe. It is not a marginalized person’s job to educate others on their marginality. If they would like to do so, listen. If they would not like to do so, respect their wishes.

  1. How can your understanding of your privileges or marginalizations improve your existing relationships with yourself and others?

This question is based on the idea that people can always use knowledge and awareness of the self to improve how one lives with oneself and those existing within one’s life. It also invites students to think about ways that this understanding can create positive change. This is not only for the most privileged students but also for marginalized students to understand those in their group who may experience other marginalizations. This can bring the discussion form the first question, which asks about how they are standing apart to this last question, which can ask how can they work to stand together.

This activity was developed by Rebecca Layne and Ryan Chiu for Dr. Arthur Romano’s Conflict Resolution Pedagogy class at George Mason’s School for Conflict Analysis and Resolution. Some walk activity questions are commonly seen on other privilege walks while others were written by these students for this specific walk. Procedures were written from experiences participating in other walks. Debrief questions, excepting question one, were written by these students with the goal of this walk in mind. Question one is fairly universal for this activity.

An Example of the Critiques that Influenced Us

Another Privilege Walk Example from Buzzfeed

Delicious, Nutritious Peace: Building Peace through Food

Image

I don’t know about you, but I love food. Most people relish the opportunity to satiate hunger, to dine with friends, to share a holiday meal with family. A resource I believe can be incredibly effective in building peace is commonplace. In the United States of America, most of us are fortunate to have this resource waiting in our cabinet at home or in the cafeteria at school. Food, in abundance for the majority of this nation’s citizens, can be a driving force in building peace within communities.

“Food is our common ground, a universal experience” – James Beard

Food can be very informative about a region and a culture. In my online research into building peace through discussing food, I happened upon a lesson plan titled “What Do People Around the World Eat?” created by Learning to Give. This 45 minute lesson plan is designed for high school students and can be easily employed in history, nutrition, or economics classes. If I was facilitating this lesson in a history or nutrition class, I would add several components.

This lesson plan first involves an activity in which students stand by a poster with a continent’s name written on it, guessing which one has the healthiest food and eating habits. Next, a slide show “What the World Eats” created by Time will be presented. Pairs will discuss why people from around the world eat such diverse food in different quantities. A volunteer will take notes on the poster about students’ observations. Discussion will then shift to the differences in observations across continents.

If this was my own lesson plan, I’d add my component after the section described above. I would add discussion about the cultures of the students. Split into 5 small groups, students would discuss traditional foods and eating norms in their culture. They can also speak more about their family and their eating style. Do they eat out all the time? Do they share family meals often? Experiences with foods from other cultures can also be brought up. As they discussed, each group would prepare a simple dish from one continent being presented. Students will grow in community with each other and understanding of the culture, as well as get several snacks to enjoy while they enter into the next round of discussion. This would add approximately 45 minutes. The dishes will be chosen based on ease, short cooking time, and appeal. Food preparation is not be feasible in all situations, but a discussion of the students’ cultural experiences with food should be included.

According to the lesson plan, after this portion, discussion will shift again to comparison of attributes of the foods (cost per week per person, nutritional value, quantity per person, variety of food groups). The class will split into groups to discuss these attributes, soon presenting a class with a summary of their observation. If computers are available, a summary with research should be expected.

This lesson plan ends with two excellent questions: “How do these differences show that there is an injustice in food availability?  Whose responsibility is it to take action to address the injustice of food availability?” After a brief discussion of this, I’d expect students to write an essay or reflection about their thoughts on the matter.

This lesson plan reflects many of the pillars of peace education, particularly community building, engaging multiple intelligences, and skill building. Students build community with each other, gain understanding of one another’s cultures, and are introduced to the outside world’s experiences with food. They have the opportunity to discuss, to view a presentation, to walk around the class, to create food—engaging verbal, visual, and kinesthetic learners. Finally, this helps develop skills in analysis, comparison, and cooking.

This lesson plan would be great for high school teachers, particularly those that lead history or nutrition classes. This can be adapted for economics classes, for younger students, or for college-level courses. Informally, I could see this project fitting very well in Saturday community projects, with Girl and Boy Scout troops, in youth groups at churches, and in community enrichment classes.

For more information about building peace through making food, The PeaceMeal Project is a good place to start.

Seeds of Change: The Natural Classroom

Many of us have heard the metaphor, ‘our education is planting the seeds for the future,’ or something similar or maybe not! Regardless, I believe this needs to be taken more literally. The metaphorical seeds should include literal seeds. Humans and our environment are partners in a mutually eternal relationship; however, the harmony has been disrupted because of industrial neglect amongst other causes. We must teach the balance and sustainable treatment of the planet and mustn’t forget that environmental education is also under the umbrella of peace education. If teachers can keep this in mind, student’s learning will breach the walls of the confining classroom. The world will become their natural classroom, always available for exploration and discovery.

This focus on the natural world was also a critical philosophy of Maria Montessori.

“It is also necessary for his physical development to place the soul of the child in contact with creation, in order that he may lay up for himself treasure from the directly education forces of living nature.”

– Maria Montessori

We should teach to this kind of connection. Outdoor education is often survival or work based, a get your hands dirty kind of approach. The time spent doing these activities outdoors will help rebuild this relationship.

Outdoor education requires children to use all 5 senses and think about the world around them. They will learn to explore, discover, and reflect. Unstructured outdoor education will allow for the student to become independent. Outdoor education gets students physically active and our shown to be more nutrition savvy. Recess is a perfect example and oftentimes very profound interpersonal lessons are taught on the playground, however recess is often taken away earlier on in a child’s education. For the sake of environmental education, the playground should remain natural as opposed to manufactured products.

After a bought of outdoor kinetics, a teacher can switch into classroom mode again without going back into the classroom! Math and English, two subjects that we might think are impossible to be taught outside can be taught outdoors as well. Math can be taught be adding and subtracting pine-cones and sticks and drawing out the equations with chalk for example. English can be taught by prompting students to reflect on their outdoor experience. Also, reading outside and holding lessons outdoors as much as possible is an great way to reap the benefits of the natural world – this was always a exciting option for me as a young learner.

What if it’s raining? In that case the inside of the classroom should have a similar feel.

More plants! Raymond De Young, an environmental psychologist at the University of Michigan, believes in the power of plants to bring peace. “I have one colleague who, whenever she’s going into a very important meeting, places a small potted plant on the center of the table. She says it has a really calming effect on everyone around.” Plants also help with preventing illness. Teachers have the option to incorporate live fauna in the classroom. Maybe have the students water the plants? Start a garden? The symbolism behind the growth of a plant can be related to the growth and progress of the child. It’s no different then having a pet in the classroom.

Open the windows! Let it shine. Not only is sunlight in the classroom healthy but research has shown that those who sit next to windows are happier, more enthusiastic, more calm, and more productive. Those plants you brought in are going to need some UV rays!

Don’t stop there! We love to fill our lives with images of the natural world, from cave paintings, to our computer desktop, to our fairy tales and folk stories. Placing more images of the planets natural wonders inside the classroom will keep students curious and connected with the diversity of the outside world they are in a serious relationship with.

Get moving! Make movement and music a priority within the classroom as well. Music can be easily incorporated into learning and research proves music’s contribution to positive child development. This helps students express themselves emotionally and stimulates creativity and imagination. Music can be included to enhance other subject areas as well. Choreograph a dance? Bring in natural instruments? “This land is your land” is a song with a lot of history and a very peaceful message. These sorts of things you never forget, as a student and a teacher.

http://www.youtube.com/watch?v=Yr5fkRmP_Q0

Here are some other ways to breach the walls of the classroom and pedagogically implement natural elements.

http://www.whitehutchinson.com/news/learnenews/2003_05/article101.shtml

http://education.audubon.org/tips-bringing-nature-classroom

What can teachers do today?

Pick some of the previous suggestions and take action! Teachers have control over the structure of their classroom and what is included. Students depend on the teacher to create for them a rich and diverse learning environment. Music, movement, and nature cannot be overlooked. This is proving to be dangerous and unproductive. I remember an exercise from the ‘Peace Education Exploratorium’ I attended a couple weeks back where the instructor pushed us outside into a cold field and had us walk around thinking about the environment. She was simultaneously playing relaxing music and I can honestly say a connection was established, if only for a brief moment. The naturalist inside of me was satisfied.

What an educator can do for tomorrow?

Environmental Psychology is an emerging field, which seeks to study built and natural environments and how they influence human behavior, and is great for the creative educator’s inquiring mind. We need to design future schools and classrooms in a way that embraces the exuberance and freedom of being a child, while rebuilding the bridge between the environment and us. The classrooms of the future allow for the extension of learning outside the walls of the classroom and for the inclusion of the outside world within the classroom.

Who will benefit?

Children and teachers will benefit from embracing a more natural learning environment. Children learn more from the actions of adults rather than their words. A teacher cannot effectively incorporate any of the previous recommendations without fully believing in and understanding music and movement as healthy expressions of emotions and the outdoors as an infinite classroom. A teacher must be an authentic role model and teachers will conversely share in the learning if they are willing. But, our home, our planet, the extension of our bodies, and the canvas for our lives, will appreciate it the most.

“What we are doing to the forests of the world is but a mirror reflection of what we are doing to ourselves and to one another.”

– Mahatma Ghandi

They are one in the same.